









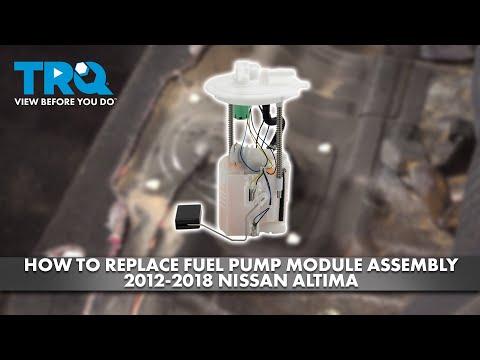







How to Replace the Fuel Pump on a 2013-2018 Nissan Altima (Trim: SL | Engine: Inline 4 2.5L | Body: Sedan)
Step-by-step in-tank pump module guide with tools, parts, safety tips, and leak checks for 2013, 2014, 2015, 2016, 2017
How to Replace the Fuel Pump on a 2013-2018 Nissan Altima (Trim: SL | Engine: Inline 4 2.5L | Body: Sedan)
Step-by-step in-tank pump module guide with tools, parts, safety tips, and leak checks for 2013, 2014, 2015, 2016, 2017


🔧 Altima - Fuel Pump Replacement
This job replaces the in-tank fuel pump module, which sits inside the fuel tank and sends gasoline to the engine. On your Altima, the pump module is accessed from inside the cabin under the rear seat, so the fuel tank usually does not need to be removed.
Difficulty Level: Intermediate | Estimated Time: 2-3 hours
⚠️ Safety & Precautions
- ⚠️ Gasoline is extremely flammable. Work outside or in a very well-ventilated area away from flames, heaters, cigarettes, sparks, and hot work lights.
- ⚠️ Disconnect the negative battery cable before opening the fuel tank access cover.
- ⚠️ Relieve fuel pressure before disconnecting the fuel line to reduce fuel spray.
- ⚠️ Keep a class B/C fire extinguisher nearby.
- ⚠️ Wear safety glasses and fuel-resistant gloves. Fuel can injure eyes and irritate skin.
- ⚠️ Use only brass, plastic, or non-sparking tools near the open fuel tank when possible.
- ⚠️ Do not use a shop vacuum near fuel vapors.
🔧 Required Tools
You'll need the following tools for this repair:
- 10mm socket
- Ratchet handle 3/8-inch drive
- Flat-blade screwdriver 1/4-inch tip
- Trim removal tool set
- Fuel line disconnect tool set 5/16-inch and 3/8-inch
- Fuel pump lock ring tool (specialty)
- Torque wrench 3/8-inch drive
- Needle-nose pliers 6-inch
- Shop towels
- Drain pan 2-gallon minimum
- Permanent marker
- Fuel-resistant gloves
- Safety glasses
- Class B/C fire extinguisher
🔩 Required Parts
HowToo sells all the parts you need for this repair:
- Fuel pump module assembly - Qty: 1
- Fuel pump tank seal/O-ring - Qty: 1
- Fuel pump lock ring - Qty: 1
- Fuel line retaining clip - Qty: 1
- Fuel absorbent pads - Qty: 1 pack
📋 Before You Begin
- 🚗 Park your Altima on level ground, shift to Park, and set the parking brake.
- ⛽ Run the fuel level below 1/4 tank if possible. This makes the pump easier and safer to remove.
- 🔋 Open the trunk and use a 10mm socket to disconnect the negative battery cable.
- 🧰 A fuel pump lock ring tool is a round specialty tool that turns the large retaining ring holding the pump module to the tank.
- 🧰 A fuel line disconnect tool releases the spring lock inside the quick-connect fuel fitting without breaking it.
- 📌 Assumption: this procedure covers the standard rear-seat access fuel pump module used on your Altima.
🔨 Step-by-Step Instructions
Follow these steps in order:
Step 1: Relieve Fuel Pressure
- Use your hand to open the fuel door and remove the gas cap to release tank vapor pressure.
- Use a 10mm socket to disconnect the negative battery cable if you have not already done so.
- Reinstall the gas cap loosely after pressure is relieved.
- Go slow around fuel.
Step 2: Remove the Rear Seat Bottom Cushion
- Use your hands to pull upward sharply at the front edge of the rear seat cushion near each lower corner.
- Lift the cushion out of the car and set it aside on a clean surface.
- If a clip is stubborn, use a trim removal tool set to gently help release it.
Step 3: Remove the Fuel Pump Access Cover
- Find the round or oval access cover on the floor under the rear seat area.
- Use a flat-blade screwdriver 1/4-inch tip or trim removal tool set to carefully lift the cover if it is sealed with butyl adhesive.
- Move the access cover aside without damaging any wiring.
Step 4: Clean the Area Around the Pump
- Use shop towels to wipe dirt and dust from the top of the fuel pump module.
- Do not let dirt fall into the tank. Dirt can damage the new pump and fuel injectors.
- Place a drain pan 2-gallon minimum and fuel absorbent pads nearby for any spilled fuel.
Step 5: Mark the Pump Position
- Use a permanent marker to draw an alignment mark from the fuel pump module top to the tank.
- This helps you install the new fuel pump in the same direction.
Step 6: Disconnect the Electrical Connector
- Use your fingers to press the locking tab on the fuel pump electrical connector.
- If the tab is tight, use a flat-blade screwdriver 1/4-inch tip gently to help release it.
- Pull the connector straight off. Do not pull on the wires.
Step 7: Disconnect the Fuel Line
- Wrap the fuel line fitting with shop towels to catch any remaining fuel.
- Use needle-nose pliers 6-inch to remove the fuel line retaining clip if equipped.
- Use the correct fuel line disconnect tool set 5/16-inch and 3/8-inch to release the quick-connect fitting.
- Pull the fuel line straight off the pump outlet.
- Cap or wrap the line with shop towels to reduce drips and fumes.
Step 8: Remove the Fuel Pump Lock Ring
- Place the fuel pump lock ring tool (specialty) onto the lock ring.
- Use a ratchet handle 3/8-inch drive to turn the lock ring counterclockwise until it releases.
- If the ring is stuck, apply steady pressure. Do not strike steel tools near the open fuel tank.
Step 9: Remove the Fuel Pump Module
- Lift the pump module upward slowly by hand.
- Tilt the module carefully to clear the float arm. The float arm is the small lever that reads fuel level.
- Let fuel drain from the module into the tank before moving it over the drain pan 2-gallon minimum.
- Remove and discard the old fuel pump tank seal/O-ring.
Step 10: Install the New Tank Seal
- Use shop towels to wipe the tank sealing surface clean.
- Install the new fuel pump tank seal/O-ring into the tank opening groove by hand.
- Make sure the seal sits flat and is not twisted.
Step 11: Install the New Fuel Pump Module
- Lower the new fuel pump module assembly into the tank by hand.
- Guide the float arm carefully so it does not bend.
- Align the new pump with the marks you made earlier using the permanent marker.
- Press the module down evenly against the new seal.
Step 12: Install the Lock Ring
- Install the new fuel pump lock ring by hand first to avoid cross-threading or misalignment.
- Use the fuel pump lock ring tool (specialty) and ratchet handle 3/8-inch drive to turn the ring clockwise until fully seated at its stops.
- If your lock ring tool supports torque measurement, use a torque wrench 3/8-inch drive and follow the tool/part manufacturer setting; many service procedures specify seating the ring fully against its stop rather than a universal torque value.
Step 13: Reconnect the Fuel Line and Wiring
- Push the fuel line straight onto the pump outlet until it clicks.
- Install the new fuel line retaining clip by hand or with needle-nose pliers 6-inch.
- Gently tug the line by hand to confirm it is locked.
- Reconnect the electrical connector until the locking tab clicks.
Step 14: Reconnect the Battery and Prime the Fuel System
- Use a 10mm socket to reconnect the negative battery cable.
- Turn the ignition ON without starting the engine for 5 seconds, then turn it OFF.
- Repeat this ON/OFF cycle 3 times. This fills the fuel line with pressure.
- Check the pump area with safety glasses on and fuel-resistant gloves on. Look and smell for leaks.
Step 15: Start the Engine and Recheck for Leaks
- Start the engine and let it idle.
- Use safety glasses and inspect the fuel line connection and pump seal area.
- If you see fuel, shut the engine off immediately and disconnect the negative battery cable with a 10mm socket.
Step 16: Reinstall the Access Cover and Seat Cushion
- Reinstall the access cover by hand and press it down firmly into the adhesive seal.
- Set the rear seat cushion back into position.
- Push down firmly by hand at the front clip locations until the cushion locks in place.
✅ After Repair
- ✅ Road test your Altima for 10-15 minutes and confirm it starts normally, accelerates smoothly, and does not stall.
- ✅ Recheck under the rear seat area for fuel smell after the road test.
- ✅ Confirm the fuel gauge reads correctly. It may take a short drive to stabilize.
- ✅ If the check engine light is on, scan for codes before replacing more parts.
- ✅ Dispose of fuel-soaked towels and the old pump according to local hazardous waste rules.
💰 DIY vs Shop Cost
Shop Cost: $650-$1,100 (parts + labor)
DIY Cost: $220-$550 (parts only)
You Save: $300-$650 by doing it yourself!
Shop labor rates vary but typically run $100-$150/hour. This repair takes a shop approximately 1.5-2.5 hours.
🎯 Ready to get started?
HowToo makes it easy: same-day/2-day shipping on every part, plus all the tools and specialty tools you need! Check out the parts and tools sections below to add everything to your cart.