


How to Replace the Fuel Pump on a 2011 Ford Explorer (In-Tank Module)
Step-by-step instructions with required tools, parts list, safety tips, and key torque specs
How to Replace the Fuel Pump on a 2011 Ford Explorer (In-Tank Module)
Step-by-step instructions with required tools, parts list, safety tips, and key torque specs


🔧 Explorer - Fuel Pump Replacement
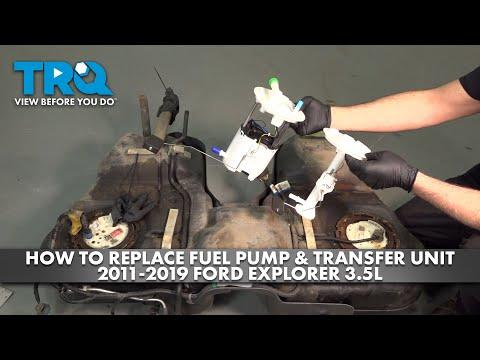
On your Explorer, the fuel pump is part of an in-tank fuel pump module. Replacing it requires safely relieving fuel pressure and lowering the fuel tank so you can remove the pump module lock ring and swap the assembly.
Difficulty Level: Advanced | Estimated Time: 3-6 hours
⚠️ Safety & Precautions
- ⚠️ Work outside or in strong ventilation; fuel vapors are highly flammable.
- ⚠️ No smoking, no sparks, no hot work lights; use LED lighting.
- ⚠️ Relieve fuel pressure before disconnecting lines to prevent fuel spray.
- ⚠️ Support the fuel tank with a jack before removing straps; a falling tank can injure you.
- ⚠️ Disconnect the negative battery cable before starting.
- ⚠️ Keep a Class B fire extinguisher nearby.
🔧 Required Tools
You'll need the following tools for this repair:
- Safety glasses
- Nitrile gloves
- Class B fire extinguisher
- Floor jack (rated 3-ton minimum)
- Jack stands (rated 3-ton minimum)
- Wheel chocks
- Socket set 8mm-21mm
- Ratchet 3/8" drive
- Ratchet 1/2" drive
- Extensions 3" and 6"
- Torque wrench 10-200 Nm
- Flat trim tool
- Flathead screwdriver
- Needle-nose pliers
- Fuel line quick-disconnect tool set (specialty)
- Fuel pump lock ring tool (specialty)
- Drain pan
- Shop rags
- Permanent marker
🔩 Required Parts
HowToo sells all the parts you need for this repair:
- Fuel pump module assembly - Qty: 1
- Fuel pump module seal O-ring - Qty: 1
- Fuel tank strap bolts - Qty: 2 (recommended if rusty)
📋 Before You Begin
- Park on level ground, set the parking brake, and chock the rear wheels.
- Try to run the fuel level low (about 1/4 tank). A full tank is much heavier.
- Disconnect the negative battery terminal using a 10mm socket.
- Relieve fuel pressure before opening any fuel line connections.
🔨 Step-by-Step Instructions
Follow these steps in order:
Step 1: Relieve fuel pressure
- Open the hood and remove the engine cover if equipped (pull up by hand).
- Locate the fuel rail Schrader valve (it looks like a tire valve) and place shop rags around it.
- Use a small flathead screwdriver to press the valve core briefly to release pressure into the rags.
- Tip: Wear safety glasses—fuel can mist.
Step 2: Raise and support the vehicle
- Use a floor jack (rated 3-ton minimum) to lift at the proper jacking points.
- Set the vehicle securely on jack stands (rated 3-ton minimum).
- Keep a drain pan and shop rags ready under the fuel tank area.
Step 3: Support the fuel tank
- Position the floor jack (rated 3-ton minimum) under the center of the fuel tank.
- Place a flat board (or stable pad) on the jack saddle so the tank isn’t dented.
Step 4: Disconnect the filler neck and vent connections
- At the filler neck area, loosen hose clamps using a flathead screwdriver (or appropriate socket from your socket set 8mm-21mm if clamp is hex-head).
- Twist and pull the filler hose(s) off carefully; use shop rags to catch any fuel drips.
- Use a permanent marker to mark hose positions so they go back the same way.
Step 5: Disconnect electrical connectors and fuel lines at the tank
- Unplug the fuel pump module electrical connector(s) using a flat trim tool to release locking tabs if needed.
- Disconnect the EVAP/vapor line(s) using needle-nose pliers for any retaining clips.
- Disconnect the fuel supply/return quick-connect(s) using a fuel line quick-disconnect tool set (specialty). A quick-disconnect tool slides into the fitting to release the internal spring clip.
- Tip: Push line in, then release—easier.
Step 6: Remove the fuel tank straps and lower the tank
- Use a socket set 8mm-21mm with a 1/2" drive ratchet and extensions 3" and 6" to remove the fuel tank strap bolts.
- Lower the tank slowly with the floor jack (rated 3-ton minimum), watching for any hoses/wires still attached.
- When reinstalling later, Torque to 48 Nm (35 ft-lbs) for the fuel tank strap bolts.
Step 7: Clean the area around the fuel pump module
- With the tank down enough to access the top, wipe dirt away using shop rags.
- Do not let debris fall into the open tank.
Step 8: Remove the fuel pump module lock ring
- Disconnect the top electrical connector (if not already) using a flat trim tool.
- Use a fuel pump lock ring tool (specialty) and a 1/2" drive ratchet to rotate the lock ring counterclockwise and remove it.
- Lift the module slightly and note the orientation; mark it with a permanent marker.
Step 9: Remove the old module and replace the seal
- Carefully lift the fuel pump module out of the tank; angle it as needed to clear the fuel level float.
- Remove the old tank seal and install the new fuel pump module seal O-ring.
- Tip: Lightly wet O-ring with clean fuel.
Step 10: Install the new fuel pump module
- Lower the new module into the tank in the same orientation as marked.
- Install the lock ring by hand first to avoid cross-threading/tilting.
- Tighten the lock ring using the fuel pump lock ring tool (specialty) and 1/2" drive ratchet.
- Torque to 110 Nm (81 ft-lbs) for the lock ring.
Step 11: Raise the tank and reconnect everything
- Raise the tank with the floor jack (rated 3-ton minimum).
- Reconnect fuel lines (push until they click) and gently tug to confirm they’re locked.
- Reconnect EVAP/vapor lines and electrical connector(s) until the tab clicks.
- Reconnect filler hose(s) and tighten clamps using a flathead screwdriver.
- Install the tank straps and bolts using the socket set 8mm-21mm and torque wrench 10-200 Nm, then Torque to 48 Nm (35 ft-lbs).
Step 12: Reconnect the battery and prime the system
- Reconnect the negative battery cable using a 10mm socket.
- Turn the key to ON (engine off) for 5 seconds, then OFF; repeat 3 times to build fuel pressure.
- Start the engine and let it idle while you inspect underneath for leaks.
✅ After Repair
- Check for fuel leaks at the tank fittings and along the fuel lines with the engine idling.
- Test drive for 10-15 minutes, then recheck for any seepage.
- If a check engine light appears, scan and address EVAP/fuel pressure related codes (a loose connector is common).
💰 DIY vs Shop Cost
Shop Cost: ₹25,000-₹55,000 (parts + labor)
DIY Cost: ₹12,000-₹35,000 (parts only)
You Save: ₹10,000-₹25,000 by doing it yourself!
Shop labor rates vary but typically run ₹1,000-₹2,500/hour. This repair takes a shop approximately 3-6 hours.
🎯 Ready to get started?
HowToo makes it easy: same-day/2-day shipping on every part, plus all the tools and specialty tools you need! Check out the parts and tools sections below to add everything to your cart.
