









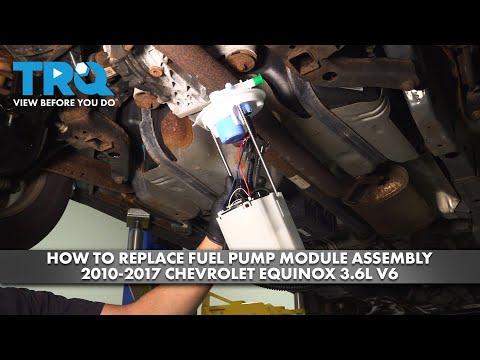





How to Replace the Fuel Pump on a 2010-2017 Chevrolet Equinox (Engine: V6 3.6L)
Step-by-step instructions with tools, parts, torque specs, and safety tips
How to Replace the Fuel Pump on a 2010-2017 Chevrolet Equinox (Engine: V6 3.6L)
Step-by-step instructions with tools, parts, torque specs, and safety tips for 2010, 2011, 2012


🔧 Fuel Pump Module - Replacement
This job involves lowering the fuel tank and replacing the in-tank fuel pump module. On your Equinox, the pump is inside the fuel tank, so you must relieve fuel pressure first and work carefully around fuel vapors.
Difficulty Level: Advanced | Estimated Time: 3-5 hours
⚠️ Safety & Precautions
- Work outside or in a very well-ventilated area.
- No smoking, sparks, open flames, or heat guns near the vehicle.
- Relieve fuel pressure before disconnecting any fuel lines.
- Disconnect the negative battery cable before starting.
- Support the fuel tank safely before removing straps.
- Keep a fire extinguisher rated for fuel fires nearby.
- Fuel vapors are more dangerous than liquid fuel.
🔧 Required Tools
You'll need the following tools for this repair:
- 8mm socket
- 10mm socket
- 13mm socket
- Ratchet
- Long extension
- Torque wrench
- Flat-blade trim tool
- Fuel line disconnect tool
- Floor jack (rated 3-ton minimum)
- Jack stands (rated for vehicle weight)
- Drain pan
- Shop towels
- Safety glasses
- Nitrile gloves
- Marker or paint pen
- Fuel tank strap support block
🔩 Required Parts
HowToo sells all the parts you need for this repair:
- Fuel pump module - Qty: 1
- Fuel pump module seal - Qty: 1
- Fuel tank strap bolts - Qty: 2
- Fuel line O-rings/seals - Qty: 1 set
- Fuel filter screen - Qty: 1
📋 Before You Begin
- Park on level ground and set the parking brake.
- Run the fuel level as low as safely possible before starting.
- Disconnect the negative battery cable.
- Relieve fuel pressure at the service point if equipped, or by using the approved scan-tool fuel system release procedure.
- Lower fuel level makes the tank much safer to handle.
🔨 Step-by-Step Instructions
Follow these steps in order:
Step 1: Relieve fuel pressure and disconnect battery
- Use the approved fuel pressure relief procedure, then disconnect the negative battery cable with a 10mm socket.
- Wait a few minutes after disconnecting the battery before opening fuel lines.
Step 2: Raise and support the vehicle
- Use a floor jack (rated 3-ton minimum) and support the Equinox securely on jack stands (rated for vehicle weight).
- Make sure the rear of the vehicle is high enough to lower the tank safely.
Step 3: Remove any tank shields or underbody covers
- Use an 8mm socket and 10mm socket to remove the fasteners holding the shield or cover.
- Set all hardware aside in order.
Step 4: Disconnect the filler and vent connections
- Use a flat-blade trim tool if needed to release retaining clips on the filler neck or splash shields.
- Mark hose positions with a marker or paint pen before removing anything.
Step 5: Support the fuel tank
- Place a floor jack (rated 3-ton minimum) with a fuel tank strap support block under the tank.
- Lift just enough to hold the tank steady.
Step 6: Remove the fuel tank straps
- Use a 13mm socket and ratchet to remove the strap bolts.
- Lower the tank slowly and check for any remaining wiring or hoses.
- Torque on installation: Torque to 25 Nm (18 ft-lbs) for the strap bolts.
Step 7: Disconnect fuel lines and electrical connector
- Use the fuel line disconnect tool to release the fuel supply line.
- Unplug the electrical connector from the pump module.
- Use shop towels to catch any spilled fuel.
Step 8: Remove the fuel pump module
- Clean the top of the tank area before opening it.
- Remove the locking ring by hand if possible; if it is tight, use a suitable non-sparking tool.
- Lift the fuel pump module straight out of the tank carefully.
- Do not bend the float arm.
Step 9: Install the new module and seal
- Install the new fuel pump module seal in the tank opening.
- Lower the new fuel pump module into place in the same orientation as the old one.
- Install and lock the retaining ring fully.
Step 10: Reconnect lines, raise tank, and reinstall straps
- Use the fuel line disconnect tool to reconnect the fuel line until it clicks.
- Reconnect the electrical connector.
- Raise the tank with the floor jack (rated 3-ton minimum).
- Install the straps using the 13mm socket.
- Torque to 25 Nm (18 ft-lbs) on the strap bolts.
Step 11: Reinstall shields and reconnect battery
- Reinstall any covers or shields with the 8mm socket and 10mm socket.
- Reconnect the negative battery cable with the 10mm socket.
Step 12: Prime and check for leaks
- Turn the key to ON for 5 seconds, then OFF. Repeat 3 times to prime the system.
- Start the engine and inspect all connections for leaks.
- Check for fuel odor around the tank and filler area.
✅ After Repair
- Start the engine and let it idle for several minutes.
- Check for fuel leaks at the tank, lines, and filler neck.
- Verify the fuel gauge reads correctly.
- Take a short test drive and recheck for warning lights.
💰 DIY vs Shop Cost
Shop Cost: $900-$1,500 (parts + labor)
DIY Cost: $250-$550 (parts only)
You Save: $650-$950 by doing it yourself!
Shop labor rates vary but typically run $100-$150/hour. This repair takes a shop approximately 3-5 hours.
🎯 Ready to get started?
HowToo makes it easy: same-day/2-day shipping on every part, plus all the tools and specialty tools you need! Check out the parts and tools sections below to add everything to your cart.
Guide for Fuel Pump Module Assembly replace for these Chevrolet vehicles
| Year Make Model | Sub Model | Engine | Body Style |
|---|---|---|---|
| 2017 Chevrolet Equinox | - | V6 3.6L | - |
| 2016 Chevrolet Equinox | - | V6 3.6L | - |
| 2015 Chevrolet Equinox | - | V6 3.6L | - |
| 2014 Chevrolet Equinox | - | V6 3.6L | - |
| 2013 Chevrolet Equinox | - | V6 3.6L | - |
| 2012 Chevrolet Equinox | - | V6 3.0L | - |
| 2011 Chevrolet Equinox | - | V6 3.0L | - |
| 2010 Chevrolet Equinox | - | V6 3.0L | - |