









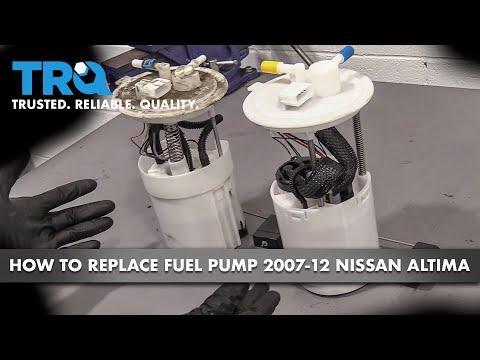







How to Replace the Fuel Pump on a 2009 Nissan Altima (In-Tank Module Guide)
Step-by-step rear-seat access instructions with tools, parts list, safety tips, and priming/leak-check steps for 2007, 2008, 2009, 2010, 2011, 2012, 2013
How to Replace the Fuel Pump on a 2009 Nissan Altima (In-Tank Module Guide)
Step-by-step rear-seat access instructions with tools, parts list, safety tips, and priming/leak-check steps for 2007, 2008, 2009, 2010, 2011, 2012, 2013


🔧 Altima - Fuel Pump Replacement
On your Altima, the fuel pump sits inside the fuel tank as part of a pump module (pump + fuel level sender). The good news: it’s typically accessed from inside the car under the rear seat, so you usually don’t need to drop the tank.
Difficulty Level: Intermediate | Estimated Time: 1.5-3.0 hours
⚠️ Safety & Precautions
- ⚠️ Work outdoors or in strong ventilation—fuel vapors ignite easily.
- ⚠️ No smoking, flames, or incandescent work lights near the car.
- ⚠️ Disconnect the negative battery cable to reduce fire risk.
- ⚠️ Relieve fuel pressure before disconnecting fuel lines to prevent spray.
- ⚠️ Keep a Class B fire extinguisher nearby.
- ⚠️ Clean dirt around the pump opening—dirt in the tank can damage the new pump.
🔧 Required Tools
You'll need the following tools for this repair:
- Safety glasses
- Nitrile gloves
- Class B fire extinguisher
- Floor jack (rated 2-ton minimum)
- Jack stands (rated 2-ton minimum)
- Wheel chocks
- 10mm socket
- 1/4" drive ratchet
- 6" extension (1/4" drive)
- Phillips screwdriver
- Trim removal tool
- Needle-nose pliers
- Small flathead screwdriver
- Brass punch (specialty)
- Small hammer
- Torque wrench (inch-pound or low-range Nm) (specialty)
- Shop towels
- Catch pan
- Permanent marker
🔩 Required Parts
HowToo sells all the parts you need for this repair:
- Fuel pump module assembly - Qty: 1
- Fuel pump module tank seal (O-ring/gasket) - Qty: 1
- Fuel pump strainer (sock filter) - Qty: 1
- Fuel tank lock ring (if required) - Qty: 1
📋 Before You Begin
- Park on level ground, set the parking brake, and place wheel chocks behind the rear wheels.
- Try to do this with less than half a tank of fuel to reduce spills.
- Open the fuel door and loosen the fuel cap to reduce tank vapor pressure.
- Disconnect the battery: use a 10mm socket to remove the negative battery terminal and isolate it so it can’t spring back.
🔨 Step-by-Step Instructions
Follow these steps in order:
Step 1: Relieve fuel pressure
- Remove the fuel pump fuse/relay, then crank the engine to stall it. This bleeds pressure in the lines.
- Use a trim removal tool to open the interior fuse access (location varies by trim; your owner’s manual shows the exact fuse/relay).
- After it stalls, turn the key OFF and reinstall the fuse/relay later during reassembly.
Step 2: Remove the rear seat bottom cushion
- From the rear footwell area, release the seat bottom clips and lift the cushion out (use a trim removal tool if needed).
- Set the seat cushion aside where it won’t get fuel smell on it.
Step 3: Expose the fuel pump access cover
- Find the service/access cover on the floor under the seat area.
- Use a Phillips screwdriver or 10mm socket (varies) to remove the access cover fasteners.
- Lift the cover and place shop towels around the area.
Step 4: Clean the area before opening the tank
- Wipe and remove loose dirt around the pump flange using shop towels.
- Cleanliness here prevents future pump failure.
Step 5: Disconnect the electrical connector
- Press the connector lock tab and unplug it (use a small flathead screwdriver gently if it’s stuck).
Step 6: Disconnect the fuel line(s)
- Place a catch pan and shop towels under the connection.
- Release the quick-connect by squeezing the tabs and pulling the line off (use needle-nose pliers only to help squeeze—don’t crush the fitting).
- Expect a small amount of fuel to drip out.
Step 7: Mark the pump module orientation
- Use a permanent marker to draw an alignment mark from the tank to the pump module top. This helps you reinstall it the same way.
Step 8: Remove the fuel pump lock ring
- The lock ring is the large ring that “twists” to clamp the module down.
- Use a brass punch (specialty) and small hammer to tap the ring counterclockwise until it releases.
- Brass reduces spark risk vs steel.
Step 9: Remove the fuel pump module
- Lift the module straight up slowly. Tilt as needed to clear the float arm (fuel level sensor).
- Let fuel drain from the module into the tank for a few seconds, then set the module into the catch pan.
- Remove the old tank seal (O-ring) from the tank opening using a small flathead screwdriver carefully.
Step 10: Install the new seal and new module
- Install the new tank seal (O-ring/gasket) into the tank groove by hand (do not reuse the old one).
- Transfer/confirm the fuel pump strainer (sock) is installed on the new module as required.
- Lower the new module in, keeping the float arm from bending, and align it with your marker line.
Step 11: Reinstall and tighten the lock ring
- Install the lock ring and tap it clockwise using the brass punch (specialty) and small hammer until it fully seats/locks.
- If your replacement procedure specifies a torque (some rings do), use a torque wrench (inch-pound or low-range Nm) (specialty) and tighten to the manufacturer spec provided with the part/service info.
Step 12: Reconnect fuel line(s) and electrical connector
- Push the fuel line on until it clicks, then gently tug to confirm it’s locked.
- Plug in the electrical connector until it clicks.
Step 13: Reinstall access cover and rear seat
- Reinstall the access cover using the Phillips screwdriver or 10mm socket.
- Reinstall the rear seat bottom cushion and press down firmly to re-latch the clips.
Step 14: Restore power and prime the fuel system
- Reinstall the fuel pump fuse/relay (if removed).
- Reconnect the negative battery terminal using a 10mm socket.
- Turn the key to ON (not START) for 3–5 seconds, then OFF. Repeat 3 times to prime the system.
✅ After Repair
- Start the engine and let it idle for 1–2 minutes.
- Check carefully for fuel leaks at the pump top and fuel line connection (sniff + visual check).
- If you see a fuel smell inside, shut it down and re-check the lock ring seating and line clicks.
- Clear any stored codes with a scan tool if a fuel-related light appears (optional).
💰 DIY vs Shop Cost
Shop Cost: $650-$1,200 (parts + labor)
DIY Cost: $180-$450 (parts only)
You Save: $470-$750 by doing it yourself!
Shop labor rates vary but typically run $100-$150/hour. This repair takes a shop approximately 1.5-3.0 hours.
🎯 Ready to get started?
HowToo makes it easy: same-day/2-day shipping on every part, plus all the tools and specialty tools you need! Check out the parts and tools sections below to add everything to your cart.