


How to Replace the Fuel Pump Module on a 2021 Jeep Gladiator (In-Tank)
Step-by-step fuel tank drop procedure with required tools/parts, strap bolt torque specs, and leak-check tips
How to Replace the Fuel Pump Module on a 2021 Jeep Gladiator (In-Tank)
Step-by-step fuel tank drop procedure with required tools/parts, strap bolt torque specs, and leak-check tips


🔧 Gladiator - Fuel Pump Replacement
On your Gladiator, the fuel pump is part of an in-tank fuel pump module (pump + level sender). Replacing it usually requires lowering the fuel tank, swapping the module and seal, then reinstalling the tank and checking carefully for leaks.
Difficulty Level: Advanced | Estimated Time: 3-5 hours
⚠️ Safety & Precautions
- Work outside or in a very well-ventilated area—fuel vapors are highly flammable.
- No smoking, no sparks, no hot lights; keep a fire extinguisher nearby.
- Let the exhaust cool completely before starting.
- Depressurize the fuel system before disconnecting any fuel lines.
- Disconnect the negative battery cable to reduce spark risk.
- Support the fuel tank with a jack before removing straps; it can drop suddenly.
- Use jack stands on the frame; never rely on a jack alone.
🔧 Required Tools
You'll need the following tools for this repair:
- Safety glasses
- Nitrile gloves
- Fire extinguisher (Class B)
- Floor jack (rated 3-ton minimum)
- Jack stands (rated 3-ton minimum)
- Wheel chocks
- Socket set (8mm-18mm)
- Ratchet (3/8" drive)
- Ratchet (1/2" drive)
- Extension set (3"-12")
- Torque wrench (10-150 ft-lbs)
- Flat-blade screwdriver
- Trim clip removal tool
- Fuel line disconnect pick set
- Pliers
- Brass punch (non-sparking)
- Dead-blow hammer
- Fuel transfer pump (hand siphon)
- Drain pan (at least 2-gallon)
- Shop rags
- OBD2 scan tool
🔩 Required Parts
HowToo sells all the parts you need for this repair:
- Fuel pump module assembly - Qty: 1
- Fuel pump module tank seal (O-ring/gasket) - Qty: 1
- Fuel pump module lock ring - Qty: 1
- Dielectric grease - Qty: 1
📋 Before You Begin
- Park on level ground, set the parking brake, and chock the wheels.
- Drive until the tank is as low as possible; a lighter tank is much safer to lower.
- Plan a clean workspace; dirt in the tank can damage the new pump.
- If you have stored trouble codes, note them with an OBD2 scan tool before disconnecting the battery.
🔨 Step-by-Step Instructions
Follow these steps in order:
Step 1: Depressurize the fuel system
- Open the fuel door and loosen the gas cap to vent tank pressure.
- Use an OBD2 scan tool to check for fuel-related codes and save them (optional but helpful).
- Locate the fuel pump fuse/relay in the power distribution center and remove it using your fingers or pliers.
- Start the engine and let it run until it stalls. Crank for 2-3 seconds more to bleed off residual pressure.
- Turn the key OFF and reinstall the fuse/relay later during reassembly.
Step 2: Disconnect the battery
- Use a 10mm socket and ratchet (3/8" drive) to disconnect the negative battery cable and secure it so it can’t spring back.
Step 3: Raise and support the truck
- Lift the rear with a floor jack (rated 3-ton minimum) at the correct lift point.
- Set it down on jack stands (rated 3-ton minimum) under the frame.
- Give the truck a gentle push to confirm it’s stable before crawling underneath.
Step 4: Support the fuel tank
- Position the floor jack (rated 3-ton minimum) under the fuel tank with a piece of wood or a flat pad (if available) to spread the load.
- Raise the jack slightly so it just supports the tank.
Step 5: Remove any shields/skid plates blocking the tank
- Use a socket set (8mm-18mm), ratchet (1/2" drive), and extension set (3"-12") to remove the bolts holding any skid plate/shielding in the way.
- Set hardware aside in order so reassembly is easier.
Step 6: Disconnect EVAP and vent hoses
- Identify EVAP/vent hoses at the tank (these are vapor lines that help control fuel vapors).
- Use pliers to release any hose clamps, and use a flat-blade screwdriver or trim clip removal tool to gently free any plastic retainers.
- Label hoses with tape for easy return.
Step 7: Disconnect electrical connectors at the tank
- Unplug the fuel pump module connector using your hand and a trim clip removal tool if the locking tab is stubborn.
- Apply a tiny amount of dielectric grease during reassembly (later) to help prevent corrosion.
Step 8: Disconnect the fuel supply line(s)
- Place a drain pan (at least 2-gallon) and shop rags under the connection.
- Disconnect the quick-connect fuel line. A “quick-connect” is a push-on fitting with a locking tab; use a fuel line disconnect pick set to release the lock without breaking it.
- Cap/cover the open line ends with clean rags to keep dirt out.
Step 9: Lower the tank enough to access the top
- Remove the fuel tank strap bolts using a socket set (8mm-18mm) and ratchet (1/2" drive).
- Slowly lower the floor jack (rated 3-ton minimum) a few inches at a time while watching for any lines/wires still attached.
- If something gets tight, stop lowering and disconnect it before continuing.
Step 10: Clean the area around the fuel pump module
- Use shop rags to wipe dirt away from the top of the tank around the module.
- This helps prevent contamination from falling into the tank.
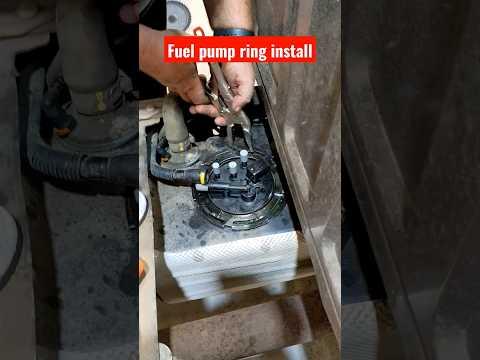
Step 11: Remove the fuel pump module lock ring
- The lock ring is the large ring that twists to lock the module into the tank opening.
- Use a brass punch (non-sparking) and dead-blow hammer to tap the lock ring counterclockwise until it releases.
- Lift the lock ring off and set it aside.
Step 12: Remove the fuel pump module
- Carefully lift the module straight up. Tilt as needed to clear the fuel level float arm.
- Let fuel drain from the module into the tank; keep the drain pan (at least 2-gallon) ready for drips.
- Remove the old tank seal (O-ring/gasket) with a flat-blade screwdriver carefully so you don’t scratch the sealing surface.
Step 13: Install the new seal and fuel pump module
- Install the new fuel pump module tank seal (O-ring/gasket) into the tank opening.
- Lower the new fuel pump module assembly into the tank, guiding the float arm in without forcing it.
- Align the module/index marks the same way the old one sat (it must seat fully and flat).
Step 14: Reinstall and tighten the lock ring
- Install the new fuel pump module lock ring.
- Use the brass punch (non-sparking) and dead-blow hammer to tap it clockwise until it is fully seated and locked.
Step 15: Raise the tank and reconnect lines
- Use the floor jack (rated 3-ton minimum) to raise the tank back into position.
- Reconnect fuel lines by pushing the quick-connect on until it clicks; gently tug to confirm it’s locked.
- Reconnect EVAP/vent hoses and reinstall retainers using pliers, flat-blade screwdriver, and trim clip removal tool as needed.
- Reconnect the electrical connector; apply a thin film of dielectric grease to the connector seal area (not on the terminals).
Step 16: Reinstall tank straps and shields
- Install tank straps and start bolts by hand to avoid cross-threading.
- Tighten strap bolts using a socket set (8mm-18mm) and torque wrench (10-150 ft-lbs).
- Torque to 54 Nm (40 ft-lbs) for the fuel tank strap bolts.
- Reinstall any skid plates/shields using a socket set (8mm-18mm), ratchet (1/2" drive), and torque wrench (10-150 ft-lbs).
Step 17: Lower the truck and reconnect the battery
- Raise slightly with the floor jack (rated 3-ton minimum), remove the jack stands (rated 3-ton minimum), and lower to the ground.
- Reconnect the negative battery cable using a 10mm socket and ratchet (3/8" drive).
Step 18: Prime the fuel system and check for leaks
- Turn key to ON (do not start) for 3-5 seconds, then OFF. Repeat 3-4 times to prime the pump.
- Start the engine and let it idle.
- Inspect under the truck for leaks at the fuel line connection and around the tank.
✅ After Repair
- Use an OBD2 scan tool to clear any fuel/EVAP codes that appeared during the repair.
- Test drive for 10-15 minutes, then re-check for fuel smell or damp spots under the tank.
- If the fuel gauge reads wrong, recheck that the module seated correctly and the connector is fully locked.
💰 DIY vs Shop Cost
Shop Cost: $900-$1,600 (parts + labor)
DIY Cost: $250-$650 (parts only)
You Save: $650-$950 by doing it yourself!
Shop labor rates vary but typically run $100-$150/hour. This repair takes a shop approximately 3-5 hours.
🎯 Ready to get started?
HowToo makes it easy: same-day/2-day shipping on every part, plus all the tools and specialty tools you need! Check out the parts and tools sections below to add everything to your cart.
