


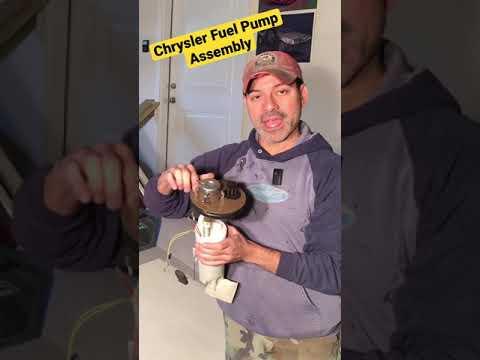


How to Replace the Fuel Pump Module on a 2018 Chrysler Pacifica (In-Tank)
Step-by-step instructions, required tools/parts, safety precautions, and access-cover vs tank-drop guidance
How to Replace the Fuel Pump Module on a 2018 Chrysler Pacifica (In-Tank)
Step-by-step instructions, required tools/parts, safety precautions, and access-cover vs tank-drop guidance


🔧 Pacifica - Fuel Pump Replacement
On your Pacifica Hybrid, the fuel pump is part of an in-tank pump module. Replacement can be straightforward if there’s an interior access cover, or much more involved if the fuel tank must be lowered.
Difficulty Level: Advanced | Estimated Time: 2.5-6.0 hours
⚠️ Safety & Precautions
- ⚠️ Hybrid high-voltage system: do not disturb orange cables/connectors.
- ⚠️ Fuel vapors ignite easily: no smoking, sparks, or hot lights.
- ⚠️ Relieve fuel pressure before disconnecting any fuel line.
- ⚠️ Work in a well-ventilated area; keep a Class B fire extinguisher nearby.
- ⚠️ Battery disconnect: you will disconnect the 12V negative cable during the job.
🔧 Required Tools
You'll need the following tools for this repair:
- Metric socket set 8mm–18mm
- 3/8" drive ratchet
- 3/8" drive extensions (3" and 6")
- Torque wrench (10–100 ft-lbs range)
- Trim clip removal tool
- Fuel line quick-disconnect tool set
- Fuel pump lock ring tool (specialty)
- Small flat-blade screwdriver
- Needle-nose pliers
- Shop rags
- Catch pan (2-gallon minimum)
- Floor jack (rated 3-ton minimum)
- Jack stands (rated 3-ton minimum)
- Wheel chocks
- Nitrile gloves
- Safety glasses
- OBD-II scan tool with fuel pump prime capability (specialty)
🔩 Required Parts
HowToo sells all the parts you need for this repair:
- In-tank fuel pump module - Qty: 1
- Fuel pump module seal O-ring - Qty: 1
- Fuel line retaining clips (if damaged) - Qty: 1
📋 Before You Begin
- Park on level ground, set the parking brake, and chock the rear wheels.
- Lower the fuel level to under 1/4 tank to reduce weight and spills.
- Plan to replace the module seal O-ring any time the module is removed.
🔨 Step-by-Step Instructions
Follow these steps in order:
Step 1: Answer these two quick checks (needed for the correct procedure)
- Look for an interior service access cover: lift the rear cargo floor and/or lift the second-row seat area carpeting for a round/oval metal cover with screws.
- Reply with: “I have an access cover” or “No access cover”.
- Reply with whether you have a scan tool that can command a fuel pump prime: Yes or No.
Step 2: Stop here to avoid wrong disassembly
- Once you answer the two checks above, I’ll give you the exact Pacifica-specific steps, including the correct access method, connector handling, and reassembly torque specs.
✅ After Repair
- After the correct procedure is completed, you’ll verify no fuel leaks and confirm normal starting/idle.
- If any warning lights appear, you’ll scan for codes and clear only after fixing the cause.
💰 DIY vs Shop Cost
Shop Cost: $900-$1,800 (parts + labor)
DIY Cost: $250-$750 (parts only)
You Save: $650-$1,050 by doing it yourself!
Shop labor rates vary but typically run $100-$150/hour. This repair takes a shop approximately 2.5-6.0 hours.
🎯 Ready to get started?
HowToo makes it easy: same-day/2-day shipping on every part, plus all the tools and specialty tools you need! Check out the parts and tools sections below to add everything to your cart.
