









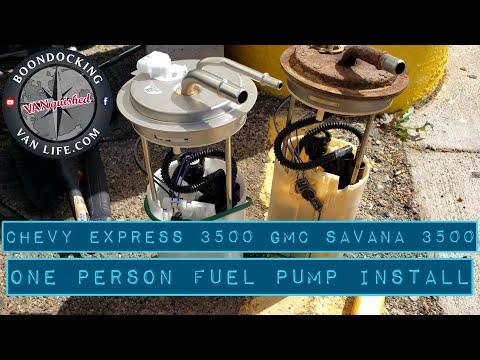







How to Replace the Fuel Pump Module on a 2016 GMC Savana 2500 (In-Tank)
Step-by-step tank-drop procedure with required tools, parts list, safety tips, and key torque specs for 2010, 2011, 2012, 2013, 2014, 2015, 2016
How to Replace the Fuel Pump Module on a 2016 GMC Savana 2500 (In-Tank)
Step-by-step tank-drop procedure with required tools, parts list, safety tips, and key torque specs for 2010, 2011, 2012, 2013, 2014, 2015, 2016


🔧 Savana - Fuel Pump Module Replacement
The fuel pump on your Savana is part of an in-tank fuel pump module (pump + level sensor + strainer). Replacing it usually requires lowering the fuel tank so you can remove the lock ring and swap the module without damaging fuel lines or wiring.
Difficulty Level: Advanced | Estimated Time: 3-6 hours
Assumption: Your Savana uses an in-tank fuel pump module accessed by lowering the fuel tank; torque specs can vary by hardware—verify exact values in a service manual if available.
⚠️ Safety & Precautions
- ⚠️ Work outside or in a very well-ventilated area; fuel vapors ignite easily.
- ⚠️ No smoking, no sparks, no hot lights; keep a fire extinguisher rated for fuel fires nearby.
- ⚠️ Depressurize the fuel system before disconnecting any fuel line.
- ⚠️ Support the tank with a transmission jack; a fuel tank can shift suddenly.
- ⚠️ Disconnect the negative battery cable to prevent accidental sparks.
- ⚠️ If the tank is more than 1/4 full, siphon or drain to reduce weight.
🔧 Required Tools
You'll need the following tools for this repair:
- Safety glasses
- Nitrile gloves
- Wheel chocks
- Floor jack (rated 3-ton minimum)
- Jack stands (rated 3-ton minimum)
- Transmission jack (specialty)
- Metric socket set (8mm-21mm)
- 3/8" drive ratchet
- 1/2" drive breaker bar
- Torque wrench (10-150 ft-lbs)
- Flat-blade screwdriver
- Fuel line quick-disconnect tool set (specialty)
- Hose clamp pliers
- Pry bar
- Brass drift punch (specialty)
- Dead-blow hammer
- Drain pan
- Shop towels
- Permanent marker
🔩 Required Parts
HowToo sells all the parts you need for this repair:
- Fuel pump module assembly - Qty: 1
- Fuel pump module seal O-ring - Qty: 1
- Fuel pump strainer - Qty: 1
- Fuel tank strap bolts - Qty: 2 (recommended if rusty)
📋 Before You Begin
- Park on level ground, set the parking brake, and place wheel chocks behind the rear wheels.
- Disconnect the battery: use a 10mm socket to remove the negative battery cable and isolate it.
- Relieve fuel pressure (simple method): remove the fuel pump relay/fuse, then start the engine and let it run until it stalls; crank 3 seconds more.
- If possible, drive until the tank is near empty to make lowering the tank safer.
🔨 Step-by-Step Instructions
Follow these steps in order:
Step 1: Safely raise and support the van
- Use a floor jack (rated 3-ton minimum) to lift the rear, then set it down on jack stands (rated 3-ton minimum).
- Keep the floor jack lightly supporting as a backup.
Step 2: Support the fuel tank
- Position a transmission jack (specialty) under the center of the tank.
- Place a flat piece of wood (if you have it) between the jack pad and tank to spread the load. Prevents tank dents
Step 3: Disconnect the filler neck and vent hoses
- Use a flat-blade screwdriver or hose clamp pliers to loosen/remove the clamps at the tank connections.
- Twist hoses gently to break them loose; do not rip them off.
- Use a permanent marker to mark hose positions if more than one hose is similar.
Step 4: Unplug the fuel pump electrical connector
- Locate the harness near the tank/front of the tank area.
- Release the lock tab by hand or with a flat-blade screwdriver, then unplug the connector.
- If it fights you, don’t force it; check for a secondary lock.
Step 5: Disconnect the fuel lines
- Place a drain pan under the connections and wrap with shop towels.
- Use a fuel line quick-disconnect tool set (specialty) to release the quick-connect fittings (the tool slides into the fitting to release the internal spring).
- Cap or wrap the open lines with shop towels to keep dirt out.
Step 6: Remove the fuel tank straps
- With the tank fully supported by the transmission jack (specialty), use a breaker bar and metric socket to remove the strap bolts.
- Lower the straps away using a pry bar if needed (rust can stick them).
- When reinstalling later: Torque strap bolts to 50 N·m (37 ft-lbs).
Step 7: Lower the tank just enough to access the pump module
- Slowly lower the transmission jack (specialty) a few inches.
- Stop and check for anything still attached (wires/hoses/lines). Disconnect as needed using the same tools above.
- Once clear, lower the tank enough to comfortably reach the top of the module.
Step 8: Clean the area around the pump module
- Use shop towels to wipe dirt off the top of the tank.
- Cleanliness prevents repeat failures; dirt in the tank can damage the new pump.
Step 9: Remove the lock ring
- Use a brass drift punch (specialty) and dead-blow hammer to tap the lock ring counterclockwise until it releases.
- Do not use steel chisels; brass reduces spark risk.
Step 10: Remove the old fuel pump module
- Lift the module straight up carefully; angle it as needed to clear the float arm.
- Let fuel drain from the module into the drain pan.
- Remove and discard the old seal using a flat-blade screwdriver carefully (don’t gouge the tank sealing surface).
Step 11: Install the new seal and new module
- Install the new Fuel pump module seal O-ring into the tank groove by hand.
- Lightly wet the seal with clean fuel (from the old module) using shop towels; do not use grease.
- Lower the new module into the tank, guiding the float arm and aligning the index marks.
Step 12: Reinstall and seat the lock ring
- Install the ring and tap it clockwise using the brass drift punch (specialty) and dead-blow hammer until fully seated against its stops.
- Fully seated ring prevents leaks; check the ring is even all around.
Step 13: Raise the tank and reconnect everything
- Use the transmission jack (specialty) to raise the tank into position.
- Reconnect fuel lines using the fuel line quick-disconnect tool set (specialty) only if needed; otherwise push until they click.
- Reconnect the electrical connector by hand until it locks.
- Reconnect filler and vent hoses using hose clamp pliers or flat-blade screwdriver for clamps.
Step 14: Reinstall tank straps
- Position straps and start bolts by hand to avoid cross-threading.
- Tighten with a ratchet, then final tighten with a torque wrench (10-150 ft-lbs).
- Torque strap bolts to 50 N·m (37 ft-lbs).
Step 15: Restore power and prime the fuel system
- Reconnect the negative battery cable using a 10mm socket.
- Reinstall the fuel pump relay/fuse by hand.
- Prime: turn key to ON (do not crank) for 5 seconds, OFF for 5 seconds; repeat 3-4 times.
✅ After Repair
- Start the engine and let it idle while you check for leaks at the pump seal area, fuel line connections, and filler hoses.
- Verify the fuel gauge reads reasonably; a wrong reading can indicate a float arm issue.
- Test drive 5-10 minutes, then recheck for seepage/drips.
- If you have a check engine light after the repair, recheck electrical connector seating and EVAP/filler hose connections.
💰 DIY vs Shop Cost
Shop Cost: $900-$1,600 (parts + labor)
DIY Cost: $250-$650 (parts only)
You Save: $650-$950 by doing it yourself!
Shop labor rates vary but typically run $100-$150/hour. This repair takes a shop approximately 3-5 hours.
🎯 Ready to get started?
HowToo makes it easy: same-day/2-day shipping on every part, plus all the tools and specialty tools you need! Check out the parts and tools sections below to add everything to your cart.