


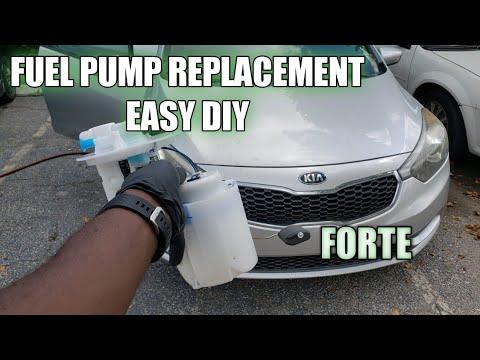


How to Replace the Fuel Pump Module on a 2015 Kia Forte (In-Tank, Under Rear Seat)
Step-by-step DIY instructions with required tools/parts, fuel pressure relief, priming, and leak-check safety tips
How to Replace the Fuel Pump Module on a 2015 Kia Forte (In-Tank, Under Rear Seat)
Step-by-step DIY instructions with required tools/parts, fuel pressure relief, priming, and leak-check safety tips


🔧 Forte - Fuel Pump Replacement
On your Forte, the fuel pump is inside the fuel tank as part of an in-tank fuel pump module (also called the fuel sender/pump assembly). The job is mainly about safely relieving fuel pressure, lifting the rear seat to access the service cover, swapping the module, and sealing everything back up so it won’t leak or smell like fuel.
Difficulty Level: Intermediate | Estimated Time: 2-4 hours
Assumption: Your Forte uses the under-rear-seat access panel (common setup).
⚠️ Safety & Precautions
- 🧯 Work outdoors or in a very well-ventilated area; fuel vapors ignite easily.
- 🔥 No smoking, no heat guns, no shop lights with hot bulbs, and no sparks.
- 🪫 Disconnect the negative battery terminal before opening the fuel system.
- ⛽ Relieve fuel pressure before disconnecting fuel lines to avoid a high-pressure spray.
- 🧤 Wear safety glasses and fuel-resistant gloves; gasoline stings eyes and skin.
- 🧼 Clean around the pump area first so dirt can’t fall into the tank.
🔧 Required Tools
You'll need the following tools for this repair:
- Safety glasses
- Nitrile gloves
- Fire extinguisher (Class B)
- 10mm socket
- 3/8" drive ratchet
- 3" socket extension
- Torque wrench (3/8" drive)
- Trim clip removal tool
- Flat blade screwdriver
- Needle-nose pliers
- Fuel line quick-disconnect tool set
- Brass drift punch
- Small hammer
- Fuel pump lock ring tool (specialty)
- Shop towels
- Plastic drain pan
- Handheld vacuum
- Permanent marker
🔩 Required Parts
HowToo sells all the parts you need for this repair:
- Fuel pump module assembly (in-tank) - Qty: 1
- Fuel pump module tank seal/O-ring - Qty: 1
- Fuel line retaining clips (if damaged) - Qty: 1
- Butyl seal tape for access cover (if needed) - Qty: 1
📋 Before You Begin
- Park on level ground, shift to Park, and set the parking brake.
- Open the fuel door to help reduce pressure in the tank.
- Have shop towels ready to catch drips.
- Know this term: a quick-connect fuel fitting is a snap-on fuel line end with a plastic clip that must be released before the line comes off.
🔨 Step-by-Step Instructions
Follow these steps in order:
Step 1: Relieve fuel pressure
- Open the hood and use a 10mm socket and ratchet to remove the negative battery cable from the battery terminal.
- Locate the fuel pump fuse/relay in the under-hood fuse box (diagram is on the fuse box cover) and remove it using needle-nose pliers.
- Start the engine and let it run until it stalls. Crank for 3-5 seconds one more time to bleed off remaining pressure.
- Turn the key OFF.
Step 2: Remove the rear seat bottom
- From the rear passenger area, use a trim clip removal tool to release the seat bottom retainers (they’re usually at the front edge of the seat cushion).
- Lift the seat bottom up and out, then set it aside.
- Tip: Pull up sharply near each retainer.
Step 3: Expose the fuel pump access cover
- Vacuum debris around the access area using a handheld vacuum.
- Use a flat blade screwdriver to carefully lift/remove the access cover (some covers use butyl adhesive).
- Wipe and clean the top of the pump module area using shop towels.
Step 4: Disconnect the electrical connector and fuel lines
- Unplug the fuel pump electrical connector by releasing its tab using a flat blade screwdriver (gentle pressure).
- Place a plastic drain pan and shop towels under the fuel line connections.
- Disconnect the fuel line(s): use the fuel line quick-disconnect tool set (if required by the fitting style), then pull the line straight off.
- If your lines use plastic safety clips, remove them with needle-nose pliers first, then disconnect the line.
Step 5: Mark the lock ring position
- Use a permanent marker to mark the lock ring position relative to the tank (this helps you reinstall to the same tightness position).
Step 6: Remove the lock ring
- Best method: use the fuel pump lock ring tool (specialty) and turn the ring counterclockwise to remove it.
- Alternate method: place a brass drift punch against a lock ring rib and tap gently with a small hammer to rotate the ring counterclockwise.
- Lift the lock ring off and set it aside.
- Tip: Brass reduces spark risk versus steel.
Step 7: Remove the fuel pump module
- Carefully lift the module straight up; angle it as needed to clear the float arm (the float arm measures fuel level).
- Let fuel drain from the module into the tank for a few seconds, then set the module into the plastic drain pan.
- Remove the old tank seal/O-ring from the tank opening using a flat blade screwdriver carefully (don’t scratch the sealing surface).
Step 8: Install the new seal and new pump module
- Install the new tank seal/O-ring into the tank groove by hand.
- Lower the new pump module into the tank, guiding the float arm so it doesn’t bend.
- Align the module’s index marks/tabs with the tank opening (it should sit fully flat).
Step 9: Reinstall and tighten the lock ring
- Reinstall the lock ring by hand first to avoid cross-threading.
- Tighten using the fuel pump lock ring tool (specialty) until the marks line up with your original reference mark.
- Torque: Tighten to the OEM specification for the lock ring (varies by equipment); use a torque wrench if your lock ring tool supports torque application.
Step 10: Reconnect fuel lines and electrical connector
- Push each fuel line on until it clicks; gently tug to confirm it’s locked.
- Reinstall any plastic safety clips using needle-nose pliers.
- Plug the electrical connector back in until it clicks.
Step 11: Reinstall the access cover and rear seat
- Re-seal the access cover. If the old butyl seal is damaged, apply butyl seal tape and press the cover down firmly by hand.
- Reinstall the rear seat bottom: align it, then press down at the retainer points until it snaps in.
Step 12: Restore power and prime the system
- Reinstall the fuel pump fuse/relay using needle-nose pliers.
- Reconnect the negative battery terminal using a 10mm socket and ratchet. Torque: Tighten to OEM specification for the battery terminal clamp.
- Prime the fuel system: turn the key to ON (do not start) for 5 seconds, then OFF. Repeat 3 times.
✅ After Repair
- Start the engine and let it idle for 2 minutes.
- Inspect for leaks and fuel smell at the access area and fuel line connections.
- If you have a check engine light afterward, re-check the electrical connector seating and fuel line locking tabs.
- Take a short test drive, then re-check for any fuel odor inside the cabin.
💰 DIY vs Shop Cost
Shop Cost: $600-$1,200 (parts + labor)
DIY Cost: $180-$600 (parts only)
You Save: $420-$600 by doing it yourself!
Shop labor rates vary but typically run $100-$150/hour. This repair takes a shop approximately 2-4 hours.
🎯 Ready to get started?
HowToo makes it easy: same-day/2-day shipping on every part, plus all the tools and specialty tools you need! Check out the parts and tools sections below to add everything to your cart.