









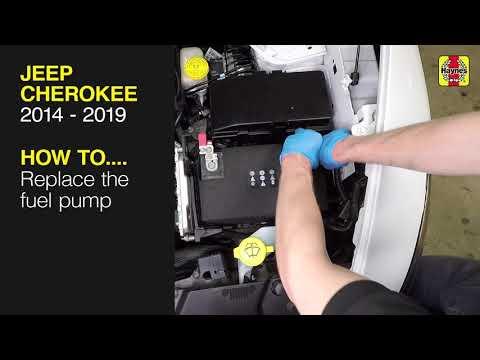







How to Replace the Fuel Pump Module on a 2014-2022 Jeep Cherokee (In-Tank Pump) (Trim: Limited | Engine: Inline 4 2.4L)
Step-by-step tank drop instructions, required tools/parts, safety tips, and key torque specs
How to Replace the Fuel Pump Module on a 2014-2022 Jeep Cherokee (In-Tank Pump) (Trim: Limited | Engine: Inline 4 2.4L)
Step-by-step tank drop instructions, required tools/parts, safety tips, and key torque specs for 2014, 2015, 2016, 2017, 2018, 2019, 2020, 2021


🔧 Cherokee - Fuel Pump Module Replacement
On your Cherokee, the fuel pump is part of an in-tank fuel pump module. Replacement typically requires lowering the fuel tank so you can remove the module locking ring and lift the module out.
Difficulty Level: Advanced | Estimated Time: 3-6 hours
⚠️ Safety & Precautions
- ⚠️ Work outside or in a well-ventilated area; fuel vapors ignite easily.
- ⚠️ No smoking, sparks, heat guns, or incandescent work lights near the vehicle.
- ⚠️ Keep a Class B fire extinguisher nearby.
- ⚠️ Fuel will spill when lines are opened; wear gloves and safety glasses.
- ⚠️ Support the tank before removing straps; a falling tank can injure you.
- ⚠️ Disconnect the negative battery cable before unplugging the fuel pump wiring.
🔧 Required Tools
You'll need the following tools for this repair:
- Safety glasses
- Nitrile gloves
- Class B fire extinguisher
- Floor jack (rated 3-ton minimum)
- Jack stands (rated 3-ton minimum)
- Wheel chocks
- Transmission jack
- Socket set (8mm-18mm)
- Ratchet
- Extension set
- Torque wrench (10-200 Nm range)
- Flat trim tool
- Fuel line disconnect tool set (5/16" and 3/8")
- Pliers
- Pick tool
- Shop towels
- Drain pan
- Fuel pump lock ring tool (specialty)
🔩 Required Parts
HowToo sells all the parts you need for this repair:
- Fuel pump module assembly - Qty: 1
- Fuel pump module tank seal (O-ring) - Qty: 1
- Fuel pump module lock ring - Qty: 1
- EVAP line retaining clip assortment - Qty: 1
📋 Before You Begin
- Start with the tank as close to empty as possible (1/8 tank or less). A full tank is heavy and harder to control.
- Park on level ground, set the parking brake, and chock the rear wheels.
- Plan how you will relieve fuel pressure: easiest is to remove the fuel pump relay/fuse and crank briefly, then turn key OFF.
- Two quick questions (so I can tailor this): Are you replacing the entire fuel pump module or just the pump motor? Also, do you have access to a transmission jack (or a stable way to support the tank)?
🔨 Step-by-Step Instructions
Follow these steps in order:
Step 1: Relieve fuel pressure
- Open the hood and use an 8mm-10mm socket (varies by clamp) to loosen the negative battery terminal clamp, then remove the negative cable. Torque to 5 Nm (44 in-lbs) when reinstalling later.
- Locate the under-hood fuse/relay box and remove the fuel pump relay (use pliers if needed).
- Reconnect the negative cable temporarily, start the engine and let it stall, then crank 2-3 seconds more. Turn key OFF.
- Disconnect the negative cable again using the 8mm-10mm socket.
Step 2: Raise and support the vehicle
- Use a floor jack (rated 3-ton minimum) to lift the rear and set the vehicle securely on jack stands (rated 3-ton minimum).
- Keep the wheel chocks in place.
Step 3: Support the fuel tank
- Position a transmission jack under the center of the fuel tank.
- Use a piece of wood (if you have it) on the jack pad to spread the load. Helps prevent tank damage.
Step 4: Disconnect filler/vent connections (as accessible)
- From under the vehicle, use a flat trim tool and/or pliers to release any shields or retainers blocking the filler/vent area.
- Use pliers to release hose clamps (if equipped) and carefully work the hoses free.
- Use shop towels to catch drips.
Step 5: Disconnect EVAP and fuel lines at the tank
- Unplug the fuel pump electrical connector using a pick tool to lift the lock tab if needed.
- For quick-connect fuel lines, use the fuel line disconnect tool set (5/16" and 3/8") to release the connectors, then pull the lines straight off.
- Cap/cover open lines with shop towels to limit vapor and contamination.
Step 6: Remove the tank straps and lower the tank
- Use the appropriate socket set (13mm-18mm) and ratchet to remove the fuel tank strap bolts while the tank is supported.
- Lower the tank slowly with the transmission jack, stopping to check for any remaining hoses/wires.
- Remove any remaining connections using the pliers or flat trim tool, then lower the tank enough to access the fuel pump module.
- When reinstalling strap bolts: Torque to 48 Nm (35 ft-lbs).
Step 7: Clean the area and remove the lock ring
- Use shop towels to wipe dirt from the top of the module area. Dirt in the tank causes problems.
- Use the fuel pump lock ring tool (specialty) with a ratchet to rotate the lock ring counterclockwise and remove it.
- Lift the lock ring off and remove the old tank seal (O-ring) using a pick tool.
Step 8: Remove the fuel pump module
- Carefully lift the module straight up. Angle it as needed to clear the float arm without bending it.
- Let fuel drain from the module into a drain pan.
- Compare the old and new module to confirm the connectors and line ports match.
Step 9: Install the new seal and module
- Install the new tank seal (O-ring) into the tank groove by hand (no tools). Make sure it sits flat and is not twisted.
- Lower the new module into place, aligning the index marks/tabs.
- Install the new lock ring, then use the fuel pump lock ring tool (specialty) with a ratchet to tighten until fully seated/locked.
Step 10: Raise the tank and reconnect everything
- Use the transmission jack to raise the tank slowly.
- Reconnect EVAP lines and fuel lines until they click; gently tug to confirm they’re locked.
- Reconnect the fuel pump electrical connector.
- Reinstall filler/vent hoses and any retainers using pliers and a flat trim tool.
- Reinstall and tighten the tank straps using the socket set and torque wrench. Torque to 48 Nm (35 ft-lbs).
Step 11: Restore power and prime the fuel system
- Reinstall the fuel pump relay in the fuse/relay box (use pliers if needed).
- Reconnect the negative battery cable using the 8mm-10mm socket. Torque to 5 Nm (44 in-lbs).
- Prime the system: turn the key to ON (engine off) for 3 seconds, OFF for 10 seconds; repeat 3-4 times.
✅ After Repair
- Start the engine and let it idle for 1-2 minutes.
- Inspect under the vehicle for any fuel seepage at the quick-connect fittings and tank seal area.
- If you have a check engine light, scan and clear codes after confirming there are no leaks.
- Road test for 10-15 minutes, then recheck for leaks.
💰 DIY vs Shop Cost
Shop Cost: $900-$1,600 (parts + labor)
DIY Cost: $250-$700 (parts only)
You Save: $650-$900 by doing it yourself!
Shop labor rates vary but typically run $100-$150/hour. This repair takes a shop approximately 3-6 hours.
🎯 Ready to get started?
HowToo makes it easy: same-day/2-day shipping on every part, plus all the tools and specialty tools you need! Check out the parts and tools sections below to add everything to your cart.
Guide for Fuel Pump Module Assembly replace for these Jeep vehicles
| Year Make Model | Sub Model | Engine | Body Style |
|---|---|---|---|
| 2022 Jeep Cherokee | Limited | Inline 4 2.4L | - |
| 2022 Jeep Cherokee | Limited | V6 3.2L | - |
| 2021 Jeep Cherokee | Latitude | Inline 4 2.4L | - |
| 2021 Jeep Cherokee | Latitude | V6 3.2L | - |
| 2021 Jeep Cherokee | Limited | V6 3.2L | - |
| 2020 Jeep Cherokee | Latitude | Inline 4 2.4L | - |
| 2020 Jeep Cherokee | Latitude | V6 3.2L | - |
| 2020 Jeep Cherokee | Limited | Inline 4 2.4L | - |
| 2020 Jeep Cherokee | Limited | V6 3.2L | - |
| 2020 Jeep Cherokee | Overland | V6 3.2L | - |
| 2019 Jeep Cherokee | Latitude | Inline 4 2.4L | - |
| 2019 Jeep Cherokee | Latitude | V6 3.2L | - |
| 2019 Jeep Cherokee | Limited | Inline 4 2.4L | - |
| 2019 Jeep Cherokee | Limited | V6 3.2L | - |
| 2019 Jeep Cherokee | Overland | V6 3.2L | - |
| 2018 Jeep Cherokee | Latitude | Inline 4 2.4L | - |
| 2018 Jeep Cherokee | Latitude | V6 3.2L | - |
| 2018 Jeep Cherokee | Limited | Inline 4 2.4L | - |
| 2018 Jeep Cherokee | Limited | V6 3.2L | - |
| 2018 Jeep Cherokee | Overland | Inline 4 2.4L | - |
| 2018 Jeep Cherokee | Overland | V6 3.2L | - |
| 2017 Jeep Cherokee | Latitude | Inline 4 2.4L | - |
| 2017 Jeep Cherokee | Latitude | V6 3.2L | - |
| 2017 Jeep Cherokee | Limited | Inline 4 2.4L | - |
| 2017 Jeep Cherokee | Limited | V6 3.2L | - |
| 2017 Jeep Cherokee | Sport | Inline 4 2.4L | - |
| 2017 Jeep Cherokee | Sport | V6 3.2L | - |
| 2017 Jeep Cherokee | Overland | Inline 4 2.4L | - |
| 2017 Jeep Cherokee | Overland | V6 3.2L | - |
| 2016 Jeep Cherokee | Latitude | Inline 4 2.4L | - |
| 2016 Jeep Cherokee | Latitude | V6 3.2L | - |
| 2016 Jeep Cherokee | Limited | Inline 4 2.4L | - |
| 2016 Jeep Cherokee | Limited | V6 3.2L | - |
| 2016 Jeep Cherokee | Sport | Inline 4 2.4L | - |
| 2016 Jeep Cherokee | Sport | V6 3.2L | - |
| 2016 Jeep Cherokee | 75th Anniversary | Inline 4 2.4L | - |
| 2016 Jeep Cherokee | 75th Anniversary | V6 3.2L | - |
| 2016 Jeep Cherokee | Overland | Inline 4 2.4L | - |
| 2016 Jeep Cherokee | Overland | V6 3.2L | - |
| 2015 Jeep Cherokee | Latitude | Inline 4 2.4L | - |
| 2015 Jeep Cherokee | Latitude | V6 3.2L | - |
| 2015 Jeep Cherokee | Limited | Inline 4 2.4L | - |
| 2015 Jeep Cherokee | Limited | V6 3.2L | - |
| 2015 Jeep Cherokee | Sport | Inline 4 2.4L | - |
| 2014 Jeep Cherokee | Latitude | Inline 4 2.4L | - |
| 2014 Jeep Cherokee | Latitude | V6 3.2L | - |
| 2014 Jeep Cherokee | Limited | Inline 4 2.4L | - |
| 2014 Jeep Cherokee | Limited | V6 3.2L | - |
| 2014 Jeep Cherokee | Sport | Inline 4 2.4L | - |
| 2014 Jeep Cherokee | Sport | V6 3.2L | - |