









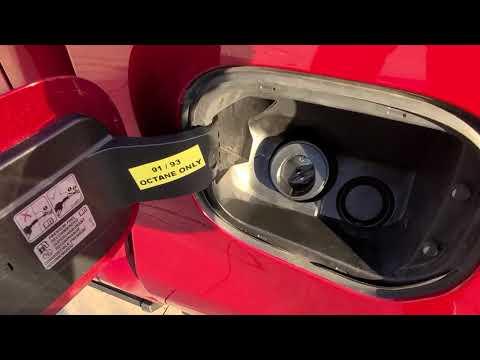





How to Replace the Fuel Cap (or Service Capless Filler) on a 2019 Chevrolet Traverse
Step-by-step tips to identify cap vs capless systems, clean sealing surfaces, and prevent EVAP/CEL issues
How to Replace the Fuel Cap (or Service Capless Filler) on a 2019 Chevrolet Traverse
Step-by-step tips to identify cap vs capless systems, clean sealing surfaces, and prevent EVAP/CEL issues


🔧 Traverse - Fuel Cap Replacement
On your Traverse, the “fuel cap” may be a traditional twist-on cap or a capless fuel filler system (no removable cap). First you’ll confirm which style you have, then either swap the cap in seconds or inspect/clean the capless sealing area.
Difficulty Level: Beginner | Estimated Time: 0.1-0.3 hours
⚠️ Safety & Precautions
- ⚠️ Work outdoors or in a well-ventilated area.
- ⚠️ Keep away from sparks, cigarettes, or open flames.
- ⚠️ Turn the engine off before opening the fuel door.
- ⚠️ If you smell strong fuel odor after, do not drive—recheck sealing.
🔧 Required Tools
You'll need the following tools for this repair:
- Nitrile gloves
- Shop towels
- Flashlight
- Mild soap and water
🔩 Required Parts
HowToo sells all the parts you need for this repair:
- Fuel filler cap - Qty: 1
- Fuel door/filler pocket sealing components - Qty: 1
📋 Before You Begin
- Park on level ground and shift to Park.
- Turn the engine off and remove the key/fob from the vehicle area.
- Open the fuel door and use a flashlight to look inside the filler opening.
- Confirm what you have: a twist-on cap (removable cap) or a capless flap (spring-loaded door inside the filler neck).
🔨 Step-by-Step Instructions
Follow these steps in order:
Step 1: Identify your fuel filler style
- Open the fuel door.
- If you see a removable cap you can grip and turn, follow Steps 2–4.
- If you see a spring-loaded inner flap and no removable cap, skip to Steps 5–7 (capless system).
Step 2: Remove the old twist-on fuel cap (if equipped)
- Use nitrile gloves and turn the cap counterclockwise until it comes off.
- If there is a tether (strap), let it hang so it doesn’t fall into the paint.
Step 3: Check the sealing surface
- Use a flashlight to inspect the filler neck sealing lip.
- Use shop towels lightly dampened with mild soap and water to wipe away dirt. Keep dirt out of the opening.
Step 4: Install the new twist-on fuel cap (if equipped)
- Place the new cap on and turn clockwise until it’s fully seated.
- If your cap “clicks,” keep turning until you hear/feel the clicks stop increasing (snug).
- No torque spec is used for a fuel cap—hand-tight only.
Step 5: Capless system check (if no removable cap)
- Use a flashlight to inspect the capless flap area for sand, leaves, or sticky residue.
- Use a shop towel with mild soap and water to clean the visible sealing area.
- Do not pry the flap open. (That flap is the seal that replaces a cap.)
Step 6: Verify the flap closes freely
- After cleaning, confirm the flap sits closed and looks even.
- If it looks damaged, warped, or won’t close, the fix is typically replacing the filler neck/filler pipe components (more involved than a “cap” swap).
Step 7: Close the fuel door
- Close the fuel door firmly until it latches.
- Wipe any spilled fuel immediately using shop towels.
✅ After Repair
- Start your Traverse and make sure there’s no fuel smell around the fuel door area.
- If the Check Engine Light was on for an EVAP leak (loose cap), it may take a few drive cycles to turn off on its own.
- If the light stays on, you may need a scan to confirm the EVAP code is cleared and no leaks remain.
💰 DIY vs Shop Cost
Shop Cost: $30-$120 (parts + labor)
DIY Cost: $10-$40 (parts only)
You Save: $20-$80 by doing it yourself!
Shop labor rates vary but typically run $100-$150/hour. This repair takes a shop approximately 0.1-0.3 hours.
🎯 Ready to get started?
HowToo makes it easy: same-day/2-day shipping on every part, plus all the tools and specialty tools you need! Check out the parts and tools sections below to add everything to your cart.
Guide for Fuel Tank Cap replace for these Chevrolet vehicles
| Year Make Model | Sub Model | Engine | Body Style |
|---|