









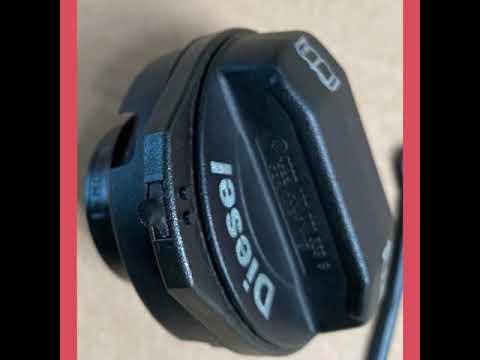






How to Replace the Fuel Cap on a 2016 Audi A3 (Fix EVAP Leaks & Check Engine Light)
Step-by-step fuel filler cap replacement with tools list, safety tips, and post-repair checks
How to Replace the Fuel Cap on a 2016 Audi A3 (Fix EVAP Leaks & Check Engine Light)
Step-by-step fuel filler cap replacement with tools list, safety tips, and post-repair checks


🔧 A3 - Fuel Cap Replacement
Replacing the fuel cap is quick and helps prevent fuel vapor leaks that can trigger a check engine light (EVAP leak) and reduce fuel system sealing. On your A3, the cap screws on and is usually tethered (attached) so it doesn’t get lost.
Difficulty Level: Beginner | Estimated Time: 0.1-0.3 hours
⚠️ Safety & Precautions
- ⚠️ Work in a well-ventilated area away from sparks, cigarettes, or open flames.
- ⚠️ Don’t top off fuel; stop when the pump clicks off.
- ⚠️ If the engine was just running, avoid hot surfaces near the fuel door area.
- ⚠️ Battery disconnect is not required.
🔧 Required Tools
You'll need the following tools for this repair:
- Nitrile gloves
- Safety glasses
- Clean shop towel
- Flashlight
🔩 Required Parts
HowToo sells all the parts you need for this repair:
- Fuel filler cap - Qty: 1
📋 Before You Begin
- Park on level ground, shift to Park, and shut the engine off.
- Press the fuel door to open it (it’s a push-to-open style on the A3).
- Wipe dirt around the filler neck using a clean shop towel so debris doesn’t fall into the tank.
🔨 Step-by-Step Instructions
Follow these steps in order:
Step 1: Remove the old fuel cap
- Put on nitrile gloves and safety glasses.
- Use your hand to turn the cap counterclockwise until it comes off.
- If it has a tether (a small strap that keeps the cap attached), let the cap hang or set it in the fuel door holder if equipped.
Step 2: Inspect and clean the sealing area
- Use a flashlight to look at the filler neck sealing surface (the rim where the cap seals).
- Use a clean shop towel to wipe the rim clean.
- Tip: Dirt here can cause EVAP leak codes.
Step 3: Install the new fuel cap
- Align the new cap and start threading it on by hand clockwise.
- Keep turning by hand until it fully seats and you feel/hear it click (if your replacement cap is a “click” style).
- Do not use tools to tighten it—hand-tight only.
Step 4: Close the fuel door
- Make sure the tether isn’t pinched.
- Press the fuel door closed until it latches.
✅ After Repair
- Start the engine and confirm there’s no fuel smell around the fuel door.
- If you replaced the cap because of a check engine light, the light may take a few drive cycles to clear on its own (or can be cleared with a scan tool).
- After your next fill-up, re-check that the cap is fully tightened.
💰 DIY vs Shop Cost
Shop Cost: $40-$120 (parts + labor)
DIY Cost: $15-$45 (parts only)
You Save: $25-$75 by doing it yourself!
Shop labor rates vary but typically run $100-$150/hour. This repair takes a shop approximately 0.2-0.4 hours.
🎯 Ready to get started?
HowToo makes it easy: same-day/2-day shipping on every part, plus all the tools and specialty tools you need! Check out the parts and tools sections below to add everything to your cart.
Guide for Fuel Tank Cap replace for these Audi vehicles
| Year Make Model | Sub Model | Engine | Body Style |
|---|