














How to Replace the Fuel Cap on a 2007 GMC Sierra 1500 (Fix EVAP Leak & Check Engine Light)
Step-by-step fuel cap replacement with required tools/parts, safety tips, and post-repair EVAP checks
How to Replace the Fuel Cap on a 2007 GMC Sierra 1500 (Fix EVAP Leak & Check Engine Light)
Step-by-step fuel cap replacement with required tools/parts, safety tips, and post-repair EVAP checks


🔧 Sierra 1500 - Fuel Cap Replacement
Replacing the fuel cap is a quick job that helps keep fuel vapors sealed in the tank. A worn or incorrect cap can cause a check engine light (often an EVAP leak) and fuel smell.
Difficulty Level: Beginner | Estimated Time: 0.1-0.3 hours
⚠️ Safety & Precautions
- ⛽ Work in a well-ventilated area; fuel vapors are flammable.
- Turn the engine off and keep sparks/flames away from the fuel door.
- If you just drove, wait a few minutes so pressure can bleed off before removing the cap.
- No battery disconnect is required.
🔧 Required Tools
You'll need the following tools for this repair:
- Nitrile gloves
- Safety glasses
- Shop towel
- Flashlight
🔩 Required Parts
HowToo sells all the parts you need for this repair:
- Fuel cap (sealed / tethered, correct for Sierra 1500) - Qty: 1
📋 Before You Begin
- Park on level ground, shift to Park, and set the parking brake.
- Make sure the engine is OFF.
- Wipe dirt around the filler neck area with a shop towel so debris doesn’t fall in.
🔨 Step-by-Step Instructions
Follow these steps in order:
Step 1: Open the fuel door
- Open the fuel door on the bedside.
- Use a flashlight to check the area for heavy dirt buildup.
Step 2: Remove the old fuel cap
- Put on nitrile gloves and safety glasses.
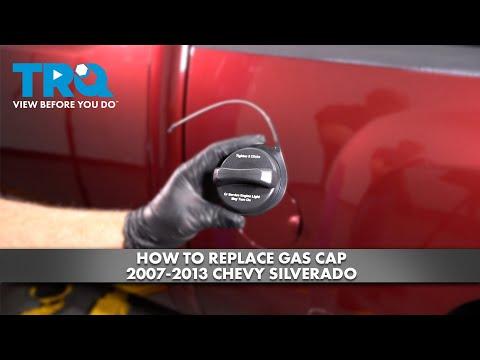
- Turn the fuel cap counterclockwise until it releases, then pull it off.
- If it hisses, pause—pressure is venting.
Step 3: Inspect and clean the sealing surface
- Use a shop towel to wipe the filler neck lip (where the cap seals).
- Check the old cap’s seal (the rubber ring) for cracks, flat spots, or tears.
Step 4: Install the new fuel cap
- Align the cap and push it onto the filler neck.
- Turn the cap clockwise until it is fully tight.
- If your cap is the “click” style, tighten until you feel/hear clicks (usually 1–3 clicks). That means the seal is set.
- If it has a tether (strap), make sure it isn’t twisted and won’t pinch in the door.
Step 5: Close the fuel door
- Close the fuel door securely.
- Use a flashlight for a final quick look to ensure the cap sits straight.
✅ After Repair
- Start the engine and confirm there’s no fuel smell around the filler area.
- If you had a check engine light for an EVAP issue, it may take a few drive cycles to turn off on its own after the seal is fixed.
- If the light stays on after a few days of normal driving, you’ll need the codes read—there may be another EVAP leak.
💰 DIY vs Shop Cost
Shop Cost: $30-$90 (parts + labor)
DIY Cost: $12-$35 (parts only)
You Save: $18-$55 by doing it yourself!
Shop labor rates vary but typically run $100-$150/hour. This repair takes a shop approximately 0.1-0.3 hours.
🎯 Ready to get started?
HowToo makes it easy: same-day/2-day shipping on every part, plus all the tools and specialty tools you need! Check out the parts and tools sections below to add everything to your cart.
Guide for Fuel Tank Cap replace for these GMC vehicles
| Year Make Model | Sub Model | Engine | Body Style |
|---|