















How to Replace the Fuel Cap Dust Plug on a 2013-2019 Ford Escape
Step-by-step capless Easy Fuel filler guide with tools, parts, safety tips, and DIY cost
How to Replace the Fuel Cap Dust Plug on a 2013-2019 Ford Escape
Step-by-step capless Easy Fuel filler guide with tools, parts, safety tips, and DIY cost for 2013, 2014, 2015, 2016, 2017, 2018, 2019


🔧 Escape - Fuel Cap Replacement
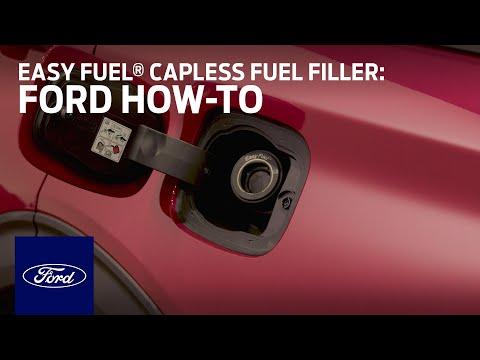
Your Escape uses Ford’s capless Easy Fuel system, so there is no traditional screw-on fuel cap from the factory. If you are replacing the fuel filler door/cover area or installing a replacement capless dust plug, the job is simple and helps keep dirt out of the filler neck.
Difficulty Level: Beginner | Estimated Time: 5-10 minutes
⚠️ Safety & Precautions
- 🔥 Work with the engine off and the key away from the vehicle.
- 🚭 Do not smoke or use open flames near the fuel filler area.
- 🧤 Wear gloves if the filler area is dirty or fuel residue is present.
- ⚠️ Do not force tools into the capless filler neck. The sealing flaps can be damaged.
- 🔋 Battery disconnect is not required for this repair.
🔧 Required Tools
You'll need the following tools for this repair:
- Nitrile gloves
- Safety glasses
- Clean microfiber towel
- Plastic trim tool
🔩 Required Parts
HowToo sells all the parts you need for this repair:
- Capless fuel filler dust plug - Qty: 1
📋 Before You Begin
- 🅿️ Park your Escape on level ground and shift to Park.
- 🔥 Turn the engine off and let the area around the fuel door air out if you smell fuel.
- 🧼 Wipe dirt away from the fuel door area with a clean microfiber towel before touching the filler neck.
- ℹ️ Your Escape is equipped with a capless fuel filler. A replacement “fuel cap” is usually a dust plug or protective insert, not a sealed screw-on cap.
🔨 Step-by-Step Instructions
Follow these steps in order:
Step 1: Open the Fuel Door
- Use your hand to press the rear edge of the fuel door inward, then release it so the door pops open.
- If the door sticks, use a plastic trim tool gently at the edge. A plastic trim tool is a non-metal pry tool that helps avoid scratching paint.
- Use light pressure only.
Step 2: Inspect the Capless Filler Neck
- Put on nitrile gloves and safety glasses.
- Use a clean microfiber towel to wipe around the outside of the filler opening.
- Look for dirt, broken plastic, or a stuck old dust plug around the opening.
- Do not push the towel deep into the filler neck.
Step 3: Remove the Old Dust Plug
- If an old capless fuel filler dust plug is installed, pull it straight outward by hand.
- If it is stuck, use a plastic trim tool to gently lift the edge, then remove it by hand.
- Do not use a screwdriver or metal pick near the filler neck.
Step 4: Install the New Dust Plug
- Line up the new capless fuel filler dust plug with the filler opening.
- Push it in by hand until it sits evenly and securely.
- No torque spec applies because this part is hand-installed and not bolted on.
- It should fit snug, not forced.
Step 5: Close the Fuel Door
- Use your hand to close the fuel door until it clicks flush with the body.
- Check that the door opens and closes smoothly.
- If the door does not sit flush, reopen it and make sure the dust plug is fully seated.
✅ After Repair
- ✅ Start your Escape and check that no fuel warning message appears.
- ✅ If your check engine light was on for an EVAP leak, it may take several drive cycles to clear after the issue is fixed.
- 🔍 If the check engine light stays on, scan for codes. Common related codes include EVAP small leak codes.
- ⛽ At the next fuel fill, make sure the pump nozzle inserts and removes smoothly from the capless filler.
💰 DIY vs Shop Cost
Shop Cost: $40-$90 (parts + labor)
DIY Cost: $10-$30 (parts only)
You Save: $30-$60 by doing it yourself!
Shop labor rates vary but typically run $100-$150/hour. This repair takes a shop approximately 0.2-0.4 hours.
🎯 Ready to get started?
HowToo makes it easy: same-day/2-day shipping on every part, plus all the tools and specialty tools you need! Check out the parts and tools sections below to add everything to your cart.
Guide for Capless Fuel Filler Dust Cap replace for these Ford vehicles
| Year Make Model | Sub Model | Engine | Body Style |
|---|---|---|---|
| 2019 Ford Escape | - | - | - |
| 2018 Ford Escape | - | - | - |
| 2017 Ford Escape | - | - | - |
| 2016 Ford Escape | - | - | - |
| 2015 Ford Escape | - | - | - |
| 2014 Ford Escape | - | - | - |
| 2013 Ford Escape | - | - | - |