









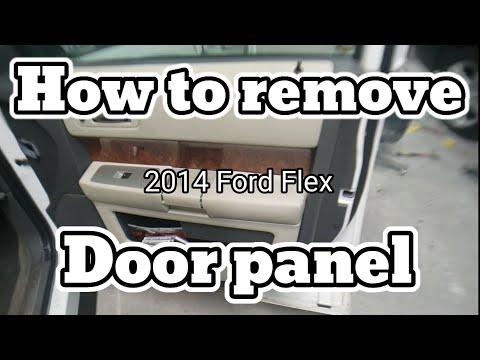






How to Replace the Front Window Regulator on a 2009-2019 Ford Flex (Left or Right)
Step-by-step door panel removal, tools/parts list, rivet vs bolt tips, and torque specs
How to Replace the Front Window Regulator on a 2009-2019 Ford Flex (Left or Right)
Step-by-step door panel removal, tools/parts list, rivet vs bolt tips, and torque specs for 2009, 2010, 2011, 2012, 2013, 2014, 2015, 2016, 2017, 2018, 2019


🔧 Flex - Front Window Regulator Replacement
The front window regulator is the cable-and-track mechanism that lifts and lowers your window glass. When it fails, the window may move crooked, grind/click, fall into the door, or stop moving. You’ll remove the door panel, secure the glass, swap the regulator (and motor if needed), then reassemble and re-learn the auto window function.
Difficulty Level: Intermediate | Estimated Time: 2-3 hours (per door)
⚠️ Safety & Precautions
- ⚠️ Keep hands clear of the regulator cables and tracks while testing.
- ⚠️ Support the window glass with tape before unbolting it; it can drop suddenly.
- ⚠️ Disconnect the negative battery cable before unplugging door wiring to avoid shorts.
- ⚠️ Wear gloves; the inner door metal edges can be razor sharp.
- ⚠️ Don’t tear the vapor barrier; it prevents water leaks into the cabin.
🔧 Required Tools
You'll need the following tools for this repair:
- Safety glasses
- Work gloves
- Trim removal tool set
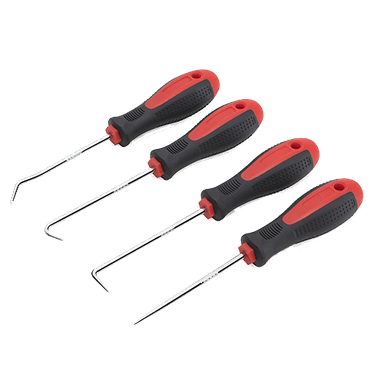
- Pick tool
- Phillips screwdriver #2
- Flathead screwdriver (small)
- 7mm socket
- 8mm socket
- 10mm socket
- 1/4" drive ratchet
- 6" extension (1/4" drive)
- Torx T20 driver
- Torx T27 driver
- Painter’s tape (2")
- Magnetic parts tray
- Flashlight
- Torque wrench (in-lb or small Nm range)
- Drill with 1/4" drill bit
- Rivet gun (specialty)
🔩 Required Parts
HowToo sells all the parts you need for this repair:
- Front window regulator assembly (left or right) - Qty: 1
- Front window regulator motor (if not included) - Qty: 1
- Door panel trim clips - Qty: 6-12
- Vapor barrier butyl tape/sealant - Qty: 1
- 1/4" blind rivets (if your regulator is riveted) - Qty: 6-10
📋 Before You Begin
- Park on level ground, shift to Park, and keep the key away from the vehicle.
- Lower the window until you can access the glass-to-regulator fasteners through the door access holes (if possible).
- Use a 10mm socket to disconnect the negative battery terminal and wait 2 minutes.
- Take photos of connectors before unplugging.
🔨 Step-by-Step Instructions
Follow these steps in order:
Step 1: Remove the door switch panel
- Use a trim removal tool set to gently pry up the window/lock switch panel.
- Unplug the electrical connectors using a pick tool to lift any locking tabs (a locking tab is a small clip that prevents a plug from backing out).
Step 2: Remove visible door panel screws
- Remove the screw(s) behind the interior door handle trim using a Torx T20 driver (pop the small cover with a small flathead screwdriver first if equipped).
- Remove the screw(s) in the armrest/pull pocket using a 7mm socket and 1/4" ratchet.
- If equipped, remove any lower edge screws with a 7mm socket.
Step 3: Release and remove the door panel
- Start at the lower corner and use a trim removal tool set to pop the door panel clips free.
- Lift the door panel straight up to unhook it from the window ledge.
- Unplug any remaining connectors (courtesy light/speaker if routed) using a pick tool.
- If there’s a mechanical door-handle cable, unclip it carefully by hand; the cable end lifts out after rotating the plastic retainer.
Step 4: Remove the vapor barrier (water shield)
- Use a trim removal tool set to start peeling the vapor barrier back.
- Warm sticky butyl lightly by hand and pull slowly to avoid tearing.
- Set it aside clean-side up so dirt doesn’t stick to the sealant.
Step 5: Secure the window glass
- Use painter’s tape (2") to tape the glass to the door frame (run 2-3 long strips over the top of the door and onto the outside of the glass).
- Use extra tape if the glass feels loose.
Step 6: Separate the glass from the regulator
- Look through the large access holes to find the glass-to-regulator clamps/bolts.
- Use a 10mm socket and extension to loosen/remove the clamp bolts.
- Carefully slide the glass upward by hand, then add more painter’s tape (2") to hold it fully up.
- Torque to 10 Nm (89 in-lb) when reinstalling these clamp bolts.
Step 7: Unplug and remove the regulator (and motor if included)
- Unplug the window motor connector by hand, using a pick tool only to lift the lock if needed.
- Remove regulator/motor mounting fasteners using a 10mm socket.
- Torque to 10 Nm (89 in-lb) for regulator/motor bolts on installation.
- If your regulator is held with rivets instead of bolts:
- Use a drill with 1/4" drill bit to drill the rivet heads off.
- Push rivet bodies through and remove the regulator.
- Install the new regulator using a rivet gun (specialty) and correct-size 1/4" blind rivets.
Step 8: Transfer the motor (only if your new regulator doesn’t include it)
- Hold the motor firmly and remove motor screws using a Torx T27 driver.
- Move the motor onto the new regulator in the same position and reinstall the screws.
- Torque to 5 Nm (44 in-lb) for motor screws.
Step 9: Install the new regulator
- Place the new regulator into the door and start all bolts by hand using a 10mm socket (don’t tighten yet).
- Align it in its mounting slots, then tighten fasteners.
- Torque to 10 Nm (89 in-lb).
- Plug in the motor connector by hand until it clicks.
Step 10: Reattach the glass to the regulator
- Remove enough painter’s tape (2") to let the glass lower carefully into the regulator clamps.
- Use a 10mm socket to reinstall/tighten the clamp bolts evenly.
- Torque to 10 Nm (89 in-lb).
Step 11: Quick function check (before reassembly)
- Reconnect the negative battery cable using a 10mm socket.
- Temporarily plug in the window switch panel and test up/down operation while keeping fingers clear.
- If the glass tilts or binds, stop and re-check regulator alignment and glass seating.
- Disconnect the negative battery cable again using a 10mm socket before final reassembly.
Step 12: Reinstall the vapor barrier and door panel
- Press the vapor barrier back on; add vapor barrier butyl tape/sealant where the seal is damaged.
- Reconnect all electrical connectors and the door-handle cable by hand.
- Hang the door panel on the top lip, then press clips in around the perimeter.
- Reinstall screws using a 7mm socket and Torx T20 driver (snug, do not overtighten).
- Snap the switch panel back in using hand pressure.
✅ After Repair
- Reconnect the negative battery cable using a 10mm socket.
- Re-learn the auto up/down (if equipped):
- Turn ignition ON.
- Hold the window switch DOWN until fully open, then keep holding for 2 seconds.
- Hold the switch UP until fully closed, then keep holding for 2 seconds.
- Test for smooth travel, no popping noises, and confirm the door locks/speaker/mirror controls work.
- Check for water leaks later (vapor barrier seal is critical).
💰 DIY vs Shop Cost
Shop Cost: $450-$850 (parts + labor)
DIY Cost: $120-$280 (parts only)
You Save: $330-$570 by doing it yourself!
Shop labor rates vary but typically run $100-$150/hour. This repair takes a shop approximately 2-3 hours.
🎯 Ready to get started?
HowToo makes it easy: same-day/2-day shipping on every part, plus all the tools and specialty tools you need! Check out the parts and tools sections below to add everything to your cart.
Assumption: Some Flex front regulators are bolted; some are riveted—steps include both.
Guide for Window Regulator replace for these Ford vehicles
| Year Make Model | Sub Model | Engine | Body Style |
|---|---|---|---|
| 2019 Ford Flex | - | - | - |
| 2018 Ford Flex | - | - | - |
| 2017 Ford Flex | - | - | - |
| 2016 Ford Flex | - | - | - |
| 2015 Ford Flex | - | - | - |
| 2014 Ford Flex | - | - | - |
| 2013 Ford Flex | - | - | - |
| 2012 Ford Flex | - | - | - |
| 2011 Ford Flex | - | - | - |
| 2010 Ford Flex | - | - | - |
| 2009 Ford Flex | - | - | - |