









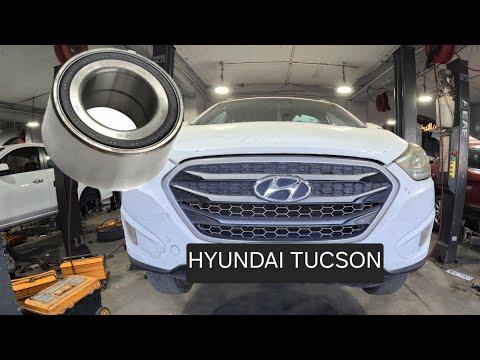







How to Replace the Front Wheel Bearing on a 2005-2016 Hyundai Tucson
Step-by-step pressed bearing guide with tools, parts, torque specs, and safety tips
How to Replace the Front Wheel Bearing on a 2005-2016 Hyundai Tucson
Step-by-step pressed bearing guide with tools, parts, torque specs, and safety tips for 2005, 2006, 2007, 2008, 2009, 2010, 2011, 2012, 2013, 2014, 2015, 2016


🔧 Tucson - Front Wheel Bearing Replacement
This guide covers replacing a front wheel bearing on your Tucson. The front bearing is pressed into the steering knuckle, so the hub and knuckle must be removed and the bearing pressed out/in with a hydraulic press or hub bearing service kit.
Assumption: This procedure is for one front wheel bearing. Rear bearing service is different because your Tucson AWD uses a rear hub/bearing assembly.
Difficulty Level: Advanced | Estimated Time: 3-5 hours per side
⚠️ Safety & Precautions
- ⚠️ Support your Tucson with jack stands before working under or beside it. Never rely on a jack alone.
- ⚠️ The axle nut is very tight. Loosen it only with the vehicle safely on the ground or the hub locked from turning.
- ⚠️ Do not pull or stretch the ABS wheel speed sensor wire. ABS means anti-lock braking system, and its sensor is fragile.
- ⚠️ Use a hydraulic press carefully. A press uses very high force and can eject parts if they are not supported squarely.
- ⚠️ Replace the axle nut if your replacement parts include a new one. Staked or locking axle nuts are generally one-time-use.
- ⚠️ After the repair, pump the brake pedal before driving so the brake pads seat back against the rotor.
🔧 Required Tools
You'll need the following tools for this repair:
- Floor jack (rated 2-ton minimum)
- Jack stands (rated 2-ton minimum)
- Wheel chocks
- Safety glasses
- Mechanic gloves
- 1/2-inch drive breaker bar
- 1/2-inch drive torque wrench (250 ft-lb capacity)
- 3/8-inch drive torque wrench (100 ft-lb capacity)
- 21mm socket
- 32mm axle nut socket
- 14mm socket
- 17mm socket
- 19mm socket
- 10mm socket
- Ratchet handle
- Combination wrench set 10mm-21mm
- Flat-head screwdriver
- Needle-nose pliers
- Ball joint separator (specialty)
- Tie rod end puller (specialty)
- Hub puller (specialty)
- Hydraulic press 12-ton minimum (specialty)
- Wheel bearing press adapters (specialty)
- Snap ring pliers (specialty)
- Dead blow hammer
- Rubber mallet
- Pry bar
- Paint marker
- Wire brush
- Brake cleaner
- Bungee cord
🔩 Required Parts
HowToo sells all the parts you need for this repair:
- Front wheel bearing - Qty: 1 per side
- Front axle nut - Qty: 1 per side
- Front hub snap ring - Qty: 1 per side
- Brake cleaner - Qty: 1 can
- Anti-seize compound - Qty: 1 small tube
📋 Before You Begin
- Park your Tucson on level ground, shift to Park, and apply the parking brake.
- Place wheel chocks behind the rear wheels.
- Do not disconnect the battery for this repair.
- Mark the strut-to-knuckle position with a paint marker before removal. This helps keep alignment close until you can have it checked.
- A hydraulic press is strongly recommended. If you do not have one, remove the steering knuckle and take it to a machine shop for bearing pressing.
🔨 Step-by-Step Instructions
Follow these steps in order:
Step 1: Loosen the Wheel Nuts and Axle Nut
- Use a 21mm socket and breaker bar to loosen the front wheel nuts about half a turn while the tire is still on the ground.
- Use a flat-head screwdriver to remove the center cap if it blocks access to the axle nut.
- Use a 32mm axle nut socket and breaker bar to loosen the axle nut while the vehicle is on the ground.
- Do not fully remove it yet.
Step 2: Raise and Support the Vehicle
- Use a floor jack to lift the front corner of your Tucson at the proper front jacking point.
- Place a jack stand under the reinforced support point.
- Lower the vehicle gently onto the jack stand and keep the floor jack lightly touching as backup.
- Use a 21mm socket to remove the wheel nuts, then remove the wheel.
Step 3: Remove the Brake Caliper and Rotor
- Use a 14mm socket to remove the brake caliper slide pin bolts.
- Lift the caliper off the bracket and hang it from the spring using a bungee cord.
- Do not let the caliper hang by the rubber brake hose.
- Use a 17mm socket to remove the caliper bracket bolts.
- Remove the brake rotor by pulling it straight off the hub.
- If stuck, tap around the rotor hat with a dead blow hammer.
- During installation later, tighten the caliper bracket bolts to Torque to 78-86 Nm (58-63 ft-lbs).
- During installation later, tighten the caliper slide pin bolts to Torque to 22-32 Nm (16-24 ft-lbs).
Step 4: Remove the ABS Wheel Speed Sensor
- Use a 10mm socket to remove the ABS sensor bolt from the steering knuckle.
- Gently twist and pull the sensor out by hand.
- If it is stuck, use a flat-head screwdriver carefully around the edge, not against the wire.
- Move the sensor aside so it cannot be damaged.
- During installation later, tighten the ABS sensor bolt to Torque to 7-10 Nm (62-89 in-lbs).
Step 5: Remove the Axle Nut
- Use a 32mm axle nut socket to remove the loosened axle nut fully.
- Push the axle inward through the hub by hand.
- If stuck, thread the old axle nut on a few turns and tap it with a rubber mallet.
- Do not hit the axle threads directly with a steel hammer.
Step 6: Disconnect the Tie Rod End
- Use a 17mm socket or wrench to remove the outer tie rod end nut.
- Use a tie rod end puller to separate the tie rod from the steering knuckle.
- A tie rod end puller safely presses the tapered joint apart without damaging the steering part.
- During installation later, tighten the tie rod end nut to Torque to 24-34 Nm (18-25 ft-lbs).
Step 7: Disconnect the Lower Ball Joint
- Use a 17mm socket or wrench to remove the lower ball joint nut.
- Use a ball joint separator to release the lower ball joint from the steering knuckle.
- A ball joint separator is a tool that separates tapered suspension joints without prying dangerously.
- During installation later, tighten the lower ball joint nut to Torque to 60-72 Nm (44-53 ft-lbs).
Step 8: Unbolt the Steering Knuckle from the Strut
- Use a paint marker to mark the strut-to-knuckle position.
- Use a 19mm socket and wrench to remove the two strut-to-knuckle bolts and nuts.
- Support the knuckle by hand as the last bolt comes out.
- Pull the steering knuckle outward while guiding the axle spline out of the hub.
- During installation later, tighten the strut-to-knuckle bolts to Torque to 140-160 Nm (103-118 ft-lbs).
Step 9: Press the Hub Out of the Bearing
- Place the steering knuckle in a hydraulic press with proper wheel bearing press adapters.
- Support the knuckle evenly so the hub can press out straight.
- Use the hydraulic press to press the hub out of the old bearing.
- The inner bearing race may stay stuck on the hub.
- If the race remains, remove it with proper press adapters or a bearing splitter if available.
- Press only on supported metal surfaces.
Step 10: Remove the Snap Ring and Old Bearing
- Use snap ring pliers to remove the snap ring from the steering knuckle.
- A snap ring is a spring steel retaining clip that locks the bearing in place.
- Use a wire brush and brake cleaner to clean dirt and rust from the snap ring groove.
- Place the knuckle back in the hydraulic press with wheel bearing press adapters.
- Press the old bearing out of the steering knuckle.
Step 11: Press In the New Bearing
- Clean the bearing bore using a wire brush and brake cleaner.
- Position the new front wheel bearing squarely in the steering knuckle.
- Use the hydraulic press and wheel bearing press adapters to press the new bearing into the knuckle.
- Press only on the outer race of the bearing. The race is the solid outer ring of the bearing.
- Do not press through the bearing balls or rollers.
- Use snap ring pliers to install the new snap ring fully into its groove.
Step 12: Press the Hub Into the New Bearing
- Support the inner race of the new bearing with the correct wheel bearing press adapter.
- Use the hydraulic press to press the hub into the new bearing.
- Make sure the hub turns smoothly by hand after pressing.
- If it feels rough or tight, stop and inspect before reinstalling.
Step 13: Reinstall the Steering Knuckle
- Guide the axle splines through the hub by hand.
- Lift the steering knuckle into position against the strut.
- Use a 19mm socket and wrench to install the strut-to-knuckle bolts.
- Align your paint marks as closely as possible.
- Tighten the strut-to-knuckle bolts to Torque to 140-160 Nm (103-118 ft-lbs).
Step 14: Reconnect the Ball Joint and Tie Rod
- Use a 17mm socket to install the lower ball joint nut.
- Tighten the lower ball joint nut to Torque to 60-72 Nm (44-53 ft-lbs).
- Use a 17mm socket to install the outer tie rod end nut.
- Tighten the outer tie rod end nut to Torque to 24-34 Nm (18-25 ft-lbs).
Step 15: Reinstall the ABS Sensor
- Use brake cleaner on a rag to clean the ABS sensor mounting area.
- Install the ABS sensor by hand into the knuckle.
- Use a 10mm socket to install the sensor bolt.
- Tighten the ABS sensor bolt to Torque to 7-10 Nm (62-89 in-lbs).
Step 16: Reinstall the Rotor and Brake Caliper
- Slide the brake rotor onto the hub by hand.
- Use a 17mm socket to install the caliper bracket bolts.
- Tighten the caliper bracket bolts to Torque to 78-86 Nm (58-63 ft-lbs).
- Install the caliper over the rotor.
- Use a 14mm socket to install the caliper slide pin bolts.
- Tighten the caliper slide pin bolts to Torque to 22-32 Nm (16-24 ft-lbs).
Step 17: Install the New Axle Nut and Wheel
- Thread the new axle nut on by hand to avoid cross-threading.
- Use a 32mm axle nut socket to snug the axle nut.
- Install the wheel by hand.
- Use a 21mm socket to snug the wheel nuts in a star pattern.
- Use the floor jack to raise the vehicle slightly, remove the jack stand, and lower the tire to the ground.
- Use a 1/2-inch drive torque wrench and 21mm socket to tighten the wheel nuts to Torque to 88-108 Nm (65-80 ft-lbs).
- Use a 1/2-inch drive torque wrench and 32mm axle nut socket to tighten the axle nut to Torque to 200-260 Nm (148-192 ft-lbs).
✅ After Repair
- ✅ Pump the brake pedal 3-5 times before moving your Tucson.
- ✅ Start the vehicle and confirm the ABS warning light turns off after a short drive.
- ✅ Test drive slowly at first. Listen for grinding, humming, clicking, or vibration.
- ✅ Have the front alignment checked because the strut-to-knuckle bolts were removed.
- ✅ Recheck the wheel nut torque after 25-50 miles.
💰 DIY vs Shop Cost
Shop Cost: $350-$650 per front bearing side, including parts and labor
DIY Cost: $60-$160 per side for parts only, plus tool rental or press service if needed
You Save: $200-$450 per side by doing it yourself!
Shop labor rates vary but typically run $100-$150/hour. This repair takes a shop approximately 2-3 hours.
🎯 Ready to get started?
HowToo makes it easy: same-day/2-day shipping on every part, plus all the tools and specialty tools you need! Check out the parts and tools sections below to add everything to your cart.
Guide for Wheel Bearing replace for these Hyundai vehicles
| Year Make Model | Sub Model | Engine | Body Style |
|---|---|---|---|
| 2016 Hyundai Tucson | - | - | - |
| 2015 Hyundai Tucson | - | - | - |
| 2014 Hyundai Tucson | - | - | - |
| 2013 Hyundai Tucson | - | - | - |
| 2012 Hyundai Tucson | - | - | - |
| 2011 Hyundai Tucson | - | - | - |
| 2010 Hyundai Tucson | - | - | - |
| 2009 Hyundai Tucson | - | - | - |
| 2008 Hyundai Tucson | - | - | - |
| 2007 Hyundai Tucson | - | - | - |
| 2006 Hyundai Tucson | - | - | - |
| 2005 Hyundai Tucson | - | - | - |