














How to Replace the Front Wheel Bearing Hub on a 2012 GMC Sierra 1500
Step-by-step instructions with tools, parts, torque specs, and safety tips for 2007, 2008, 2009, 2010, 2011, 2012, 2013
How to Replace the Front Wheel Bearing Hub on a 2012 GMC Sierra 1500
Step-by-step instructions with tools, parts, torque specs, and safety tips for 2007, 2008, 2009, 2010, 2011, 2012, 2013


🔧 Front Wheel Bearing Hub Assembly - Replacement
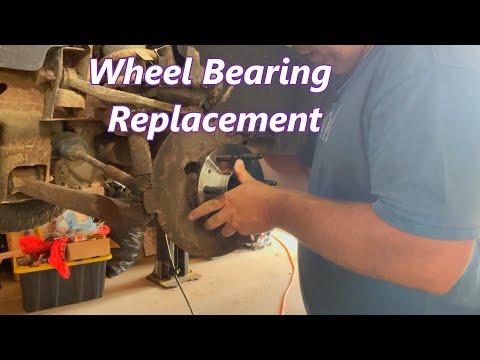
On your Sierra, the front wheel bearing is serviced as a complete hub assembly. That means you replace the bearing and hub together, which is simpler than pressing a bearing in and out.
Difficulty Level: Intermediate | Estimated Time: 2-3 hours
⚠️ Safety & Precautions
- Support the vehicle securely on jack stands before removing the wheel.
- Do not let the brake caliper hang by the hose.
- If equipped with ABS, handle the wheel speed sensor wire carefully.
- Use caution around rusted fasteners; penetrating oil helps.
- No battery disconnect is normally required for this repair.
🔧 Required Tools
You'll need the following tools for this repair:
- Floor jack (rated 3-ton minimum)
- Jack stands (rated for vehicle weight)
- Wheel chocks
- 19mm lug wrench or socket
- 15mm socket
- 18mm socket
- 21mm socket
- 36mm socket
- Ratchet
- Breaker bar
- Torque wrench
- Flat blade screwdriver
- Trim tool
- Hammer
- Penetrating oil
- Safety glasses
- Mechanic gloves
🔩 Required Parts
HowToo sells all the parts you need for this repair:
- Front wheel hub and bearing assembly - Qty: 1 per side
- New hub bolts - Qty: 3 per side
- Wheel speed sensor retaining clip - Qty: 1 if damaged
📋 Before You Begin
- Park on level ground.
- Set the parking brake.
- Chock the rear wheels.
- Loosen the lug nuts before lifting the truck.
- Spray rusty fasteners first.
🔨 Step-by-Step Instructions
Follow these steps in order:
Step 1: Loosen the wheel
- Use a 19mm lug wrench or socket to crack loose the lug nuts on the wheel you are servicing.
- Do not remove them yet.
Step 2: Raise and support the truck
- Use a floor jack (rated 3-ton minimum) to lift the front of the truck.
- Place jack stands (rated for vehicle weight) under the frame and lower the truck onto them.
- Remove the wheel with the 19mm lug wrench or socket.
Step 3: Remove the brake caliper and bracket
- Use a 15mm socket to remove the caliper guide pins.
- Remove the caliper and hang it with wire or a hook. Never let it hang by the hose.
- Use an 18mm socket to remove the caliper bracket bolts.
- Lift off the bracket and set it aside.
Step 4: Remove the rotor
- Pull the brake rotor straight off the hub.
- If it is stuck, tap it gently with a hammer and use a flat blade screwdriver if needed.
Step 5: Disconnect the ABS sensor wire
- Use a trim tool or flat blade screwdriver to release the wheel speed sensor wire clips.
- Unplug the sensor connector if needed so the harness can move freely.
Step 6: Remove the axle nut
- Use a 36mm socket and breaker bar to remove the axle nut.
- If the axle turns, have an assistant hold the brake or use the parking brake carefully.
Step 7: Remove the hub bolts
- From the back of the knuckle, use a 21mm socket to remove the three hub bolts.
- Penetrating oil helps a lot here.
Step 8: Remove the hub assembly
- Pull the hub assembly straight out of the knuckle.
- If it is stuck, tap around the flange with a hammer from the rear side.
- Clean the hub mounting surface on the knuckle.
Step 9: Install the new hub assembly
- Slide the new hub bearing assembly into place.
- Install the three hub bolts by hand first with a 21mm socket.
- Tighten the hub bolts to 140 Nm (103 ft-lbs).
Step 10: Reinstall the axle nut
- Install a new axle nut by hand.
- Use a 36mm socket and torque wrench to tighten it to 325 Nm (240 ft-lbs).
Step 11: Reinstall the brake parts
- Reinstall the rotor.
- Install the caliper bracket with an 18mm socket.
- Tighten the caliper bracket bolts to 230 Nm (170 ft-lbs).
- Reinstall the caliper with a 15mm socket.
- Tighten the caliper guide pins to 31 Nm (23 ft-lbs).
Step 12: Reconnect ABS wiring and finish up
- Reattach the wheel speed sensor wire clips.
- Install the wheel and hand-tighten the lug nuts with a 19mm lug wrench or socket.
- Lower the truck and torque the lug nuts to 190 Nm (140 ft-lbs) in a star pattern.
✅ After Repair
- Pump the brake pedal until it feels firm before moving the truck.
- Check for ABS warning lights.
- Road test at low speed and listen for noise.
- Recheck lug nut torque after the test drive.
💰 DIY vs Shop Cost
Shop Cost: $450-$850 (parts + labor)
DIY Cost: $120-$260 (parts only)
You Save: $280-$590 by doing it yourself!
Shop labor rates vary but typically run $100-$150/hour. This repair takes a shop approximately 2-3 hours.
🎯 Ready to get started?
HowToo makes it easy: same-day/2-day shipping on every part, plus all the tools and specialty tools you need! Check out the parts and tools sections below to add everything to your cart.