


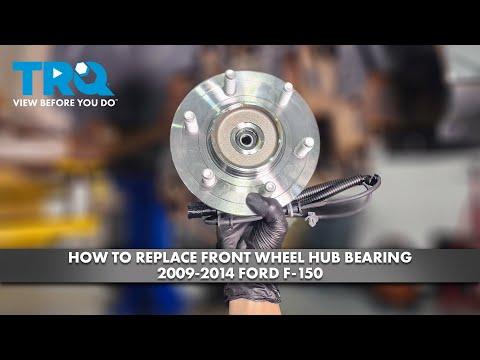


How to Replace the Front Wheel Bearing Hub on a 2012 Ford F-150
Step-by-step hub assembly replacement with tools, parts, torque specs, and safety tips for 2011, 2012, 2013, 2014
How to Replace the Front Wheel Bearing Hub on a 2012 Ford F-150
Step-by-step hub assembly replacement with tools, parts, torque specs, and safety tips for 2011, 2012, 2013, 2014
🔧 Front Wheel Bearing Hub - Replacement
On your F-150, the front wheel bearing is part of the hub assembly, so the usual repair is replacing the complete hub unit. If you are hearing a growl, humming, or feeling looseness in the front wheel, this is the repair that fixes it.
Difficulty Level: Intermediate | Estimated Time: 2-4 hours
⚠️ Safety & Precautions
- Support the truck securely on jack stands before removing a wheel.
- Do not work under a vehicle supported only by a jack.
- Use caution around the brake caliper and rotor; they are heavy.
- Do not let the caliper hang by the brake hose.
- Battery disconnect is not required for this repair.
- Keep the steering straight for easier hub removal.
🔧 Required Tools
You'll need the following tools for this repair:
- Floor jack (rated 3-ton minimum)
- Jack stands (rated for truck weight)
- Wheel chocks
- 19mm socket
- 21mm socket
- 7mm socket
- 13mm socket
- 18mm socket
- Ratchet
- Breaker bar
- Torque wrench
- Bungee cord or mechanic's wire
- Flat screwdriver
- Rubber mallet
- Penetrating oil
- Wire brush
- Safety glasses
- Gloves
🔩 Required Parts
HowToo sells all the parts you need for this repair:
- Front wheel bearing hub assembly - Qty: 1 per side replaced
- Brake cleaner - Qty: 1
- Anti-seize compound - Qty: 1
📋 Before You Begin
- Park on level ground.
- Set the parking brake.
- Chock the rear wheels.
- Loosen the lug nuts before lifting the truck.
- If both front bearings are noisy, replace them in pairs.
🔨 Step-by-Step Instructions
Follow these steps in order:
Step 1: Loosen the wheel
- Use a 21mm socket and breaker bar to loosen the lug nuts 1/2 turn before lifting the truck.
Step 2: Raise and support the truck
- Use a floor jack (rated 3-ton minimum) to lift the front corner.
- Set the truck on jack stands (rated for truck weight).
- Remove the wheel with the 21mm socket.
Step 3: Remove the brake caliper and bracket
- Use a 7mm socket to remove the caliper slide pin bolts.
- Lift the caliper off the rotor.
- Hang the caliper with bungee cord or mechanic's wire.
- Use an 18mm socket to remove the caliper bracket bolts.
- Remove the bracket from the knuckle.
Step 4: Remove the brake rotor
- Pull the rotor straight off the hub.
- If stuck, tap it gently with a rubber mallet.
- Spray penetrating oil first if rusted.
Step 5: Remove the ABS sensor wire from the hub area
- Use a flat screwdriver to release the sensor wire clips from the steering knuckle.
- Do not pull on the wire itself.
Step 6: Remove the hub bolts
- From the back side of the knuckle, use an 18mm socket to remove the 3 hub mounting bolts.
- Spray penetrating oil on the bolts first if needed.
- Break the bolts loose before removing them fully.
Step 7: Remove the hub assembly
- Pull the hub straight out of the knuckle.
- If stuck, tap around the hub flange with a rubber mallet.
- Clean the mounting surface with a wire brush.
Step 8: Install the new hub assembly
- Position the new hub in the knuckle.
- Install the 3 hub bolts by hand first.
- Use an 18mm socket to tighten them evenly.
- Torque to 133 Nm (98 ft-lbs).
Step 9: Reinstall the rotor and brakes
- Slide the rotor back onto the hub.
- Reinstall the caliper bracket with an 18mm socket.
- Torque to 184 Nm (136 ft-lbs).
- Reinstall the caliper with a 7mm socket.
- Torque to 35 Nm (26 ft-lbs).
Step 10: Reinstall the wheel
- Put the wheel back on.
- Thread the lug nuts by hand first.
- Lower the truck and use a 21mm socket and torque wrench.
- Torque to 150 Nm (111 ft-lbs).
Step 11: Repeat on the other side if needed
- If both front bearings are noisy, repeat the same steps on the opposite side.
✅ After Repair
- Pump the brake pedal until it feels firm before driving.
- Check for ABS warning lights.
- Test drive slowly and listen for noise.
- Recheck lug nut torque after the test drive.
💰 DIY vs Shop Cost
Shop Cost: $450-$900 per side (parts + labor)
DIY Cost: $90-$220 per side (parts only)
You Save: $360-$680 by doing it yourself!
Shop labor rates vary but typically run $100-$150/hour. This repair takes a shop approximately 2-3 hours.
🎯 Ready to get started?
HowToo makes it easy: same-day/2-day shipping on every part, plus all the tools and specialty tools you need! Check out the parts and tools sections below to add everything to your cart.
