








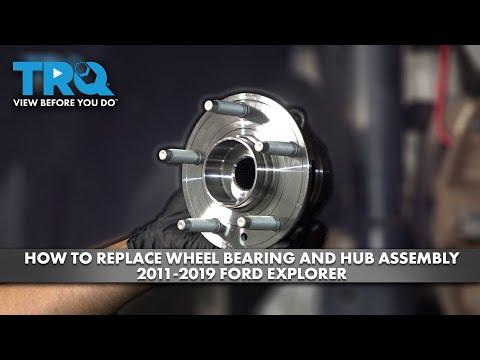







How to Replace the Front Wheel Bearing Hub on a 2011-2019 Ford Explorer
Step-by-step instructions with tools, parts, torque specs, and safety tips
How to Replace the Front Wheel Bearing Hub on a 2011-2019 Ford Explorer
Step-by-step instructions with tools, parts, torque specs, and safety tips for 2011, 2012, 2013, 2014, 2015, 2016, 2017, 2018, 2019


🔧 Wheel Bearing - Front Hub Assembly Replacement
Assumption: This guide covers the front wheel bearing/hub assembly on your Explorer. The rear is similar, but the parking brake makes it a little different.
The front wheel bearing on this Explorer is serviced as a complete hub assembly. That means you remove the knuckle-side hub, install the new assembly, and torque everything correctly so the wheel runs smooth and quiet.
Difficulty Level: Intermediate | Estimated Time: 2-3 hours
⚠️ Safety & Precautions
- Work on a flat surface and chock the rear wheels.
- Lift the Explorer with a proper jack and support it with jack stands before removing the wheel.
- Do not hang the brake caliper by the hose.
- If equipped with an electronic parking brake on the rear, it must be retracted with a scan tool before rear service.
- Use care around ABS wiring. Do not pull on the wheel speed sensor harness.
🔧 Required Tools
You'll need the following tools for this repair:
- Floor jack (rated 3-ton minimum)
- Jack stands (rated 3-ton minimum)
- Wheel chocks
- Breaker bar
- Torque wrench
- 19mm socket
- 13mm socket
- 15mm socket
- 18mm socket
- 21mm socket
- Torx T30 screwdriver
- Ratchet
- Long-handled pry bar
- Dead-blow hammer
- Penetrating oil
- Brake hanger hook
- Safety glasses
- Mechanic gloves
🔩 Required Parts
HowToo sells all the parts you need for this repair:
- Front wheel hub bearing assembly - Qty: 1
- Front axle nut - Qty: 1
- Brake caliper bracket bolts - Qty: 2
- Hub mounting bolts - Qty: 3
📋 Before You Begin
- Park on level ground and set the parking brake.
- Loosen the lug nuts before lifting the vehicle.
- Turn the steering wheel so you have better access to the side you are servicing.
- Penetrating oil helps on rusty bolts.
🔨 Step-by-Step Instructions
Follow these steps in order:
Step 1: Remove the wheel
- Use a 19mm socket and breaker bar to loosen the lug nuts, then raise the Explorer and support it with jack stands.
- Remove the wheel and set it aside.
Step 2: Remove the brake caliper and rotor
- Use a 15mm socket to remove the caliper slide bolts.
- Hang the caliper with a brake hanger hook. Do not let it pull on the hose.
- Use a 13mm socket to remove the caliper bracket bolts, then remove the bracket.
- Pull the rotor off. If it is stuck, tap it lightly with a dead-blow hammer.
Step 3: Remove the axle nut and separate the hub
- Use a 21mm socket to remove the axle nut.
- Torque note for reassembly: Tighten the new axle nut to 407 Nm (300 ft-lbs).
- Use a long-handled pry bar to gently push the CV axle inward if needed.
- Use a Torx T30 screwdriver to remove the wheel speed sensor if it blocks access.
Step 4: Remove the hub assembly
- Use an 18mm socket to remove the three hub mounting bolts from the back of the knuckle.
- If the hub is rusted in place, tap around the flange with a dead-blow hammer and work it free.
- Remove the hub bearing assembly from the knuckle.
Step 5: Install the new hub assembly
- Clean the knuckle mating surface before installation.
- Position the new hub assembly and start the three mounting bolts by hand.
- Use an 18mm socket to tighten the hub bolts to 115 Nm (85 ft-lbs).
- Reinstall the wheel speed sensor and route the harness exactly as removed.
Step 6: Reinstall the brake parts
- Reinstall the rotor, caliper bracket, and caliper.
- Use a 13mm socket for the caliper bracket bolts and tighten to 175 Nm (129 ft-lbs).
- Use a 15mm socket for the caliper slide bolts and tighten to 35 Nm (26 ft-lbs).
Step 7: Reinstall the axle nut and wheel
- Install the new axle nut with a 21mm socket and torque to 407 Nm (300 ft-lbs).
- Reinstall the wheel and tighten the lug nuts by hand.
- Lower the Explorer and use a torque wrench with a 19mm socket to tighten the lug nuts to 135 Nm (100 ft-lbs).
✅ After Repair
- Start the vehicle and check for ABS or traction control warning lights.
- Test drive at low speed first. Listen for growling, clicking, or rubbing.
- Recheck lug nut torque after 25-50 miles.
- If the ABS light stays on, scan for wheel speed sensor faults.
💰 DIY vs Shop Cost
Shop Cost: $450-$850 (parts + labor)
DIY Cost: $120-$260 (parts only)
You Save: $330-$590 by doing it yourself!
Shop labor rates vary but typically run $100-$150/hour. This repair takes a shop approximately 2-3 hours.
🎯 Ready to get started?
HowToo makes it easy: same-day/2-day shipping on every part, plus all the tools and specialty tools you need! Check out the parts and tools sections below to add everything to your cart.
Guide for Wheel Bearing and Hub Assembly replace for these Ford vehicles
| Year Make Model | Sub Model | Engine | Body Style |
|---|---|---|---|
| 2019 Ford Explorer | - | - | - |
| 2018 Ford Explorer | - | - | - |
| 2017 Ford Explorer | - | - | - |
| 2016 Ford Explorer | - | - | - |
| 2015 Ford Explorer | - | - | - |
| 2014 Ford Explorer | - | - | - |
| 2013 Ford Explorer | - | - | - |
| 2012 Ford Explorer | - | - | - |
| 2011 Ford Explorer | - | - | - |