









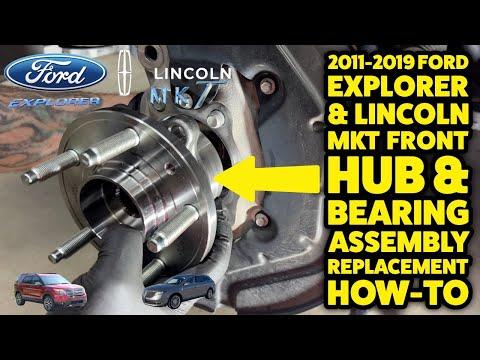







How to Replace the Front Wheel Bearing Hub Assembly on a 2011-2019 Ford Explorer
Step-by-step instructions with tools, parts, safety tips, and torque specs
How to Replace the Front Wheel Bearing Hub Assembly on a 2011-2019 Ford Explorer
Step-by-step instructions with tools, parts, safety tips, and torque specs for 2011, 2012, 2013, 2014, 2015, 2016, 2017, 2018, 2019


🔧 Wheel Bearing / Hub Assembly - Replacement
Assumption: This procedure covers the front hub bearing assembly on your Explorer. On this vehicle, the bearing is serviced as a complete hub assembly, not as a press-in bearing.
Replacing a worn hub bearing restores quiet operation and helps prevent wheel play, ABS faults, and uneven tire wear. If you hear a growl that changes with speed or feel looseness at the wheel, the hub assembly is the usual fix.
Difficulty Level: Intermediate | Estimated Time: 2-4 hours per side
⚠️ Safety & Precautions
- Park on level ground and set the parking brake.
- Chock the wheels that stay on the ground.
- Use jack stands; never rely on a jack alone.
- If working near the front, the ABS wheel speed sensor is part of the hub area. Handle the wiring carefully.
- If your vehicle has electronic parking brake functions involved in other repairs, they are not needed for this hub job.
- Battery disconnect is not required for this repair.
🔧 Required Tools
You'll need the following tools for this repair:
- Floor jack (rated 3-ton minimum)
- Jack stands
- Wheel chocks
- Safety glasses
- Mechanic gloves
- Breaker bar
- Torque wrench
- Ratchet
- 10mm socket
- 13mm socket
- 15mm socket
- 18mm socket
- 21mm socket
- Torx T30 screwdriver
- Bungee cord or wire hanger
- Rubber mallet
- Flat screwdriver
- Trim clip tool
- Hub puller or slide hammer (specialty)
- Penetrating oil
- Wire brush
🔩 Required Parts
HowToo sells all the parts you need for this repair:
- Front wheel bearing hub assembly - Qty: 1 per side
- New axle nut - Qty: 1 per side
- New hub mounting bolts - Qty: 3 per side
- Brake caliper bracket bolts - Qty: 2 if required by your service procedure
- Dust shield or ABS sensor seal hardware - Qty: 1 if damaged
📋 Before You Begin
- Loosen the wheel lug nuts before raising the vehicle.
- If the axle nut is staked, straighten the staked area before removal.
- Have the new hub ready before disassembly so the vehicle is not left apart.
- Penetrating oil helps on rusty suspension parts.
🔨 Step-by-Step Instructions
Follow these steps in order:
Step 1: Raise and secure the vehicle
- Use the floor jack to raise the front of your Explorer.
- Support it with jack stands under the proper front lift points.
- Remove the wheel with a 21mm socket.
Step 2: Remove the brake caliper and rotor
- Use a 15mm socket or 13mm socket to remove the caliper bolts, depending on caliper hardware.
- Hang the caliper with a bungee cord or wire hanger. Do not let it hang by the hose.
- Use a Torx T30 screwdriver to remove the rotor retaining screw if equipped.
- Remove the rotor. Tap gently with a rubber mallet if stuck.
Step 3: Remove the axle nut
- Use a breaker bar and the correct axle nut socket to remove the axle nut.
- If the nut is staked, make sure the stake is fully unstaked first.
- Keep the axle centered in the hub.
Step 4: Disconnect the hub area attachments
- Use a 10mm socket to remove the ABS wheel speed sensor fastener if needed.
- Unclip the sensor harness from the knuckle with a trim clip tool.
- Move the sensor wiring aside so it cannot be damaged.
Step 5: Free the steering knuckle
- Use a 21mm socket or 18mm socket to separate the lower suspension or tie rod fasteners as needed for access.
- If you need extra room, disconnect the tie rod end from the knuckle using the proper socket and a separator tool.
- Do not strike the axle threads directly.
Step 6: Remove the hub assembly
- Use a 13mm socket or the correct socket set to remove the hub mounting bolts from the back of the knuckle.
- Spray penetrating oil around the hub flange if rusted.
- Use a hub puller or slide hammer to pull the hub assembly out if it is seized.
- Clean the mounting surface with a wire brush.
Step 7: Install the new hub assembly
- Position the new front wheel bearing hub assembly into the knuckle.
- Install the new hub bolts by hand first to avoid cross-threading.
- Tighten the bolts with a ratchet, then finish with a torque wrench.
- Torque to factory specification.
Step 8: Reassemble the brake and axle hardware
- Reinstall the rotor and caliper using the 13mm socket or 15mm socket.
- Install the new axle nut by hand.
- Torque to factory specification.
- If the axle nut is a staked type, stake it after torquing.
Step 9: Reinstall the wheel
- Put the wheel back on and snug the lug nuts with a 21mm socket.
- Lower the vehicle and final-torque the lug nuts with a torque wrench.
- Torque to factory specification.
✅ After Repair
- Spin the wheel by hand and listen for rubbing or grinding.
- Check for ABS warning lights after start-up.
- Test drive at low speed first, then increase speed gradually.
- Listen for bearing noise changes during turning and braking.
- If the steering wheel pulls or the brake pedal feels odd, recheck the assembly.
💰 DIY vs Shop Cost
Shop Cost: $450-$900 per side (parts + labor)
DIY Cost: $120-$280 per side (parts only)
You Save: $330-$620 by doing it yourself!
Shop labor rates vary but typically run $100-$150/hour. This repair takes a shop approximately 2-4 hours.
🎯 Ready to get started?
HowToo makes it easy: same-day/2-day shipping on every part, plus all the tools and specialty tools you need! Check out the parts and tools sections below to add everything to your cart.
Guide for Wheel Bearing and Hub Assembly replace for these Ford vehicles
| Year Make Model | Sub Model | Engine | Body Style |
|---|---|---|---|
| 2019 Ford Explorer | - | - | - |
| 2018 Ford Explorer | - | - | - |
| 2017 Ford Explorer | - | - | - |
| 2016 Ford Explorer | - | - | - |
| 2015 Ford Explorer | - | - | - |
| 2014 Ford Explorer | - | - | - |
| 2013 Ford Explorer | - | - | - |
| 2012 Ford Explorer | - | - | - |
| 2011 Ford Explorer | - | - | - |
