















How to Replace the Front Struts on a 2010-2017 Chevrolet Equinox
Step-by-step instructions with tools, parts, torque specs, and alignment tips
How to Replace the Front Struts on a 2010-2017 Chevrolet Equinox
Step-by-step instructions with tools, parts, torque specs, and alignment tips for 2010, 2011, 2012, 2013, 2014, 2015, 2016, 2017


🔧 Struts - Front Strut Replacement
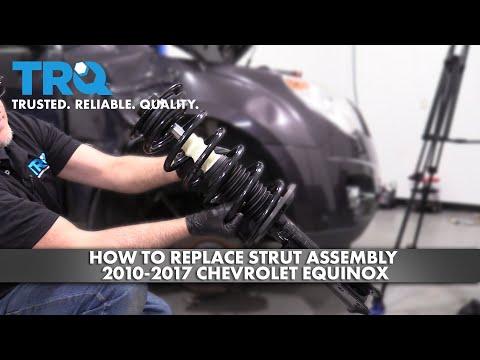
Assuming you mean the front struts on your Equinox. This job involves removing the wheel, disconnecting the strut from the knuckle and suspension links, then swapping the strut assembly and torquing everything back to spec. Because this affects steering and alignment, an alignment is required after the repair.
Difficulty Level: Intermediate | Estimated Time: 2-4 hours
⚠️ Safety & Precautions
- Support the vehicle securely with jack stands; never work under a vehicle held up only by a jack.
- The suspension is under spring pressure. If you are transferring the coil spring to a new strut, use a spring compressor (specialty) and keep your hands clear.
- Do not hang the brake hose or wheel speed sensor wire by the knuckle.
- After reassembly, an alignment is required before normal driving.
- Disconnect the battery only if you need to move wiring near the battery tray or ABS connectors.
🔧 Required Tools
You'll need the following tools for this repair:
- Floor jack (rated 3-ton minimum)
- Jack stands (rated 3-ton minimum)
- Wheel chocks
- Safety glasses
- Mechanic gloves
- Breaker bar
- Torque wrench
- 13mm socket
- 15mm socket
- 18mm socket
- 21mm socket
- 21mm wrench
- Ratchet
- Socket extension
- Trim clip tool
- Penetrating oil
- Spring compressor (specialty)
- Paint marker
- Dead-blow hammer
🔩 Required Parts
HowToo sells all the parts you need for this repair:
- Front strut assembly - Qty: 2
- Front strut upper mount hardware kit - Qty: 2
- Front stabilizer link nuts - Qty: 2
- Front strut-to-knuckle bolts and nuts - Qty: 4
- Wheel alignment - Qty: 1
📋 Before You Begin
- Park on level ground, set the parking brake, and chock the rear wheels.
- Loosen the front lug nuts before raising the vehicle.
- If you are replacing both sides, do one side at a time so the other side can help you see how parts route.
- If you are reusing the spring and mount, mark the orientation of the top mount before disassembly.
- Take photos before unbolting anything.
🔨 Step-by-Step Instructions
Follow these steps in order:
Step 1: Raise and secure the vehicle
- Use a floor jack to lift the front of the Equinox at the proper lift point.
- Place jack stands under the frame and lower the vehicle onto them.
- Remove the front wheel with a 21mm socket.
Step 2: Disconnect the stabilizer link
- Use a 21mm wrench and 21mm socket to remove the front sway bar link nut from the strut.
- If the stud spins, hold it with the wrench while turning the nut with the socket.
- Move the link out of the way. Do not force the boot.
Step 3: Free the brake hose and wiring
- Use a trim clip tool to release any brackets attached to the strut body.
- Set the brake hose and wheel speed sensor wire aside without stretching them.
Step 4: Separate the strut from the knuckle
- Use a paint marker to mark the camber position of the strut-to-knuckle bolts.
- Remove the lower strut bolts with an 18mm socket and breaker bar.
- Support the knuckle so it does not drop and stress the axle or brake hose.
- On reassembly, Torque to 190 Nm (140 ft-lbs).
Step 5: Remove the upper strut nuts
- Open the hood and locate the upper strut mount.
- Use a 13mm socket to remove the three upper mount nuts.
- Hold the strut assembly from below as you remove the last nut.
- On reassembly, Torque to 25 Nm (18 ft-lbs).
Step 6: Remove the strut assembly
- Lower the strut assembly out of the wheel well.
- If clearance is tight, use a dead-blow hammer gently at the knuckle joint to help separate the parts.
Step 7: Transfer the spring and mount if needed
- If your replacement is not a complete strut assembly, use a spring compressor (specialty) to compress the spring evenly.
- Remove the center nut with a socket set matched to the shaft size.
- Transfer the spring, upper mount, and isolators to the new strut in the same order.
- Make sure the spring ends sit in the correct pockets. Misaligned springs make noise.
Step 8: Install the new strut
- Position the strut in the tower and hand-start the upper nuts using a 13mm socket.
- Align the lower strut ears with the knuckle and install the bolts with an 18mm socket.
- Reconnect the brake hose bracket and any wiring clips.
- Torque the sway bar link nut with a 21mm socket to 75 Nm (55 ft-lbs).
Step 9: Tighten all fasteners
- Use a torque wrench to fully tighten the upper mount nuts.
- Torque the lower strut-to-knuckle bolts to 190 Nm (140 ft-lbs).
- Recheck all brackets and clips for proper seating.
Step 10: Reinstall the wheel
- Install the wheel and hand-tighten the lug nuts with a 21mm socket.
- Lower the vehicle and torque the lug nuts to 140 Nm (103 ft-lbs) in a star pattern.
✅ After Repair
- Start the vehicle and turn the steering wheel lock-to-lock to check for noise.
- Inspect the strut area for loose brackets or rubbing hoses.
- Drive slowly at first and listen for clunks or pops.
- Schedule a front-end alignment as soon as possible.
- Have both front struts replaced in pairs for even ride quality.
💰 DIY vs Shop Cost
Shop Cost: $900-$1,500 (parts + labor)
DIY Cost: $220-$520 (parts only)
You Save: $680-$980 by doing it yourself!
Shop labor rates vary but typically run $100-$150/hour. This repair takes a shop approximately 2-4 hours.
🎯 Ready to get started?
HowToo makes it easy: same-day/2-day shipping on every part, plus all the tools and specialty tools you need! Check out the parts and tools sections below to add everything to your cart.
Guide for Suspension Strut and Coil Spring Assembly replace for these Chevrolet vehicles
| Year Make Model | Sub Model | Engine | Body Style |
|---|---|---|---|
| 2017 Chevrolet Equinox | - | - | - |
| 2016 Chevrolet Equinox | - | - | - |
| 2015 Chevrolet Equinox | - | - | - |
| 2014 Chevrolet Equinox | - | - | - |
| 2013 Chevrolet Equinox | - | - | - |
| 2012 Chevrolet Equinox | - | - | - |
| 2011 Chevrolet Equinox | - | - | - |
| 2010 Chevrolet Equinox | - | - | - |