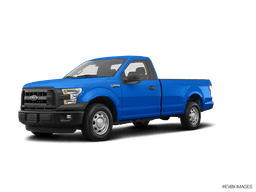














How to Replace the Front Door Lock Actuator on a 2016 Ford F-150
Step-by-step instructions with tools, parts, torque specs, and safety tips for 2014, 2015, 2016, 2017, 2018, 2019
How to Replace the Front Door Lock Actuator on a 2016 Ford F-150
Step-by-step instructions with tools, parts, torque specs, and safety tips for 2014, 2015, 2016, 2017, 2018, 2019


🔧 Front Door Lock Actuator - Replacement
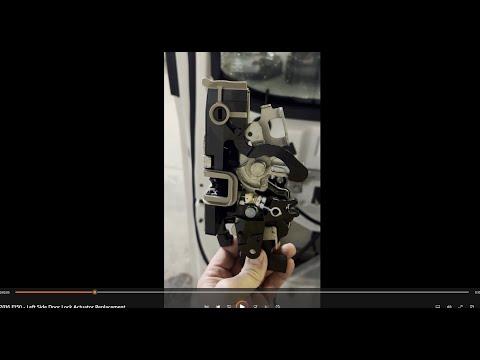
The front door lock actuator on your F-150 is typically serviced as part of the latch/lock assembly inside the door. This job requires removing the interior door panel, disconnecting the latch hardware, and swapping the actuator assembly with care around clips, connectors, and the window glass.
Difficulty Level: Intermediate | Estimated Time: 1.5-3 hours
⚠️ Safety & Precautions
- Disconnect the negative battery cable before unplugging door wiring.
- The side airbag is inside the door area; do not probe yellow connectors.
- Support the door glass carefully so it does not drop while the panel is removed.
- Keep track of vapor barrier adhesive so the door stays sealed after reassembly.
- If your truck has power windows or locks, avoid turning the ignition on with connectors unplugged.
🔧 Required Tools
You'll need the following tools for this repair:
- 10mm socket
- 7mm socket
- 8mm socket
- Ratchet
- Extension set
- Torx T20 screwdriver
- Torx T30 screwdriver
- Trim panel tool - a plastic pry tool used to remove clips without damaging the panel
- Small flat screwdriver
- Pick tool
- Needle-nose pliers
- Torque wrench
- Painter's tape
- Shop towels
- Safety glasses
- Mechanic gloves
🔩 Required Parts
HowToo sells all the parts you need for this repair:
- Front door lock actuator/latch assembly - Qty: 1
- Door panel clip set - Qty: 1 set
- Door vapor barrier adhesive - Qty: 1
📋 Before You Begin
- Park on level ground and set the parking brake.
- Lower the window glass before disconnecting the battery if possible.
- Open the door fully so you have room to work.
- Disconnect the negative battery cable and wait 10 minutes before unplugging door harness connectors.
- Keep the screws sorted by location.
🔨 Step-by-Step Instructions
Follow these steps in order:
Step 1: Remove the door trim panel
- Use a trim panel tool to pop off the trim covers around the armrest, door handle, and switch area.
- Use a 7mm socket and Torx T20 screwdriver to remove the visible panel screws.
- Lift the panel upward to release the top edge from the window ledge.
- Disconnect the electrical connectors for the switch pack and any courtesy lights.
- Pull straight out to avoid broken clips.
Step 2: Peel back the vapor barrier
- Use a small flat screwdriver and your hands to carefully separate the vapor barrier from the door shell.
- Do not tear it; you will need it to seal the door later.
- Set it aside on a clean surface.
Step 3: Disconnect the latch and lock hardware
- Use a pick tool and needle-nose pliers to release the lock cable and door handle linkage.
- Use a 10mm socket with extension to remove the latch mounting bolts.
- Support the latch while removing the last bolt so it does not drop inside the door.
- Torque on reassembly: 9 Nm (80 in-lbs)
Step 4: Remove the door lock actuator assembly
- Slide the latch/actuator assembly out through the service opening in the door.
- If it hangs up, adjust the window glass position slightly by hand and use painter's tape to hold the glass up.
- Disconnect the actuator electrical connector before fully removing the assembly.
Step 5: Install the new actuator assembly
- Position the new front door lock actuator/latch assembly into the door.
- Reconnect the electrical connector first.
- Reconnect the lock cable and door handle linkage using needle-nose pliers.
- Install the latch bolts with a 10mm socket.
- Torque to 9 Nm (80 in-lbs)
Step 6: Test the mechanism before closing the door
- Reconnect the negative battery cable.
- Use the key fob, interior switch, and door handle to test lock and unlock operation.
- Confirm the inside and outside handles open the door correctly.
- If the lock cycles but the handle does not work, recheck the cable routing.
Step 7: Reinstall the vapor barrier and door panel
- Press the vapor barrier back into place using the original adhesive or new door vapor barrier adhesive.
- Reconnect all door panel electrical connectors.
- Hang the top edge of the panel on the window ledge, then press the clips in with a trim panel tool.
- Reinstall the screws with a 7mm socket and Torx T20 screwdriver.
- Torque to snug only; do not overtighten plastic trim screws.
✅ After Repair
- Test the front door lock several times with the key fob and switch.
- Check the door opens and closes smoothly from inside and outside.
- Make sure the window switch, speaker, and mirror controls still work.
- Listen for air leaks or rattles around the door panel on a short road test.
💰 DIY vs Shop Cost
Shop Cost: $350-$700 (parts + labor)
DIY Cost: $90-$220 (parts only)
You Save: $260-$480 by doing it yourself!
Shop labor rates vary but typically run $100-$150/hour. This repair takes a shop approximately 1.5-3 hours.
🎯 Ready to get started?
HowToo makes it easy: same-day/2-day shipping on every part, plus all the tools and specialty tools you need! Check out the parts and tools sections below to add everything to your cart.