










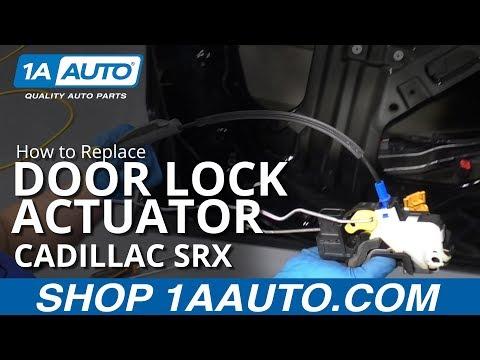





How to Replace the Front Door Lock Actuator (Latch Assembly) on a 2019-2023 Cadillac XT4
Step-by-step door panel removal, tools/parts list, safety tips, and latch bolt torque spec (9 Nm / 80 in-lb)
How to Replace the Front Door Lock Actuator (Latch Assembly) on a 2019-2023 Cadillac XT4
Step-by-step door panel removal, tools/parts list, safety tips, and latch bolt torque spec (9 Nm / 80 in-lb) for 2019, 2020, 2021, 2022, 2023


🔧 XT4 - Front Door Lock Actuator Replacement
On your XT4, the “door lock actuator” is typically built into the front door latch/lock assembly. Replacing it means removing the interior door panel, peeling back the water shield, disconnecting the latch cables/connector, and swapping the latch/actuator assembly inside the door.
Difficulty Level: Intermediate | Estimated Time: 1.5-3.0 hours (one door)
⚠️ Safety & Precautions
- 🔸 Keep the ignition OFF and the key fob at least 10 ft away from the XT4 while working (prevents wake-ups).
- 🔸 The door contains SIR wiring (airbag system). Don’t probe yellow connectors, and don’t turn the ignition on with connectors unplugged.
- 🔸 Support the door panel as you unplug switches so you don’t pull on the wiring.
- 🔸 Recommended: disconnect the 12V battery negative cable to avoid airbag/door module faults.
- 🔸 Wear gloves—door inner metal edges are sharp.
🔧 Required Tools
You'll need the following tools for this repair:
- Safety glasses
- Mechanic gloves
- Plastic trim removal tool set
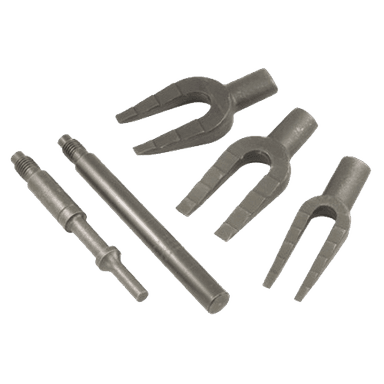
- Door trim clip remover (fork style)
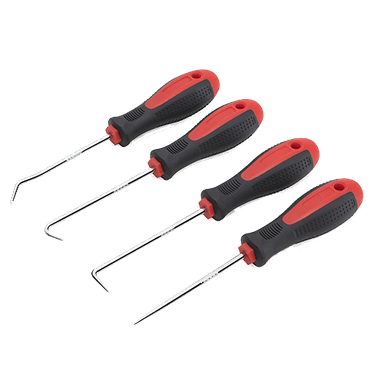
- Pick tool (90-degree)
- Torx T20 driver
- Torx T30 driver
- 7mm socket
- 10mm socket
- 1/4" ratchet
- 3" extension (1/4" drive)
- Torque wrench (inch-pound)
- Flashlight
- Painter’s tape (1")
🔩 Required Parts
HowToo sells all the parts you need for this repair:
- Front door lock actuator/latch assembly - Qty: 1
- Door trim panel clips - Qty: 6-12 (as needed)
- Butyl tape (water shield adhesive) - Qty: 1
📋 Before You Begin
- 🔸 Park on level ground, shift to Park, and set the parking brake.
- 🔸 Open the window fully (or at least halfway) so you can access the latch area easier.
- 🔸 Use the 10mm socket to disconnect the battery negative terminal and wait 2 minutes before unplugging door electronics.
- 🔸 Put painter’s tape along the door edge and near the handle area to prevent scratches.
🔨 Step-by-Step Instructions
Follow these steps in order:
Step 1: Remove the interior door trim panel
- Use a plastic trim removal tool set to carefully pry off the trim covers hiding the screws (work slowly to avoid snapping tabs).
- Remove the door panel screws using a 7mm socket and/or Torx T20 driver (locations are typically behind the handle trim and in the pull cup).
- Use a door trim clip remover (fork style) to pop the panel clips around the outer edge. This tool slides under the panel to release clips.
- Lift the panel straight up to unhook it from the window beltline, then support it close to the door.
Step 2: Disconnect switches and the inside handle cable
- Unplug the door switch connectors using a pick tool (90-degree) to lift the lock tabs if needed (don’t force them).
- Disconnect the inside door handle cable: use the plastic trim removal tool set to open the cable retainer, then lift the cable end out of the handle.
- Set the door panel aside somewhere safe.
Step 3: Peel back the water shield (vapor barrier)
- Use the plastic trim removal tool set to gently peel the water shield back far enough to access the latch area.
- If the butyl adhesive stretches, use fresh butyl tape during reassembly to reseal it.
Step 4: Disconnect the latch electrical connector
- Locate the latch/actuator connector near the rear edge of the door.
- Press the release and unplug it; use a pick tool (90-degree) only to assist the tab if it’s stubborn.
Step 5: Remove the latch/actuator assembly from the door
- At the door’s rear edge, remove the latch fasteners using a Torx T30 driver.
- Inside the door, disconnect any latch cables/rods you can reach (use the flashlight and pick tool (90-degree) to open the plastic retainers, then lift the cable ends out).
- Maneuver the latch/actuator assembly out through the access opening (rotate it as needed; don’t pry on the window glass).
Step 6: Install the new latch/actuator assembly
- Position the new latch/actuator into the door through the access opening (match the orientation of the old one).
- Reconnect all latch cables/rods and fully seat each plastic retainer (use the flashlight to confirm they’re locked).
- Install the latch fasteners at the door edge using the Torx T30 driver, then use an inch-pound torque wrench to finish tightening: Torque to 9 Nm (80 in-lb).
- Reconnect the electrical connector until it clicks (no tools needed).
Step 7: Reseal the water shield and reinstall the door panel
- Press the water shield back into place; add butyl tape anywhere it won’t stick or has gaps.
- Reconnect the inside handle cable (seat the cable end first, then lock the retainer) using your hands and the plastic trim removal tool set if needed.
- Reconnect the switch connectors by hand (listen/feel for a click).
- Hang the door panel on the top edge first, then press the clips in around the perimeter with your palm.
- Reinstall screws using the 7mm socket and/or Torx T20 driver (snug only; do not overtighten).
Step 8: Reconnect the battery
- Reconnect the battery negative terminal using a 10mm socket (snug and secure).
✅ After Repair
- 🔸 Test the door lock using the key fob, driver switch, and the inside lock/unlock.
- 🔸 Confirm the door opens from inside and outside and that the handle returns normally.
- 🔸 Verify the window switch and mirror controls work.
- 🔸 If an airbag/SIR light turns on, you’ll typically need a capable scan tool to clear the code after confirming all connectors are fully seated.
- 🔸 Check that the water shield is fully sealed (helps prevent future water leaks and speaker issues).
💰 DIY vs Shop Cost
Shop Cost: ₹12,000-₹25,000 (parts + labor)
DIY Cost: ₹4,000-₹15,000 (parts only)
You Save: ₹8,000-₹10,000+ by doing it yourself!
Shop labor rates vary but typically run ₹1,000-₹2,500/hour. This repair takes a shop approximately 1.5-3.0 hours.
🎯 Ready to get started?
HowToo makes it easy: same-day/2-day shipping on every part, plus all the tools and specialty tools you need! Check out the parts and tools sections below to add everything to your cart.
Guide for Door Lock Actuator replace for these Cadillac vehicles
| Year Make Model | Sub Model | Engine | Body Style |
|---|---|---|---|
| 2023 Cadillac XT4 | - | - | - |
| 2022 Cadillac XT4 | - | - | - |
| 2021 Cadillac XT4 | - | - | - |
| 2020 Cadillac XT4 | - | - | - |
| 2019 Cadillac XT4 | - | - | - |
