


How to Replace the Front Ball Joints on a 2016 Toyota Sequoia
Step-by-step instructions with tools, parts, torque specs, and alignment tips for 2008, 2009, 2010, 2011, 2012, 2013, 2014, 2015, 2016, 2017, 2018
How to Replace the Front Ball Joints on a 2016 Toyota Sequoia
Step-by-step instructions with tools, parts, torque specs, and alignment tips for 2008, 2009, 2010, 2011, 2012, 2013, 2014, 2015, 2016, 2017, 2018
🔧 Ball Joints - Replacement
Assumption: This guide covers the front ball joints on your Sequoia, and the exact hardware may vary if you’re replacing the upper joint, lower joint, or the control arm assembly.
The ball joints connect the steering knuckle to the suspension arms and control wheel movement. If you have looseness, clunking, or tire wear, replacing worn joints and getting a front-end alignment is the right fix.
Difficulty Level: Advanced | Estimated Time: 4-7 hours
⚠️ Safety & Precautions
- Support the Sequoia on jack stands before removing any suspension parts.
- Do not work under a vehicle held up only by a floor jack.
- The front suspension is heavy; use care when separating the knuckle from the control arm.
- If you disconnect the steering knuckle, a front-end alignment is required after repair.
- Do not let the brake caliper hang by the hose.
- If you open the suspension enough to remove the axle from the hub, protect the CV boot from damage.
🔧 Required Tools
You'll need the following tools for this repair:
- Floor jack (rated 3-ton minimum)
- Jack stands (rated for vehicle weight)
- Wheel chocks
- Lug wrench
- Metric socket set
- 14mm socket
- 17mm socket
- 19mm socket
- 21mm socket
- 24mm socket
- Breaker bar
- Torque wrench
- Ratchet
- Prick punch or paint marker
- Ball joint separator (specialty)
- Ball joint press kit (specialty)
- Needle-nose pliers
- Hammer
- Wire brush
- Safety glasses
- Mechanic gloves
🔩 Required Parts
HowToo sells all the parts you need for this repair:
- Front upper ball joint - Qty: 2
- Front lower ball joint - Qty: 2
- Front control arm hardware kit - Qty: 1
- Cotter pins - Qty: 2
- Front wheel alignment service - Qty: 1
📋 Before You Begin
- Park on level ground and set the parking brake.
- Chock the rear wheels.
- Break the front lug nuts loose before lifting the vehicle.
- Mark the position of any cam bolts or eccentric washers before removal.
- Take photos before you unbolt anything.
🔨 Step-by-Step Instructions
Follow these steps in order:
Step 1: Lift and secure the front end
- Use a floor jack to raise the front of the Sequoia.
- Support it with jack stands under the frame.
- Remove the front wheels with a lug wrench.
Step 2: Remove brake and hub access parts
- Use a 14mm socket to remove the brake caliper bolts.
- Hang the caliper safely with wire if needed.
- Use the correct socket set to remove any rotor or dust shield hardware blocking access.
- Do not let the brake hose stretch.
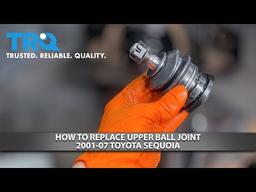
Step 3: Separate the steering knuckle
- Remove the cotter pin with needle-nose pliers if the joint uses one.
- Use the correct socket to remove the ball joint nut.
- Use a ball joint separator to break the taper loose from the steering knuckle.
- If a lower joint is pressed into the arm, continue to the press step below.
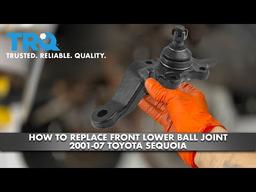
Step 4: Remove the worn ball joint
- If the ball joint is bolted on, use the correct socket set to remove the mounting bolts.
- If the ball joint is pressed in, use the ball joint press kit to press it out of the control arm.
- Clean the bore with a wire brush.
- Keep the press square to avoid damage.
Step 5: Install the new ball joint
- Position the new joint in the arm or knuckle.
- Use the ball joint press kit if it is a press-in style.
- Use the correct socket set to tighten bolted joints.
- Install a new cotter pin if the design uses one.
Step 6: Torque all fasteners
- Tighten the ball joint hardware with a torque wrench.
- Torque to the Toyota factory specification for the exact joint and fastener size.
- Tighten any removed brake hardware to factory spec as well.
- Use the service manual torque for your exact fastener.
Step 7: Reassemble the front end
- Reinstall the rotor, caliper, and wheel.
- Use a torque wrench to tighten wheel lug nuts in a star pattern.
- Lower the Sequoia carefully from the jack stands.
✅ After Repair
- Check for clunks and looseness by rocking the wheel by hand.
- Test drive at low speed first.
- Listen for rubbing, popping, or clicking.
- Schedule a front-end alignment right away.
- Recheck lug nut torque after the first drive.
💰 DIY vs Shop Cost
Shop Cost: $600-$1,400 (parts + labor)
DIY Cost: $180-$500 (parts only)
You Save: $420-$900 by doing it yourself!
Shop labor rates vary but typically run $100-$150/hour. This repair takes a shop approximately 4-7 hours.
🎯 Ready to get started?
HowToo makes it easy: same-day/2-day shipping on every part, plus all the tools and specialty tools you need! Check out the parts and tools sections below to add everything to your cart.