









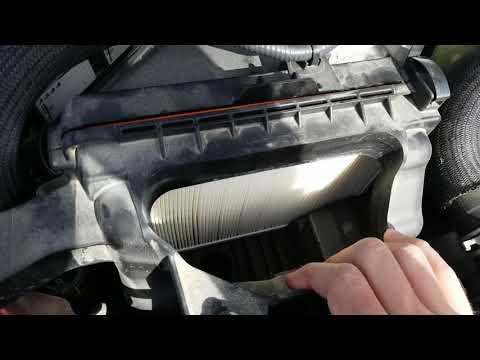







How to Replace the Engine Air Filter on a 2018 INFINITI Q50 (DIY Guide) (Trim: Base)
Step-by-step airbox removal, tools list, correct filter orientation, and torque specs
How to Replace the Engine Air Filter on a 2018 INFINITI Q50 (DIY Guide) (Trim: Base)
Step-by-step airbox removal, tools list, correct filter orientation, and torque specs for 2018


🔧 Q50 - Engine Air Filter Replacement
The engine air filter keeps dust and debris out of your engine. Replacing it restores proper airflow, can improve throttle response, and helps protect the turbo and engine internals.
Difficulty Level: Beginner | Estimated Time: 0.25-0.5 hours
⚠️ Safety & Precautions
- ⚠️ Work on a cool engine to avoid burns from hot parts.
- ⚠️ Keep tools and fingers away from the radiator fan area.
- ⚠️ Do not run the engine with the air filter removed.
- ⚠️ Battery disconnect is not required for this service.
🔧 Required Tools
You'll need the following tools for this repair:
- 10mm socket
- 1/4" ratchet
- 6" extension (1/4" drive)
- Torx T25 screwdriver
- Phillips #2 screwdriver
- Flat trim tool
- Flashlight
- Nitrile gloves
- Safety glasses
🔩 Required Parts
HowToo sells all the parts you need for this repair:
- Engine air filter - Qty: 1
📋 Before You Begin
- Park on level ground and set the parking brake.
- Turn the engine off and let it cool for 15–30 minutes.
- Have a trash bag ready for the old filter.
🔨 Step-by-Step Instructions
Follow these steps in order:
Step 1: Open the hood and locate the air filter housing
- Open the hood and support it securely.
- Use a flashlight to find the black plastic air filter box (air cleaner housing) connected to the intake tube.
Step 2: Release the airbox cover (clips or screws)
- If your airbox uses metal latches, flip them open by hand or with a flat trim tool (a non-scratch prying tool).
- If your airbox uses screws, remove them using a Torx T25 screwdriver or Phillips #2 screwdriver (varies by housing style).
- If an intake snorkel or small bracket blocks access, loosen the fastener using a 10mm socket, 1/4" ratchet, and 6" extension.
Step 3: Lift the airbox cover and remove the old filter
- Lift the airbox lid straight up just enough to access the filter (you usually don’t need to fully remove the lid).
- Pull the old air filter out.
- Use the flashlight to check the bottom of the airbox for leaves/sand and wipe it clean with a dry rag (do not let debris fall into the intake).
Step 4: Install the new air filter (correct orientation)
- Insert the new filter into the airbox the same way the old one came out.
- Make sure the filter’s rubber edge sits flat all the way around (no waves or corners folded).
- A pinched seal can trigger a rough idle.
Step 5: Reinstall and secure the airbox cover
- Lower the airbox lid carefully, making sure it seats evenly.
- Re-close the metal clips, or reinstall the screws using a Torx T25 screwdriver / Phillips #2 screwdriver.
- If screws are used: Torque to 5 Nm (44 in-lbs).
- Re-tighten any loosened bracket/snorkel fasteners using a 10mm socket and 1/4" ratchet (snug, do not over-tighten plastic).
Step 6: Final under-hood check
- Confirm no tools are left in the engine bay.
- Visually confirm the intake tube is fully seated and nothing is cracked or disconnected.
✅ After Repair
- Start the engine and let it idle for 30–60 seconds.
- Listen for a whistling/hissing sound (can indicate the airbox isn’t sealed).
- Take a short test drive and confirm normal throttle response and no warning lights.
💰 DIY vs Shop Cost
Shop Cost: $80-$150 (parts + labor)
DIY Cost: $15-$35 (parts only)
You Save: $45-$135 by doing it yourself!
Shop labor rates vary but typically run $100-$150/hour. This repair takes a shop approximately 0.3-0.5 hours.
🎯 Ready to get started?
HowToo makes it easy: same-day/2-day shipping on every part, plus all the tools and specialty tools you need! Check out the parts and tools sections below to add everything to your cart.
Guide for Engine Air Filter replace for these INFINITI vehicles
| Year Make Model | Sub Model | Engine | Body Style |
|---|---|---|---|
| 2018 INFINITI Q50 | Hybrid Luxe | - | - |