









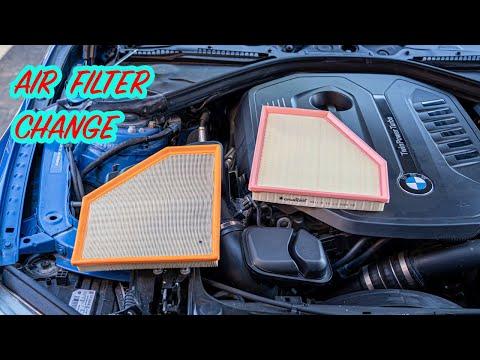







How to Replace the Engine Air Filter on a 2016 BMW 340i (Step-by-Step Guide)
Tools, parts, safety tips, and easy airbox removal steps to restore airflow and performance for 2016, 2017, 2018
How to Replace the Engine Air Filter on a 2016 BMW 340i (Step-by-Step Guide)
Tools, parts, safety tips, and easy airbox removal steps to restore airflow and performance for 2016, 2017, 2018


🔧 340i - Engine Air Filter Replacement
Your 340i’s engine air filter sits in the airbox and keeps dust and debris out of the turbo and engine. Replacing it restores airflow, helps performance, and protects expensive components.
Difficulty Level: Beginner | Estimated Time: 0.25-0.5 hours
⚠️ Safety & Precautions
- ⚠️ Work on a cool engine to avoid burns from hot plastics and metal parts.
- ⚠️ Keep tools and fingers away from the electric cooling fan; it can turn on unexpectedly.
- ⚠️ No battery disconnect is required for this job.
🔧 Required Tools
You'll need the following tools for this repair:
- Torx T25 screwdriver
- 10mm socket
- 1/4" ratchet
- 6" extension for 1/4" ratchet
- Trim clip removal tool
- Flashlight
- Nitrile gloves
- Safety glasses
🔩 Required Parts
HowToo sells all the parts you need for this repair:
- Engine air filter - Qty: 1
📋 Before You Begin
- Park on level ground, shift to Park, and set the parking brake.
- Open the hood and let the engine cool for 15–30 minutes.
- Have a flashlight ready so you can clearly see the airbox screws/clips.
🔨 Step-by-Step Instructions
Follow these steps in order:
Step 1: Locate the airbox
- The airbox is the large black plastic box at the front/side of the engine bay with an intake duct/snorkel feeding into it.
- Use a flashlight to identify the airbox cover screws (typically Torx) and any intake duct fasteners.
Step 2: Remove the intake snorkel/duct (if it blocks the airbox cover)
- Use a trim clip removal tool to pop up any plastic push-clips (a push-clip is a two-piece fastener that releases when you pry the center pin up).
- If there are bolts, use a 10mm socket with a 1/4" ratchet and extension to remove them.
- Lift the snorkel/duct out and set it aside where it won’t get stepped on.
- Tip: Keep clips/bolts in a small cup.
Step 3: Open the airbox
- Use a Torx T25 screwdriver to loosen/remove the airbox cover screws around the lid.
- If your airbox uses metal clips instead of screws, release them by hand while wearing nitrile gloves.
- Lift the airbox lid just enough to access the filter. Do not force it; wiring and ducts may limit movement.
- Torque: Reinstall airbox screws snug by hand (do not overtighten into plastic).
Step 4: Remove the old air filter
- Pull the filter straight up and out of the airbox.
- Use a flashlight to check the bottom of the airbox for leaves/sand.
- If debris is present, wipe it out carefully with a clean rag (avoid pushing dirt deeper into the intake).
Step 5: Install the new air filter
- Place the new filter into the airbox in the same orientation as the old one.
- Make sure the filter’s rubber edge is fully seated all the way around (no corners folded over).
- Tip: A pinched seal can let dust bypass.
Step 6: Close the airbox and reinstall the snorkel/duct
- Lower the airbox lid into place, ensuring it sits evenly.
- Use a Torx T25 screwdriver to tighten the airbox screws evenly, working in a crisscross pattern.
- Reinstall the snorkel/duct using the 10mm socket and 1/4" ratchet (if bolts were removed).
- Reinstall any push-clips by pressing them back in by hand; use the trim clip removal tool if you need to align the center pin.
✅ After Repair
- Start the engine and let it idle for 30 seconds.
- Listen for any whistling/hissing that could indicate the airbox lid isn’t fully seated.
- Take a short test drive and recheck that the snorkel/duct and clips are secure.
💰 DIY vs Shop Cost
Shop Cost: ₹1,500-₹4,000 (parts + labor)
DIY Cost: ₹800-₹2,500 (parts only)
You Save: ₹700-₹1,500 by doing it yourself!
Shop labor rates vary but typically run ₹800-₹2,000/hour. This repair takes a shop approximately 0.3-0.5 hours.
🎯 Ready to get started?
HowToo makes it easy: same-day/2-day shipping on every part, plus all the tools and specialty tools you need! Check out the parts and tools sections below to add everything to your cart.