









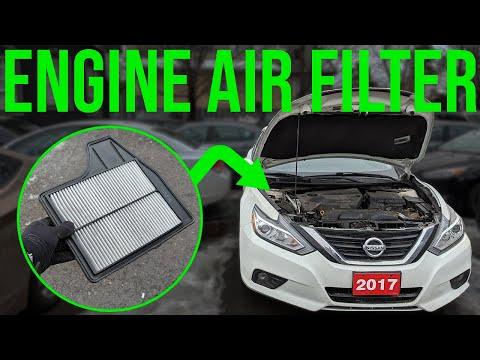







How to Replace the Engine Air Filter on a 2013 Nissan Altima (Step-by-Step)
Beginner-friendly instructions with tools, parts list, safety tips, and final checks to ensure a proper air box seal for 1993, 1994, 1995, 1996, 1997, 1998, 1999, 2000, 2001
How to Replace the Engine Air Filter on a 2013 Nissan Altima (Step-by-Step)
Beginner-friendly instructions with tools, parts list, safety tips, and final checks to ensure a proper air box seal for 1993, 1994, 1995, 1996, 1997, 1998, 1999, 2000, 2001


🔧 Altima - Engine Air Filter Replacement
Your Altima’s engine air filter sits in the air box (air cleaner housing) and keeps dust and debris out of the engine. Replacing it helps maintain smooth acceleration, good fuel economy, and protects the engine over time.
Difficulty Level: Beginner | Estimated Time: 0.2-0.5 hours
⚠️ Safety & Precautions
- ⚠️ Work with the engine OFF and cool to avoid burns.
- ⚠️ Do not pull on any wiring near the intake tube; the MAF sensor (Mass Air Flow sensor) measures incoming air and can be damaged if handled roughly.
- ⚠️ Keep tools and rags out of the intake opening so nothing gets sucked into the engine.
- ⚠️ Battery disconnect is not required for this job.
🔧 Required Tools
You'll need the following tools for this repair:
- 10mm socket
- 1/4" ratchet
- 6" extension (1/4")
- Flathead screwdriver (medium)
- Flashlight
- Nitrile gloves
- Safety glasses
🔩 Required Parts
HowToo sells all the parts you need for this repair:
- Engine air filter - Qty: 1
📋 Before You Begin
- Park on level ground and shift to Park.
- Open the hood and let the engine cool for 10–15 minutes.
- Locate the air box: a black plastic box connected to the intake tube near the front/side of the engine bay.
🔨 Step-by-Step Instructions
Follow these steps in order:
Step 1: Locate and inspect the air box
- Use a flashlight to find the air box and the metal clips (or screws/bolts) around its seam.
- Look for a sensor on the intake tube (that’s the MAF). Don’t unplug it for this job.
Step 2: Unfasten the air box cover
- If your air box uses clips: release them using a flathead screwdriver (medium) if needed (most clips can be flipped by hand).
- If your air box uses bolts/screws: loosen/remove them with a 10mm socket, 1/4" ratchet, and 6" extension (1/4").
Step 3: Open the air box and remove the old filter
- Lift the air box lid up slightly (you usually don’t need to remove the whole lid).
- Pull the old filter straight out by hand while wearing nitrile gloves.
- Use the flashlight to check the bottom of the air box for leaves or dirt.
Step 4: Clean the air box sealing area
- Wipe the inside lip (where the filter seals) with a clean, dry cloth (no tools required).
- Do not use water or spray cleaners inside.
Step 5: Install the new filter (correct direction matters)
- Insert the new filter into the air box by hand.
- Make sure it sits flat and fully in the groove all the way around.
- If the filter has an “AIR FLOW” arrow, point it toward the engine (toward the intake tube).
Step 6: Close and secure the air box
- Lower the lid and ensure it sits evenly (no gaps).
- Re-latch the clips by hand, or tighten the fasteners with a 10mm socket and 1/4" ratchet until snug (do not over-tighten plastic).
Step 7: Quick final check
- Gently tug the lid to confirm it’s locked.
- Visually confirm no tools are left in the engine bay using the flashlight.
✅ After Repair
- Start the engine and let it idle for 30 seconds.
- Listen for hissing/whistling (can mean the air box isn’t sealed).
- If the check engine light comes on soon after, re-check that the air box lid is seated evenly and the intake tube wasn’t disturbed.
💰 DIY vs Shop Cost
Shop Cost: ₹800-₹2,000 (parts + labor)
DIY Cost: ₹400-₹1,200 (parts only)
You Save: ₹400-₹800 by doing it yourself!
Shop labor rates vary but typically run ₹800-₹2,000/hour. This repair takes a shop approximately 0.2-0.5 hours.
🎯 Ready to get started?
HowToo makes it easy: same-day/2-day shipping on every part, plus all the tools and specialty tools you need! Check out the parts and tools sections below to add everything to your cart.