









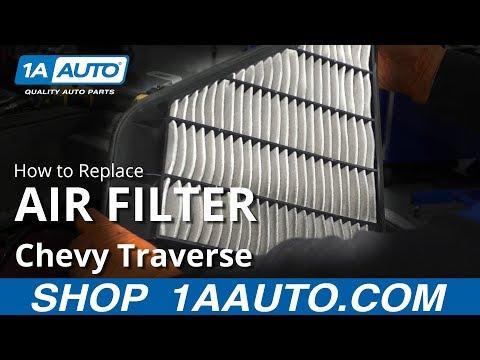







How to Replace the Engine Air Filter on a 2009-2017 Chevrolet Traverse (Engine: V6 3.6L)
Beginner-friendly step-by-step instructions with tools, parts list, safety tips, and final checks
How to Replace the Engine Air Filter on a 2009-2017 Chevrolet Traverse (Engine: V6 3.6L)
Beginner-friendly step-by-step instructions with tools, parts list, safety tips, and final checks for 2009, 2010, 2011, 2012, 2013, 2014, 2015, 2016, 2017


🔧 Traverse - Engine Air Filter Replacement
Your Traverse’s engine air filter keeps dust and debris out of the engine. Replacing it helps maintain power, fuel economy, and protects internal engine parts.
Difficulty Level: Beginner | Estimated Time: 0.2-0.5 hours
⚠️ Safety & Precautions
- ⚠️ Work with the engine off and cool to avoid burns.
- ⚠️ Keep fingers clear of moving parts; do not work near the radiator fans if the key is on.
- ⚠️ Don’t let dirt fall into the air intake box while the filter is out.
- ⚠️ Battery disconnect is not required for this job.
🔧 Required Tools
You'll need the following tools for this repair:
- Nitrile gloves
- Safety glasses
- Flathead screwdriver
- Trim clip tool
- Flashlight
🔩 Required Parts
HowToo sells all the parts you need for this repair:
- Engine air filter - Qty: 1
📋 Before You Begin
- Park on level ground and shift to Park.
- Turn the engine off, remove the key, and open the hood.
- Have a clean rag ready to wipe out loose dust inside the air box.
🔨 Step-by-Step Instructions
Follow these steps in order:
Step 1: Find the air filter housing
- Use a flashlight to locate the black plastic air filter box near the front/side of the engine bay, connected to the intake tube (the large plastic/rubber duct).
Step 2: Unclip (or loosen) the air box lid
- Release the metal retaining clips by hand. If a clip is tight, gently pry with a flathead screwdriver.
- If your air box uses plastic push-clips on a snorkel/cover, pop them up using a trim clip tool (a small pry tool that lifts plastic fasteners without breaking them).
- Don’t force clips—wiggle, then lift.
Step 3: Open the air box and remove the old filter
- Lift the air box lid enough to slide the filter out. Use gloves to keep your hands clean.
- Pay attention to how the filter sits (which side faces up) so the new one goes in the same way.
Step 4: Clean the air box sealing surface
- Use a flashlight to check for leaves/sand inside the lower air box.
- Wipe out loose dirt with a clean rag (do not spray cleaners into the intake).
- Clean seal = no unfiltered air leaks.
Step 5: Install the new engine air filter
- Place the new filter into the lower air box, making sure it sits flat and fully into the corners.
- Check that the rubber edge (gasket) is not pinched or folded.
Step 6: Close the air box and secure all clips
- Lower the air box lid straight down so it meets evenly all the way around.
- Re-lock all the metal clips by hand. If needed, use a flathead screwdriver gently to seat a stubborn clip.
- Reinstall any plastic push-clips using a trim clip tool to align them, then press them down by hand.
Step 7: Quick final check
- Use a flashlight to verify the lid is fully closed and the filter edge isn’t sticking out.
- Make sure no tools or rags are left in the engine bay.
✅ After Repair
- Start the engine and let it idle for 20–30 seconds; listen for any whistling/hissing (a sign the air box isn’t sealed).
- If you hear a leak noise, shut off the engine and re-check that the filter is seated and the clips are fully latched.
- Optional: write the date/mileage on the filter frame with a marker for tracking.
💰 DIY vs Shop Cost
Shop Cost: $50-$120 (parts + labor)
DIY Cost: $15-$35 (parts only)
You Save: $35-$85 by doing it yourself!
Shop labor rates vary but typically run $100-$150/hour. This repair takes a shop approximately 0.2-0.5 hours.
🎯 Ready to get started?
HowToo makes it easy: same-day/2-day shipping on every part, plus all the tools and specialty tools you need! Check out the parts and tools sections below to add everything to your cart.
Guide for Engine Air Filter replace for these Chevrolet vehicles
| Year Make Model | Sub Model | Engine | Body Style |
|---|---|---|---|
| 2017 Chevrolet Traverse | - | V6 3.6L | - |
| 2016 Chevrolet Traverse | - | V6 3.6L | - |
| 2015 Chevrolet Traverse | - | V6 3.6L | - |
| 2014 Chevrolet Traverse | - | V6 3.6L | - |
| 2013 Chevrolet Traverse | - | V6 3.6L | - |
| 2012 Chevrolet Traverse | - | V6 3.6L | - |
| 2011 Chevrolet Traverse | - | V6 3.6L | - |
| 2010 Chevrolet Traverse | - | V6 3.6L | - |
| 2009 Chevrolet Traverse | - | V6 3.6L | - |