


How to Replace the Cabin Air Filter on a 2017 Nissan Rogue
Step-by-step DIY cabin filter change with tools, parts list, safety tips, and installation instructions behind the glove box
How to Replace the Cabin Air Filter on a 2017 Nissan Rogue
Step-by-step DIY cabin filter change with tools, parts list, safety tips, and installation instructions behind the glove box
🔧 Rogue - Cabin Air Filter Replacement
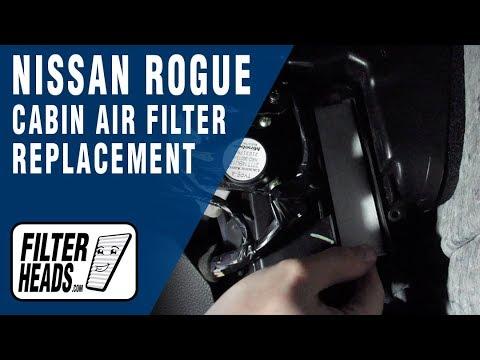
You’ll be replacing the cabin air filter, which cleans the air that comes through the vents into the interior of your Rogue. On this model, the filter sits behind the glove box, and you’ll mainly be working with plastic clips and a small access door.
Difficulty Level: Beginner | Estimated Time: 20–35 minutes
⚠️ Safety & Precautions
- 🛑 Work with the engine off, ignition off, and key fob away from the vehicle.
- 🛑 Set the parking brake and make sure the blower fan and A/C are switched off before starting.
- 🛑 Open and empty the glove box so nothing falls on you or jams the door.
- 🛑 Avoid forcing plastic clips; gently flex them to prevent breaking.
- 🛑 Battery disconnection is not required for this procedure.
🔧 Required Tools
You'll need the following tools for this repair:
- 🧰 Phillips #2 screwdriver
- 🧰 Trim removal tool (plastic pry tool) (specialty)
- 🧰 Flashlight
- 🧰 Mechanic’s gloves
- 🧰 Safety glasses
🔩 Required Parts
HowToo sells all the parts you need for this repair:
- 🧩 Cabin air filter (microfilter, for HVAC) - Qty: 1
- 🧩 Interior cleaning wipes - Qty: 1 pack
- 🧩 Disposable shop towels - Qty: 1 roll
📋 Before You Begin
- 🚗 Park your Rogue on level ground, shift to Park, and set the parking brake.
- 🔇 Turn the climate control system completely off (fan off, A/C off, ignition off).
- 🧺 Empty the glove box (manual, papers, etc.) so nothing gets in the way.
- 🧽 Have a small trash bag ready for the old filter; it can be dusty.
🔨 Step-by-Step Instructions
Follow these steps in order:
Step 1: Open and prepare the glove box
- Use your hands to fully open the glove box door.
- Remove any items inside so you can see all the inner plastic walls and stoppers.
- Keep screws and clips in a small cup.
Step 2: Disconnect the glove box damper
- The damper is a small arm on the right side of the glove box that makes the door open slowly.
- Use your flashlight to see the damper clearly on the right-hand side.
- Gently pull the damper arm off its pin by hand; if tight, use the trim removal tool to gently pry it off.
- Pull straight outward to avoid bending it.
Step 3: Lower the glove box to access the filter area
- On each side of the glove box, you’ll see plastic stops that limit how far it opens.
- With both hands, gently squeeze the sides of the glove box inward so those stops clear the dashboard opening.
- Let the glove box swing down carefully so it hangs lower and exposes the HVAC (air box) area behind it.
- Support the glove box so it doesn’t drop suddenly.
Step 4: Locate the cabin air filter access door
- Behind the lowered glove box, look straight toward the firewall (the back of the dash).
- You’ll see a rectangular plastic cover on the HVAC housing; this is the cabin filter access door.
- Use your flashlight to clearly see the small locking tabs on the sides or top of the cover.
Step 5: Remove the cabin filter access door
- Release the locking tabs on the cover by hand; press them inward or upward as designed.
- If the tabs are stiff, use the trim removal tool to gently help lift a tab while pulling the cover toward you.
- Set the cover aside where it won’t get lost.
- No torque spec is required when reinstalling this plastic cover; just snap it fully in place by hand.
Step 6: Remove the old cabin air filter
- Note the direction of the arrow on the existing filter frame; it usually indicates airflow direction (typically downwards on this Nissan).
- With one hand, gently pull the filter straight out; you may need to slightly bend it to clear the opening.
- Be prepared for dust and debris to fall; wear your safety glasses and keep shop towels handy.
- Place the old filter into your trash bag.
- Take a photo of the arrow before removal.
Step 7: Clean the filter housing area
- Use a dry shop towel to gently wipe around the opening of the filter slot to remove loose dust.
- Do not push debris deeper into the housing; wipe outward only.
- Avoid using liquids or sprays inside the HVAC box.
Step 8: Install the new cabin air filter
- Check the new filter for an arrow marking either “Air Flow” or “UP”:
- If marked “Air Flow”, match the arrow to the same direction as the old filter (typically arrow pointing down).
- If marked “UP”, the arrow should point upward toward the roof of the car.
- Carefully slide the new filter into the slot, keeping the seal edges straight so it doesn’t fold or wrinkle.
- Gently push it all the way in until it stops; do not force it.
- Correct orientation is critical for proper airflow.
Step 9: Reinstall the cabin filter access door
- Align the cover with the opening on the HVAC housing.
- Hook any bottom tabs first, then press the top or side tabs until they click securely into place.
- Run your finger around the edges to confirm it’s seated evenly.
- Nissan does not specify a torque for this door; press until the clips fully engage by hand.
Step 10: Reposition and secure the glove box
- Lift the glove box back toward its normal open position.
- Gently squeeze the sides inward again so the stops clear the dash opening, then release them so the stops rest behind the dash lip.
- Reconnect the right-side damper arm by pushing it back onto its pin firmly by hand.
- If your Rogue has any screws along the bottom edge of the glove box (some builds do), reinstall them with the Phillips #2 screwdriver:
- No specific torque is given; tighten just snug by hand, do not overtighten into plastic.
Step 11: Final checks and clean up
- Open and close the glove box a few times to ensure it moves smoothly and the damper works properly.
- Wipe any dust from the dashboard and glove box with interior cleaning wipes.
- Return your items to the glove box.
✅ After Repair
- 🌀 Start the engine or switch ignition to ON, then turn on the blower fan and A/C.
- 🧪 Check for normal airflow from the vents at different fan speeds; it should not be weaker than before.
- 👃 Smell the air briefly; it should not have a musty or dusty odor. A light “new filter” or paper smell is normal.
- 📝 Make a note of the mileage and date; plan to replace the cabin filter about every 12–15 months or as needed in dusty conditions.
💰 DIY vs Shop Cost
Shop Cost: $80–$130 (parts + labor)
DIY Cost: $15–$40 (parts only)
You Save: $40–$100 by doing it yourself!
Shop labor rates vary but typically run $100–$150/hour. This repair takes a shop approximately 0.3–0.5 hours.
🎯 Ready to get started?
HowToo makes it easy: same-day/2-day shipping on every part, plus all the tools and specialty tools you need! Check out the parts and tools sections above to add everything to your cart.
