








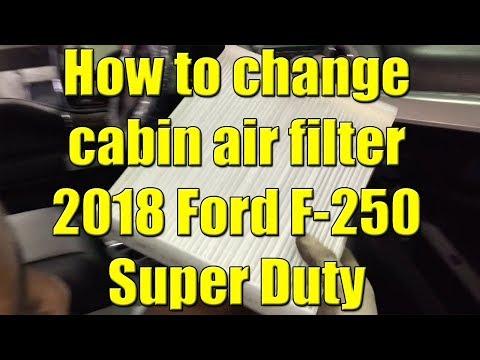







How to Replace the Cabin Air Filter on a 2017-2022 Ford F-250 Super Duty (Glove Box Access)
Step-by-step instructions for factory access or retrofit door install, plus tools, parts, and safety tips
How to Replace the Cabin Air Filter on a 2017-2022 Ford F-250 Super Duty (Glove Box Access)
Step-by-step instructions for factory access or retrofit door install, plus tools, parts, and safety tips for 2017, 2018, 2019, 2020, 2021, 2022


🔧 F-250 Super Duty - Cabin Air Filter Replacement
On your F-250, the cabin air filter location is behind the glove box area. Some trucks have a factory filter door you can open and swap the filter, while others only have the HVAC housing “provision” (no filter installed) unless a retrofit door is added.
Quick check: If you don’t see a small rectangular filter access door behind the glove box, your truck likely didn’t come with a cabin filter from the factory.
Difficulty Level: Beginner (if access door exists) / Advanced (if retrofit) | Estimated Time: 15-30 min / 1-2 hours
⚠️ Safety & Precautions
- 🛑 Turn the ignition OFF and remove the key before working around the glove box area.
- 🧤 Wear gloves—plastic edges behind the dash can be sharp.
- ⚠️ If you choose the retrofit/cutting method, protect wiring and keep plastic shavings out of the blower opening.
- 🔋 Battery disconnect is not required for a simple filter swap.
🔧 Required Tools
You'll need the following tools for this repair:
- 7mm socket
- 1/4" ratchet
- 6" extension (1/4")
- Trim removal tool
- Phillips screwdriver #2
- Flashlight
- Nitrile gloves
- Safety glasses
- Shop vacuum
- Utility knife
- Rotary cutting tool (specialty)
🔩 Required Parts
HowToo sells all the parts you need for this repair:
- Cabin air filter - Qty: 1
- Cabin air filter access door retrofit kit - Qty: 1 (only if no factory door)
📋 Before You Begin
- Park your F-250 on level ground and set the parking brake.
- Move the passenger seat back for working room.
- Have a shop vacuum ready to catch dust/leaves.
🔨 Step-by-Step Instructions
Follow these steps in order:
Step 1: Confirm whether your F-250 has a cabin filter access door
- Open the glove box and use a flashlight to look behind it for a small rectangular filter door on the HVAC case.
- If you see a door with tabs/clips, proceed to Step 2.
- If there is no door (just a solid plastic panel area), skip to Step 6 (retrofit path).
Step 2: Remove or lower the glove box
- Empty the glove box.
- Gently push in on both sides of the glove box to clear the stops and let it swing downward.
- If any trim panel blocks access, use a trim removal tool to carefully pop it loose.
- Tip: Support the glove box so it doesn’t slam down.
Step 3: Open the cabin filter door
- Use a trim removal tool (or your fingers) to release the door tabs and remove the cover.
- Set the cover aside where it won’t get stepped on.
Step 4: Remove the old cabin filter
- Pull the filter straight out.
- Keep it level to avoid dumping leaves and dust.
- Use a shop vacuum to clean the filter slot and surrounding area.
Step 5: Install the new cabin filter and reassemble
- Check the airflow arrow on the filter frame.
- Install the filter in the same direction as the arrow indicates (airflow direction is marked on the filter).
- Reinstall the door until the tabs click in.
- Lift the glove box back into place and re-seat the stops.
Step 6: Retrofit path (only if there is NO factory access door)
- Put on safety glasses and nitrile gloves.
- Lower the glove box as in Step 2.
- Locate the molded “cutout outline” on the HVAC housing where the filter door would be.
- Use a utility knife to score the outline first.
- Use a rotary cutting tool (specialty) to carefully cut along the outline.
- Use a shop vacuum while cutting to capture shavings.
- Trim removal tool can help pry out the cut panel once free.
- Definition: A rotary cutting tool is a handheld high-speed tool that cuts plastic with a small bit.
Step 7: Install the retrofit door and cabin filter
- Fit the cabin air filter access door retrofit kit to the opening you created.
- Slide in the cabin air filter, following the airflow arrow on the filter.
- Snap the retrofit door closed.
- Reinstall/raise the glove box.
✅ After Repair
- Start your F-250 and run the fan on high for 30 seconds.
- Switch between fresh air and recirculation and listen for rubbing noises (a sign the filter isn’t seated).
- Verify airflow is strong and there’s no whistling from an unlatched door.
💰 DIY vs Shop Cost
Shop Cost: $120-$250 (parts + labor; more if retrofit)
DIY Cost: $20-$80 (parts only; more if retrofit kit)
You Save: $100-$170 by doing it yourself!
Shop labor rates vary but typically run $100-$150/hour. This repair takes a shop approximately 0.5-1.0 hours.
🎯 Ready to get started?
HowToo makes it easy: same-day/2-day shipping on every part, plus all the tools and specialty tools you need! Check out the parts and tools sections below to add everything to your cart.
Quick question (so I can keep this 100% accurate): When you lower the glove box on your F-250, do you see a rectangular cabin-filter door on the HVAC box, or is it solid plastic with only an outline?
Guide for Cabin Air Filter replace for these Ford vehicles
| Year Make Model | Sub Model | Engine | Body Style |
|---|---|---|---|
| 2022 Ford F-250 Super Duty | - | - | - |
| 2021 Ford F-250 Super Duty | - | - | - |
| 2020 Ford F-250 Super Duty | - | - | - |
| 2019 Ford F-250 Super Duty | - | - | - |
| 2018 Ford F-250 Super Duty | - | - | - |
| 2017 Ford F-250 Super Duty | - | - | - |