









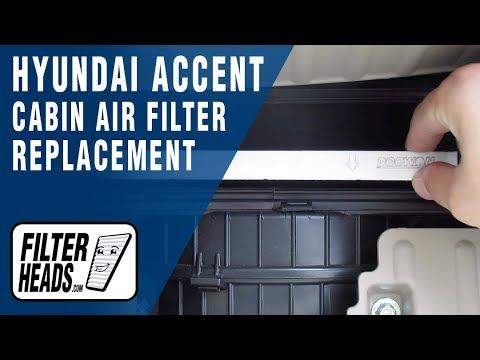






How to Replace the Cabin Air Filter on a 2016 Hyundai Accent (Glove Box Method)
Step-by-step instructions with required tools/parts, airflow direction tips, and post-install checks for 2012, 2013, 2014, 2015, 2016, 2017
How to Replace the Cabin Air Filter on a 2016 Hyundai Accent (Glove Box Method)
Step-by-step instructions with required tools/parts, airflow direction tips, and post-install checks for 2012, 2013, 2014, 2015, 2016, 2017


🔧 Accent - Cabin Air Filter Replacement
Your A/C and heater pull air through the cabin air filter before it enters the interior. Replacing a dirty filter helps airflow, reduces musty smells, and keeps dust/pollen down inside the cabin.
Difficulty Level: Beginner | Estimated Time: 0.25-0.5 hours
⚠️ Safety & Precautions
- ⚠️ Turn the ignition OFF and remove the key before working under the dash.
- ⚠️ Don’t force plastic tabs; they can crack if bent too far.
- ⚠️ Battery disconnect is not required for this service.
🔧 Required Tools
You'll need the following tools for this repair:
- Nitrile gloves
- Safety glasses
- Flashlight
- Trim removal tool (plastic)
🔩 Required Parts
HowToo sells all the parts you need for this repair:
- Cabin air filter - Qty: 1
📋 Before You Begin
- Park on level ground and set the parking brake.
- Open the passenger door for easier access to the glove box area.
- Have a trash bag ready for debris.
🔨 Step-by-Step Instructions
Follow these steps in order:
Step 1: Open and empty the glove box
- Open the glove box and remove anything inside so it doesn’t fall out.
- Use a flashlight to look along the right side of the glove box for the small “damper” arm (a little strap that slows the glove box).
Step 2: Disconnect the glove box damper
- Use a trim removal tool (plastic) to gently pop the damper arm off its pin on the right side.
- Damper arm = a small link that keeps the glove box from dropping fast.
Step 3: Drop the glove box down
- Press inward on both sides of the glove box to clear the side stops.
- Once the stops clear, let the glove box swing down toward the floor.
- Press evenly—don’t twist the glove box.
Step 4: Remove the cabin filter cover
- Behind the glove box, locate the rectangular cabin filter housing.
- Release the tabs on the cover by hand (or gently with the trim removal tool (plastic)), then pull the cover off.
Step 5: Remove the old cabin air filter
- Put on nitrile gloves and pull the filter straight out.
- Keep it level so trapped leaves/dust don’t spill into the blower area.
Step 6: Install the new cabin air filter
- Check the airflow arrow on the filter frame.
- Install it in the same direction as the old one (typically airflow points downward toward the blower).
- Slide the filter in until it seats fully—don’t crush or fold it.
Step 7: Reinstall the cover and glove box
- Reinstall the housing cover and press until the tabs click.
- Lift the glove box back up and press the sides inward again to pass the stops back into place.
- Reconnect the damper arm using the trim removal tool (plastic) if needed to align it.
✅ After Repair
- Start the engine and run the blower on medium-high for 30 seconds.
- Switch between fresh air and recirculation and confirm airflow is strong and quiet.
- If you hear a fluttering noise, the filter may be installed backward or not fully seated—recheck fit.
💰 DIY vs Shop Cost
Shop Cost: $60-$140 (parts + labor)
DIY Cost: $12-$35 (parts only)
You Save: $48-$105 by doing it yourself!
Shop labor rates vary but typically run $100-$150/hour. This repair takes a shop approximately 0.3-0.5 hours.
🎯 Ready to get started?
HowToo makes it easy: same-day/2-day shipping on every part, plus all the tools and specialty tools you need! Check out the parts and tools sections below to add everything to your cart.