









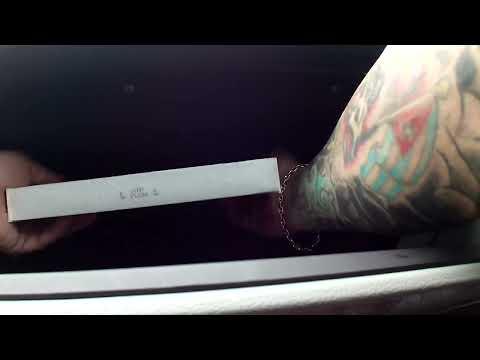






How to Replace the Cabin Air Filter on a 2015-2020 Acura TLX (Step-by-Step)
Glove box removal walkthrough, required tools/parts, airflow direction tips, and post-install checks
How to Replace the Cabin Air Filter on a 2015-2020 Acura TLX (Step-by-Step)
Glove box removal walkthrough, required tools/parts, airflow direction tips, and post-install checks for 2015, 2016, 2017, 2018, 2019, 2020


🔧 TLX - Cabin Air Filter Replacement
Your TLX’s cabin air filter cleans the air going into the HVAC system (heat/AC). Replacing it improves airflow and helps reduce dust, odors, and fogging.
Difficulty Level: Beginner | Estimated Time: 0.3-0.7 hours
⚠️ Safety & Precautions
- ⚠️ Turn the ignition OFF and remove the key/fob from the cabin.
- ⚠️ Don’t force plastic panels—use gentle pressure to avoid breaking clips.
- ⚠️ Battery disconnect is not required for this job.
🔧 Required Tools
You'll need the following tools for this repair:
- Clean nitrile gloves
- Safety glasses
- Flashlight
- Small flat trim tool
🔩 Required Parts
HowToo sells all the parts you need for this repair:
- Cabin air filter - Qty: 1
📋 Before You Begin
- Park on level ground and set the parking brake.
- Move the front passenger seat back to give yourself room.
- Have a trash bag ready for the old filter.
🔨 Step-by-Step Instructions
Follow these steps in order:
Step 1: Open the glove box and clear space
- Open the glove box and remove any items.
- Use nitrile gloves and safety glasses to keep dust off your hands and eyes.
Step 2: Remove the glove box damper (soft-open arm)
- On the right side of the glove box, locate the small “damper” arm (it slows the glove box as it opens).
- Gently pop it off its peg using a small flat trim tool. Go slow—plastic gets brittle.
Step 3: Lower the glove box fully
- Push in on both sides of the glove box (near the upper corners) to clear the stopper tabs.
- Lower the glove box down toward the floor.
Step 4: Remove the cabin filter cover
- Behind the glove box, find the rectangular filter housing cover.
- Press the side tabs and pull the cover straight off (use the flashlight to see the tabs clearly).
Step 5: Remove the old filter
- Slide the old filter straight out of the housing.
- Keep it level so debris doesn’t spill into the blower (the HVAC fan).
Step 6: Install the new filter (airflow direction matters)
- Check the new filter for an “AIR FLOW” arrow printed on the side.
- Install it in the same direction as the old one (typically the arrow points downward toward the floor).
- If it doesn’t slide in easily, don’t force it—pull it out and re-square it, then try again.
Step 7: Reinstall the cover and glove box
- Snap the filter cover back on until both tabs click.
- Lift the glove box back up and push the sides in again to pass the stopper tabs.
- Reattach the damper arm to its peg by hand; it should click into place.
✅ After Repair
- Start the car and run the fan at medium speed to confirm strong airflow and no rattles.
- Turn on A/C and heat briefly to ensure the airflow direction feels normal.
- If you hear ticking or fluttering, the filter may not be seated—recheck the cover and filter alignment.
💰 DIY vs Shop Cost
Shop Cost: $70-$160 (parts + labor)
DIY Cost: $15-$40 (parts only)
You Save: $55-$120 by doing it yourself!
Shop labor rates vary but typically run $100-$150/hour. This repair takes a shop approximately 0.3-0.7 hours.
🎯 Ready to get started?
HowToo makes it easy: same-day/2-day shipping on every part, plus all the tools and specialty tools you need! Check out the parts and tools sections below to add everything to your cart.
Guide for Cabin Air Filter replace for these Acura vehicles
| Year Make Model | Sub Model | Engine | Body Style |
|---|---|---|---|
| 2020 Acura TLX | - | - | - |
| 2019 Acura TLX | - | - | - |
| 2018 Acura TLX | - | - | - |
| 2017 Acura TLX | - | - | - |
| 2016 Acura TLX | - | - | - |
| 2015 Acura TLX | - | - | - |