


How to Replace the Cabin Air Filter on a 2013 Ford Escape (Glove Box Method)
Step-by-step instructions with required tools/parts, airflow direction tips, and post-install checks
How to Replace the Cabin Air Filter on a 2013 Ford Escape (Glove Box Method)
Step-by-step instructions with required tools/parts, airflow direction tips, and post-install checks


🔧 Escape - Cabin Air Filter Replacement
Your Escape’s cabin air filter cleans the air going into the HVAC (heat/AC) system. Replacing it helps improve airflow, reduce odors, and keep dust/pollen out of the cabin.
Difficulty Level: Beginner | Estimated Time: 10-25 minutes
⚠️ Safety & Precautions
- 🛑 Park on level ground, shift to Park, and turn the ignition OFF.
- 🛑 Keep fingers clear of the glove box hinges when it drops down.
- 🛑 No battery disconnect required for this job.
🔧 Required Tools
You'll need the following tools for this repair:
- Flashlight
- Nitrile gloves
- Plastic trim removal tool (non-marring)
🔩 Required Parts
HowToo sells all the parts you need for this repair:
- Cabin air filter - Qty: 1
📋 Before You Begin
- 🧰 Empty the glove box so nothing falls out when you lower it.
- 🧭 Move the passenger seat back for more working room.
- 💡 Have your flashlight ready to spot the filter door.
🔨 Step-by-Step Instructions
Follow these steps in order:
Step 1: Open and lower the glove box
- Open the glove box fully using your hands.
- On the right side, unhook the glove box “damper” arm (the small strap/arm that slows the glove box). Use the plastic trim removal tool (non-marring) to gently pry it off if it’s tight. Go slow to avoid snapping the clip.
- Push the glove box sides inward (left and right) with your hands to clear the stops, then let the glove box swing downward.
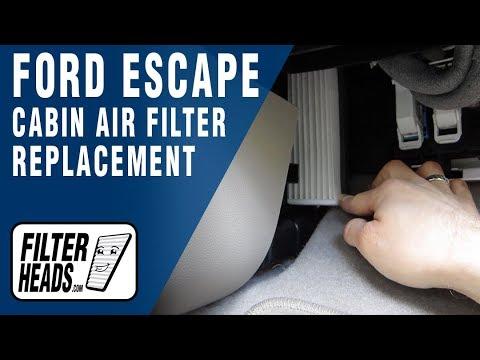
Step 2: Remove the cabin filter access door
- Look behind the lowered glove box with the flashlight.
- Find the rectangular cabin filter cover (access door) on the HVAC housing.
- Release the cover’s tabs using your fingers; if needed, use the plastic trim removal tool (non-marring) to press the tabs and pull the cover off.
Step 3: Remove the old cabin air filter
- Wear nitrile gloves (it can be dusty).
- Slide the old filter straight out by hand. If it catches, wiggle it gently and keep it level so debris doesn’t spill.
Step 4: Install the new cabin air filter
- Check the airflow arrow on the new filter (it must match the direction of airflow shown on the housing/cover).
- Slide the new filter into the slot by hand until it seats fully (no bending unless needed to start it).
Step 5: Reinstall the cover and glove box
- Reinstall the access door by hand until the tabs click into place.
- Lift the glove box back up and push the sides inward with your hands to pass the stops again.
- Reconnect the damper arm on the right side by hand (use the plastic trim removal tool (non-marring) only if you need gentle help).
- Close the glove box and confirm it opens/closes smoothly.
✅ After Repair
- 🔎 Turn the ignition ON and run the fan at different speeds to confirm strong airflow and no rattles.
- 🧼 If there’s a musty smell, run fresh air (not recirculate) for a few minutes.
💰 DIY vs Shop Cost
Shop Cost: $80-$160 (parts + labor)
DIY Cost: $15-$40 (parts only)
You Save: $40-$145 by doing it yourself!
Shop labor rates vary but typically run $100-$150/hour. This repair takes a shop approximately 0.3-0.7 hours.
🎯 Ready to get started?
HowToo makes it easy: same-day/2-day shipping on every part, plus all the tools and specialty tools you need! Check out the parts and tools sections below to add everything to your cart.
