









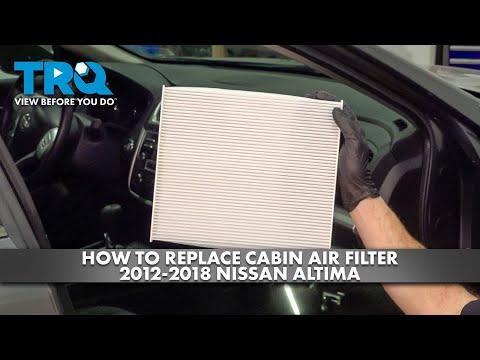







How to Replace the Cabin Air Filter on a 2013-2018 Nissan Altima
Step-by-step DIY guide with tools, filter location, airflow direction, and safety tips for 2013, 2014, 2015, 2016, 2017, 2018
How to Replace the Cabin Air Filter on a 2013-2018 Nissan Altima
Step-by-step DIY guide with tools, filter location, airflow direction, and safety tips for 2013, 2014, 2015, 2016, 2017, 2018


🔧 Altima - Cabin Air Filter Replacement
The cabin air filter cleans the air coming through your vents. On your Altima, it is located behind the passenger-side lower dash area and slides into the HVAC housing.
This is a simple beginner-friendly job, but the filter opening is a little tight, so take your time and avoid forcing the new filter.
Difficulty Level: Beginner | Estimated Time: 15-30 minutes
⚠️ Safety & Precautions
- ⚠️ Park your Altima on level ground and turn the ignition off.
- ⚠️ Do not run the blower fan while the cabin filter is removed.
- ⚠️ No battery disconnect is required for this repair.
- ⚠️ Work gently around the plastic dash panels; older clips can crack if forced.
🔧 Required Tools
You'll need the following tools for this repair:
- Phillips #2 screwdriver
- Trim removal tool
- Flashlight
- Nitrile gloves
- Safety glasses
🔩 Required Parts
HowToo sells all the parts you need for this repair:
- Cabin air filter - Qty: 1
📋 Before You Begin
- 🚗 Move the front passenger seat all the way back for more working room.
- 🔦 Use a flashlight to see under the passenger-side dash.
- 🧤 Wear gloves because the old filter may contain dust, pollen, and debris.
- 📌 A trim removal tool is a small plastic pry tool used to remove panels without scratching them.
🔨 Step-by-Step Instructions
Follow these steps in order:
Step 1: Open the passenger door and clear the work area
- Use your hands to remove any floor mats or loose items from the passenger footwell.
- Use the flashlight to look under the passenger-side dashboard, near the center console side.
- The cabin filter door is mounted on the HVAC case, which is the black plastic air box behind the dash.
Step 2: Remove the passenger lower side trim panel
- Use the trim removal tool to gently pry the passenger-side lower console trim panel away from the center console area.
- If your Altima has a small retaining screw, use the Phillips #2 screwdriver to remove it.
- Set the trim panel aside where it will not get stepped on.
- Pull straight to avoid bending clips.
Step 3: Find the cabin filter access door
- Use the flashlight to locate the narrow vertical cabin filter cover on the side of the HVAC housing.
- The cover is near the passenger-side center console area, low under the dash.
- Look for a slim rectangular plastic door with a small tab or latch.
Step 4: Remove the cabin filter access door
- Use your fingers to press the tab on the cabin filter door.
- If the tab is tight, use the trim removal tool gently to help release it.
- Pull the access door off and set it aside.
- No torque spec applies because this cover clips into place.
Step 5: Remove the old cabin air filter
- Use your fingers to pinch the exposed edge of the cabin air filter.
- Pull the filter out slowly.
- The filter may need to flex slightly as it comes out because the opening is narrow.
- Keep the dirty side facing upward as much as possible to avoid spilling debris.
- Move slowly so debris stays inside.
Step 6: Compare the old and new filters
- Use your hands to place the old and new cabin air filters side by side.
- Make sure the new filter matches the old filter shape and size.
- Check the airflow arrow on the new filter. On your Altima, install the filter with the airflow arrow pointing toward the rear of the vehicle if marked as airflow direction.
- If the filter says “UP” instead of airflow, install it with the “UP” arrow pointing upward.
Step 7: Install the new cabin air filter
- Use your hands to gently compress the new cabin air filter just enough to fit it into the opening.
- Slide it fully into the HVAC housing.
- Make sure the filter is not folded over, crushed, or sticking out of the slot.
- A slight flex is normal.
Step 8: Reinstall the access door
- Use your hands to align the cabin filter access door with the filter opening.
- Press the door into place until the latch clicks.
- If removed, use the Phillips #2 screwdriver to reinstall any small retaining screw snugly.
- Do not overtighten plastic screws. Tighten only until seated.
Step 9: Reinstall the lower trim panel
- Use your hands to align the passenger-side lower trim panel clips with their holes.
- Press the panel back into place until the clips snap in.
- If removed, use the Phillips #2 screwdriver to reinstall the retaining screw snugly.
- No torque spec applies to the plastic trim clip fasteners.
✅ After Repair
- ✅ Start your Altima and turn the blower fan on low, then medium, then high.
- ✅ Listen for rattling or flapping noises. If you hear one, turn the fan off and recheck that the filter is seated flat.
- ✅ Check airflow from the vents and confirm the A/C and heat controls work normally.
- ✅ Replace the cabin air filter about every 12,000-15,000 miles, or sooner in dusty conditions.
💰 DIY vs Shop Cost
Shop Cost: $70-$140 (parts + labor)
DIY Cost: $15-$35 (parts only)
You Save: $55-$105 by doing it yourself!
Shop labor rates vary but typically run $100-$150/hour. This repair takes a shop approximately 0.3-0.5 hours.
🎯 Ready to get started?
HowToo makes it easy: same-day/2-day shipping on every part, plus all the tools and specialty tools you need! Check out the parts and tools sections below to add everything to your cart.