









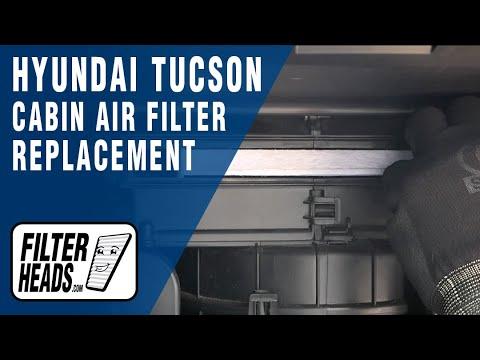





How to Replace the Cabin Air Filter on a 2010-2015 Hyundai Tucson
Step-by-step DIY guide with glove box removal, filter direction, tools, and safety tips
How to Replace the Cabin Air Filter on a 2010-2015 Hyundai Tucson
Step-by-step DIY guide with glove box removal, filter direction, tools, and safety tips for 2010, 2011, 2012, 2013, 2014, 2015


🔧 Tucson - Cabin Air Filter Replacement
This repair replaces the cabin air filter, which cleans the air coming through your heater and A/C vents. On your Tucson, the filter is located behind the glove box and is a good beginner job with no scan tool or special programming needed.
Difficulty Level: Beginner | Estimated Time: 10-20 minutes
⚠️ Safety & Precautions
- ⚠️ Park your Tucson on level ground and turn the ignition off before starting.
- ⚠️ Do not force the glove box stops or filter cover; the plastic tabs can break if bent too far.
- ⚠️ Battery disconnect is not required for this repair.
🔧 Required Tools
You'll need the following tools for this repair:
- Safety glasses
- Nitrile gloves
- Shop vacuum with crevice nozzle
- Flashlight
🔩 Required Parts
HowToo sells all the parts you need for this repair:
- Cabin air filter - Qty: 1
📋 Before You Begin
- 🚗 Move the passenger seat all the way back so you have room to work.
- 🧤 Put on nitrile gloves and safety glasses.
- 📦 Empty the glove box completely so items do not fall out when it drops down.
- 💡 Use a flashlight so you can clearly see the filter door behind the glove box.
🔨 Step-by-Step Instructions
Follow these steps in order:
Step 1: Open and Empty the Glove Box
- Use your hands to open the glove box fully.
- Remove all papers, manuals, and loose items from inside.
- Use a flashlight to look at both inside walls of the glove box.
- Keep small items in a cup.
Step 2: Release the Glove Box Stops
- Use your hands to locate the round glove box stop knobs on the left and right inside walls.
- A glove box stop is a small plastic limiter that keeps the glove box from falling open too far.
- Turn each stop knob counterclockwise by hand, then pull it inward and remove it.
- Support the glove box with one hand as the stops come out.
Step 3: Lower the Glove Box
- Use your hands to gently lower the glove box down toward the passenger floor.
- If your Tucson has a small damper arm on the side, unclip it by hand before lowering the glove box fully.
- A damper arm is a small plastic support that slows the glove box as it opens.
- Do not pull hard; the glove box should lower with light pressure.
Step 4: Remove the Cabin Filter Cover
- Use your flashlight to find the rectangular cabin filter cover behind the glove box opening.
- Use your fingers to squeeze the locking tabs on the filter cover.
- Pull the cover straight off by hand and set it aside.
- No bolts are used here, so no torque specification applies.
Step 5: Remove the Old Cabin Air Filter
- Use your fingers to slide the old cabin air filter straight out of the housing.
- Notice the airflow arrow printed on the old filter before removing it completely.
- On your Tucson, install the new filter with the airflow arrow pointing in the same direction as the old one.
- Use a shop vacuum with crevice nozzle to gently remove loose leaves or dust from the filter slot.
- Do not push dirt deeper inside.
Step 6: Install the New Cabin Air Filter
- Use your hands to slide the new cabin air filter into the housing.
- Keep the airflow arrow pointed the same way as the original filter.
- Make sure the filter sits flat and does not fold or bunch up.
- If it does not slide in easily, pull it back out and realign it.
Step 7: Reinstall the Filter Cover
- Use your hands to place the cabin filter cover back onto the housing.
- Press until the locking tabs click into place.
- Gently tug the cover by hand to make sure it is secure.
Step 8: Raise and Secure the Glove Box
- Use your hands to lift the glove box back into position.
- If equipped, reconnect the glove box damper arm by hand.
- Reinstall both glove box stop knobs by hand and turn them clockwise until seated.
- Close and open the glove box once to confirm it moves normally.
✅ After Repair
- ✅ Start your Tucson and turn the blower fan on low, medium, and high.
- ✅ Check that air comes out of the vents normally.
- ✅ Listen for rattles or fluttering, which can mean the filter is not seated flat.
- ✅ If airflow is still weak, check that the filter cover is fully latched and the filter is not installed crooked.
- ✅ Replace the cabin air filter about every 12 months or 12,000-15,000 miles, sooner in dusty conditions.
💰 DIY vs Shop Cost
Shop Cost: $60-$120 (parts + labor)
DIY Cost: $15-$35 (parts only)
You Save: $45-$85 by doing it yourself!
Shop labor rates vary but typically run $100-$150/hour. This repair takes a shop approximately 0.2-0.4 hours.
🎯 Ready to get started?
HowToo makes it easy: same-day/2-day shipping on every part, plus all the tools and specialty tools you need! Check out the parts and tools sections below to add everything to your cart.
Guide for Cabin Air Filter replace for these Hyundai vehicles
| Year Make Model | Sub Model | Engine | Body Style |
|---|---|---|---|
| 2015 Hyundai Tucson | - | - | - |
| 2014 Hyundai Tucson | - | - | - |
| 2013 Hyundai Tucson | - | - | - |
| 2012 Hyundai Tucson | - | - | - |
| 2011 Hyundai Tucson | - | - | - |
| 2010 Hyundai Tucson | - | - | - |