








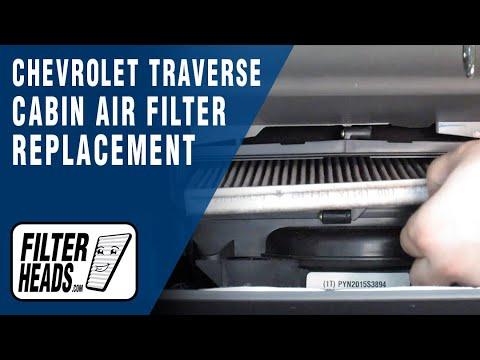






How to Replace the Cabin Air Filter on a 2009-2017 Chevrolet Traverse
Step-by-step glove box access instructions, required tools/parts, and airflow direction tips
How to Replace the Cabin Air Filter on a 2009-2017 Chevrolet Traverse
Step-by-step glove box access instructions, required tools/parts, and airflow direction tips for 2009, 2010, 2011, 2012, 2013, 2014, 2015, 2016, 2017


🔧 Traverse - Cabin Air Filter Replacement
Your Traverse’s cabin air filter cleans the air that comes through the HVAC (heat/AC) vents. Replacing it restores airflow, reduces dust/pollen, and can help with musty odors.
Difficulty Level: Beginner | Estimated Time: 0.3-0.7 hours
Assumption: Your A/C system uses the standard glove-box access panel.
⚠️ Safety & Precautions
- ⚠️ Turn the ignition OFF and remove the key before working near the passenger airbag area (above the glove box).
- ⚠️ Don’t force plastic tabs—cold plastic breaks easier; warm the cabin first if it’s chilly.
- ⚠️ Battery disconnect is not required for this job.
🔧 Required Tools
You'll need the following tools for this repair:
- Nitrile gloves
- Safety glasses
- Plastic trim removal tool (non-marring)
- Small flashlight
🔩 Required Parts
HowToo sells all the parts you need for this repair:
- Cabin air filter - Qty: 1
📋 Before You Begin
- Park on level ground and set the parking brake.
- Move the front passenger seat back for more working room.
- Empty the glove box so nothing falls out when you lower it.
🔨 Step-by-Step Instructions
Follow these steps in order:
Step 1: Open and clear the glove box
- Open the glove box fully and remove all contents.
- Use a small flashlight to look along the right side for the glove box “damper” (a small arm that slows the glove box).
Step 2: Disconnect the glove box damper
- On the right side of the glove box, gently unhook the damper from the glove box (it usually pops off a small pin).
- If it’s tight, use a plastic trim removal tool (non-marring) to gently pry it off. Go slow—small plastic clips snap.
Step 3: Lower the glove box
- Push the glove box sides inward to clear the stop tabs (the little plastic “ears” that keep it from dropping).
- Let the glove box swing downward toward the floor.
Step 4: Remove the cabin filter access cover
- Behind the lowered glove box, locate the cabin filter cover (rectangular panel).
- Release the cover tabs by hand; if needed, use the plastic trim removal tool (non-marring) to help lift a tab.
- Remove the cover and set it aside.
Step 5: Remove the old cabin air filter
- Pull the filter straight out.
- Note the airflow direction marking on the old filter (often an arrow). This matters for correct installation.
- Wear nitrile gloves—old filters can be dusty.
Step 6: Install the new cabin air filter
- Insert the new filter in the same orientation as the old one, matching the airflow arrow.
- Make sure it seats fully and isn’t folded or pinched.
Step 7: Reinstall the cover and glove box
- Reinstall the access cover until the tabs click into place.
- Lift the glove box back up, push the sides inward again, and re-seat the stop tabs.
- Reconnect the glove box damper on the right side (press it back onto its pin until it snaps on).
✅ After Repair
- Start the engine and run the blower on medium-high for 30 seconds.
- Verify airflow feels stronger and there are no rattles from the glove box area.
- If you hear ticking, re-check the filter cover is fully clipped in.
💰 DIY vs Shop Cost
Shop Cost: $90-$180 (parts + labor)
DIY Cost: $15-$45 (parts only)
You Save: $45-$150 by doing it yourself!
Shop labor rates vary but typically run $100-$150/hour. This repair takes a shop approximately 0.3-0.7 hours.
🎯 Ready to get started?
HowToo makes it easy: same-day/2-day shipping on every part, plus all the tools and specialty tools you need! Check out the parts and tools sections below to add everything to your cart.
Guide for Cabin Air Filter replace for these Chevrolet vehicles
| Year Make Model | Sub Model | Engine | Body Style |
|---|---|---|---|
| 2017 Chevrolet Traverse | - | - | - |
| 2016 Chevrolet Traverse | - | - | - |
| 2015 Chevrolet Traverse | - | - | - |
| 2014 Chevrolet Traverse | - | - | - |
| 2013 Chevrolet Traverse | - | - | - |
| 2012 Chevrolet Traverse | - | - | - |
| 2011 Chevrolet Traverse | - | - | - |
| 2010 Chevrolet Traverse | - | - | - |
| 2009 Chevrolet Traverse | - | - | - |