















How to Replace the Cabin Air Filter on a 2008-2016 Ford F-250 Super Duty (With Retrofit Option) (Engine: V8 6.2L)
Step-by-step glove box access, required tools/parts, and how to tell if your truck has a factory filter door
How to Replace the Cabin Air Filter on a 2008-2016 Ford F-250 Super Duty (With Retrofit Option) (Engine: V8 6.2L)
Step-by-step glove box access, required tools/parts, and how to tell if your truck has a factory filter door for 2008, 2009, 2010


🔧 F-250 Super Duty - Cabin Air Filter Replacement
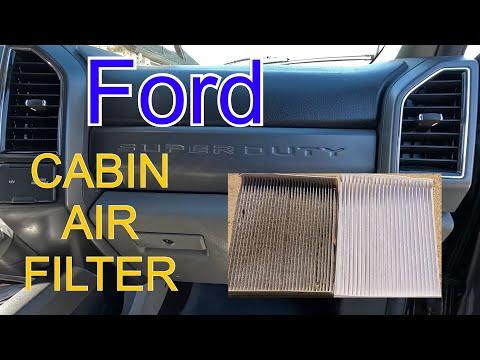
On many Super Duty trucks in this generation, a cabin air filter was not installed from the factory. If your A/C case has a small filter access door behind the glove box, you can replace it in minutes. If there’s no access door, the truck isn’t equipped (a retrofit kit is required).
Difficulty Level: Beginner | Estimated Time: 0.2-0.6 hours
⚠️ Safety & Precautions
- ⚠️ Turn the ignition OFF and remove the key before working under the dash.
- ⚠️ Use a flashlight and work slowly to avoid snapping plastic dash clips.
- ⚠️ Battery disconnect is not required for a standard filter swap.
🔧 Required Tools
You'll need the following tools for this repair:
- Trim removal tool set
- Phillips screwdriver
- 7mm socket
- 1/4" drive ratchet
- Flashlight
- Work gloves
🔩 Required Parts
HowToo sells all the parts you need for this repair:
- Cabin air filter - Qty: 1
- Cabin air filter retrofit kit - Qty: 1 (only if no factory access door)
📋 Before You Begin
- Park on level ground, shift to Park, and set the parking brake.
- Move the passenger seat back for more working room.
- Tip: Take a photo before removing anything.
🔨 Step-by-Step Instructions
Follow these steps in order:
Step 1: Access the area behind the glove box
- Open the glove box and remove all items.
- If a damper strap is attached on the right side, gently unhook it by hand or use a trim removal tool set.
- Push in on both sides of the glove box to clear the stops, then let it swing down.
Step 2: Check for a cabin filter access door
- Use a flashlight to look straight behind the glove box toward the HVAC case (the black plastic A/C housing).
- Look for a small rectangular cover/door (often held by tabs or small screws).
- If you do not see any access door or slot for a filter, your A/C case likely does not have a serviceable cabin filter without a cabin air filter retrofit kit.
Step 3: Remove the access door (if equipped)
- If the door uses tabs, release them by hand or with a trim removal tool set.
- If screws are present, remove them using a 7mm socket and 1/4" drive ratchet or a Phillips screwdriver (use the tool that matches your fasteners).
- Set the door/screws aside where they won’t get lost.
Step 4: Remove the old cabin air filter
- Slide the filter straight out with your hands (wear work gloves if it’s dirty).
- Keep it level as you pull it out to avoid dumping leaves and dust.
- Tip: Vacuum the slot if debris is visible.
Step 5: Install the new cabin air filter
- Check the airflow arrow printed on the filter frame.
- Install the new filter in the same direction the old one came out (airflow arrow must match the housing direction).
- Slide it in fully so it seats flat and doesn’t buckle.
Step 6: Reinstall the access door and glove box
- Reinstall the filter door and tighten screws snug using a 7mm socket and 1/4" drive ratchet (do not overtighten plastic).
- Lift the glove box back up, push the sides inward to pass the stops, and close it.
- Reconnect the damper strap if equipped.
Step 7: If there is no access door (retrofit note)
- A retrofit kit typically requires removing trim and cutting an outline in the HVAC case to create a filter opening.
- This is doable, but it’s more involved and must be done carefully to avoid damaging the evaporator core (the cold A/C radiator inside the case).
- Tip: If you choose retrofit, follow the kit’s template exactly.
✅ After Repair
- Start the engine and turn the blower fan to high.
- Confirm airflow is strong and there are no new rattles behind the glove box.
- If you smell dust for a minute, that’s normal as the system clears out.
💰 DIY vs Shop Cost
Shop Cost: $80-$180 (parts + labor)
DIY Cost: $15-$45 (parts only)
You Save: $65-$135 by doing it yourself!
Shop labor rates vary but typically run $100-$150/hour. This repair takes a shop approximately 0.2-0.6 hours.
🎯 Ready to get started?
HowToo makes it easy: same-day/2-day shipping on every part, plus all the tools and specialty tools you need! Check out the parts and tools sections below to add everything to your cart.
Guide for Engine Air Filter replace for these Ford vehicles
| Year Make Model | Sub Model | Engine | Body Style |
|---|---|---|---|
| 2016 Ford F-250 Super Duty | - | V8 6.2L | - |
| 2015 Ford F-250 Super Duty | - | V8 6.2L | - |
| 2014 Ford F-250 Super Duty | - | V8 6.2L | - |
| 2013 Ford F-250 Super Duty | - | V8 6.2L | - |
| 2012 Ford F-250 Super Duty | - | V8 6.2L | - |
| 2011 Ford F-250 Super Duty | - | V8 6.2L | - |
| 2010 Ford F-250 Super Duty | - | V10 6.8L | - |
| 2010 Ford F-250 Super Duty | - | V8 5.4L | - |
| 2009 Ford F-250 Super Duty | - | V10 6.8L | - |
| 2009 Ford F-250 Super Duty | - | V8 5.4L | - |
| 2008 Ford F-250 Super Duty | - | V10 6.8L | - |
| 2008 Ford F-250 Super Duty | - | V8 5.4L | - |