









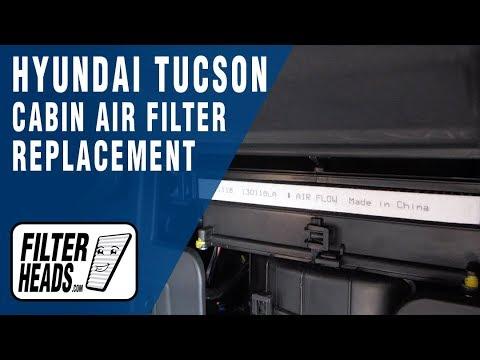






How to Replace the Cabin Air Filter on a 2005-2015 Hyundai Tucson (Engine: Inline 4 2.0L)
Step-by-step DIY guide with tools, filter orientation, glove box access, and safety tips
How to Replace the Cabin Air Filter on a 2005-2015 Hyundai Tucson (Engine: Inline 4 2.0L)
Step-by-step DIY guide with tools, filter orientation, glove box access, and safety tips for 2005, 2006, 2007, 2008, 2009, 2011, 2012, 2013, 2014, 2015


🔧 Tucson - Cabin Air Filter Replacement
Replacing the cabin air filter on your Tucson is a beginner-friendly job done from behind the glove box. A fresh cabin filter helps improve airflow from the vents and reduces dust, pollen, and odors inside the cabin.
Difficulty Level: Beginner | Estimated Time: 10-20 minutes
⚠️ Safety & Precautions
- ⚠️ Park your Tucson on level ground and switch the ignition off before starting.
- ⚠️ Do not force the glove box stops; the plastic can crack if bent too far.
- ⚠️ Empty the glove box first so items do not fall out when it drops down.
- ⚠️ Battery disconnect is not required for this repair.
🔧 Required Tools
You'll need the following tools for this repair:
- Safety glasses
- Nitrile gloves
- Shop vacuum with crevice nozzle
- Clean microfiber towel
- Flashlight
🔩 Required Parts
HowToo sells all the parts you need for this repair:
- Cabin air filter - Qty: 1
📋 Before You Begin
- ✅ Move the front passenger seat back to give yourself more room.
- ✅ Open the passenger door fully for better access to the glove box.
- ✅ Empty the glove box completely.
- ✅ A cabin air filter sits in the HVAC box, which is the plastic air-handling unit behind the dashboard.
- ✅ Note the airflow arrow on the old filter before removal. This arrow shows the direction air passes through the filter.
🔨 Step-by-Step Instructions
Follow these steps in order:
Step 1: Open and Empty the Glove Box
- Use your hands to open the glove box fully.
- Remove all items from the glove box so nothing spills when the box drops down.
- Use a flashlight to look inside the glove box area before removing the stops.
- Put small items in a cup.
Step 2: Release the Glove Box Stops
- Use your hands to locate the round glove box stop knobs on the left and right inner sides of the glove box.
- Turn each stop knob counterclockwise by hand until it releases.
- Pull both stop knobs out and set them aside.
- Support the glove box with one hand so it does not drop suddenly.
Step 3: Lower the Glove Box
- Use your hands to gently lower the glove box downward.
- If your Tucson has a small glove box damper arm on the right side, unclip it by hand from the glove box peg.
- A damper arm is a small plastic link that slows the glove box as it opens.
- Let the glove box hang down carefully to expose the cabin filter cover behind it.
Step 4: Remove the Cabin Filter Cover
- Use your fingers to press the tabs on both sides of the rectangular cabin filter cover.
- Pull the cover straight outward by hand.
- Set the cover aside with the tabs facing up so you remember its position.
- No bolts are used here, so no torque spec applies.
Step 5: Remove the Old Cabin Air Filter
- Use your fingers to slide the old cabin air filter straight out of the filter slot.
- Watch for the airflow arrow printed on the side of the old filter.
- On this Tucson, cabin airflow is typically downward through the filter, so the arrow should usually point down.
- Use a shop vacuum with crevice nozzle to remove loose leaves or dust from the filter opening.
- Use a clean microfiber towel to wipe the edge of the filter housing if dusty.
- Do not push debris deeper inside.
Step 6: Install the New Cabin Air Filter
- Use your hands to slide the new cabin air filter into the housing.
- Match the airflow arrow direction to the old filter’s orientation.
- If the old filter was missing or installed incorrectly, install the new filter with the airflow arrow pointing downward.
- Make sure the filter sits flat and fully inside the slot.
- Do not fold or crush the filter frame.
Step 7: Reinstall the Cabin Filter Cover
- Use your hands to position the cabin filter cover over the opening.
- Push the cover straight in until both side tabs click into place.
- Gently tug the cover by hand to confirm it is locked.
- No torque spec applies because the cover clips on by hand.
Step 8: Raise and Secure the Glove Box
- Use your hands to lift the glove box back into position.
- If equipped, reconnect the glove box damper arm by pushing it back onto its peg by hand.
- Reinstall both glove box stop knobs by hand.
- Turn the stop knobs clockwise until seated.
- Open and close the glove box once to confirm smooth movement.
✅ After Repair
- ✅ Start your Tucson and turn the blower fan to low, medium, and high speeds.
- ✅ Check that air flows normally from the vents.
- ✅ Listen for rattles or fluttering that could mean the filter is not seated flat.
- ✅ If airflow is weak, recheck that the filter is fully inserted and the cover is clipped shut.
- ✅ Replace the cabin air filter about every 12,000-15,000 miles, or sooner in dusty conditions.
💰 DIY vs Shop Cost
Shop Cost: $50-$100 (parts + labor)
DIY Cost: $15-$35 (parts only)
You Save: $35-$65 by doing it yourself!
Shop labor rates vary but typically run $100-$150/hour. This repair takes a shop approximately 0.2-0.4 hours.
🎯 Ready to get started?
HowToo makes it easy: same-day/2-day shipping on every part, plus all the tools and specialty tools you need! Check out the parts and tools sections below to add everything to your cart.
Guide for Cabin Air Filter replace for these Hyundai vehicles
| Year Make Model | Sub Model | Engine | Body Style |
|---|---|---|---|
| 2015 Hyundai Tucson | - | Inline 4 2.0L | - |
| 2015 Hyundai Tucson | - | Inline 4 2.4L | - |
| 2014 Hyundai Tucson | - | Inline 4 2.0L | - |
| 2014 Hyundai Tucson | - | Inline 4 2.4L | - |
| 2013 Hyundai Tucson | - | Inline 4 2.0L | - |
| 2013 Hyundai Tucson | - | Inline 4 2.4L | - |
| 2012 Hyundai Tucson | - | Inline 4 2.0L | - |
| 2012 Hyundai Tucson | - | Inline 4 2.4L | - |
| 2011 Hyundai Tucson | - | Inline 4 2.0L | - |
| 2011 Hyundai Tucson | - | Inline 4 2.4L | - |
| 2010 Hyundai Tucson | - | Inline 4 2.4L | - |
| 2009 Hyundai Tucson | - | Inline 4 2.0L | - |
| 2009 Hyundai Tucson | - | V6 2.7L | - |
| 2008 Hyundai Tucson | - | Inline 4 2.0L | - |
| 2008 Hyundai Tucson | - | V6 2.7L | - |
| 2007 Hyundai Tucson | - | Inline 4 2.0L | - |
| 2007 Hyundai Tucson | - | V6 2.7L | - |
| 2006 Hyundai Tucson | - | Inline 4 2.0L | - |
| 2006 Hyundai Tucson | - | V6 2.7L | - |
| 2005 Hyundai Tucson | - | Inline 4 2.0L | - |
| 2005 Hyundai Tucson | - | V6 2.7L | - |