









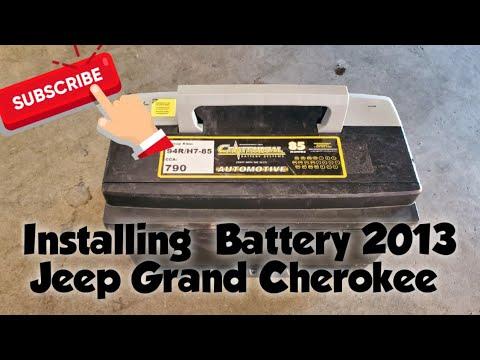






How to Replace the Battery on a 2013 Jeep Grand Cherokee (Under Passenger Seat)
Step-by-step DIY instructions with tools, parts, safety tips, and proper disconnect/reconnect order for 2011, 2013, 2014, 2015, 2016, 2017, 2018, 2019, 2020, 2021, 2022, 2023, 2024
How to Replace the Battery on a 2013 Jeep Grand Cherokee (Under Passenger Seat)
Step-by-step DIY instructions with tools, parts, safety tips, and proper disconnect/reconnect order for 2011, 2013, 2014, 2015, 2016, 2017, 2018, 2019, 2020, 2021, 2022, 2023, 2024


🔧 Grand Cherokee - Battery Replacement
On your Grand Cherokee, the 12V battery is located under the front passenger seat. The job is mostly access and careful disconnect/reconnect so you don’t damage electronics or short the battery.
Difficulty Level: Beginner | Estimated Time: 0.5-1.0 hours
⚠️ Safety & Precautions
- ⚠️ Keep metal tools off both terminals at once; it can short.
- ⚠️ Remove rings/watches before starting.
- ⚠️ Always disconnect the negative (–) terminal first, reconnect it last.
- ⚠️ Battery acid is corrosive; wear gloves and eye protection.
- ⚠️ Keep the key fob away from the vehicle while you work.
- ⚠️ Battery disconnect is recommended for this repair.
🔧 Required Tools
You'll need the following tools for this repair:
- 10mm socket
- 13mm socket
- 1/4" drive ratchet
- 3" extension for 1/4" drive
- Trim clip tool
- Torque wrench (inch-pound) (specialty)
- Battery terminal brush
- Nitrile gloves
- Safety glasses
- Shop rags
🔩 Required Parts
HowToo sells all the parts you need for this repair:
- 12V battery (match the group size and type shown on your old battery label; AGM if your original is AGM) - Qty: 1
- Battery terminal anti-corrosion spray - Qty: 1
- Battery terminal felt washers (red/black) - Qty: 1
📋 Before You Begin
- Park on level ground, shift to Park, and remove the key fob from the cabin.
- Open the hood and keep it open (you’ll be working inside, but this helps access and light).
- Move the front passenger seat all the way back and up to maximize access.
- Turn off all accessories and make sure interior lights are off.
- Tip: Take a photo of terminal routing first.
🔨 Step-by-Step Instructions
Follow these steps in order:
Step 1: Access the battery under the passenger seat
- Use the seat power controls to slide the passenger seat fully rearward and raise it.
- Use a trim clip tool to carefully lift/remove the battery access cover (if equipped) under the seat area.
Step 2: Disconnect the negative (–) battery terminal
- Use a 10mm socket with a 1/4" drive ratchet to loosen the negative terminal clamp nut.
- Wiggle the clamp up and off the battery post (do not pry hard on the post).
- Wrap the negative cable end in a shop rag so it can’t spring back onto the post.
- Tip: Negative off first prevents accidental shorts.
Step 3: Disconnect the positive (+) battery terminal
- Use a 10mm socket to loosen the positive terminal clamp nut.
- Remove the clamp from the positive post and position it safely so it cannot touch metal.
Step 4: Remove the battery hold-down
- Locate the battery hold-down clamp at the base of the battery.
- Use a 13mm socket, 3" extension for 1/4" drive, and 1/4" drive ratchet to remove the hold-down bolt.
- Set the hold-down parts aside where you won’t lose them.
Step 5: Remove the old battery
- With nitrile gloves and safety glasses on, lift the battery straight up and out.
- Use a shop rag to clean any debris in the battery tray.
Step 6: Clean and prep the terminals
- Use a battery terminal brush to clean the inside of both cable clamps until shiny metal is visible.
- Install new battery terminal felt washers if you’re using them (red on +, black on –).
Step 7: Install the new battery and secure it
- Place the new battery in the tray in the same orientation as the original.
- Reinstall the hold-down clamp and bolt using a 13mm socket.
- Use a torque wrench (inch-pound) (specialty) to tighten the hold-down to the factory specification for your A4—sorry, for your Grand Cherokee (if you want, share a clear photo of the hold-down bolt area and I’ll confirm the exact spec for your setup).
Step 8: Reconnect the positive (+) terminal first
- Install the positive clamp onto the positive post.
- Use a 10mm socket to tighten the clamp nut to the factory specification.
- Apply battery terminal anti-corrosion spray after tightening.
Step 9: Reconnect the negative (–) terminal last
- Install the negative clamp onto the negative post.
- Use a 10mm socket to tighten the clamp nut to the factory specification.
- Apply battery terminal anti-corrosion spray after tightening.
Step 10: Reinstall the battery access cover and return the seat
- Reinstall the access cover using your hands and the trim clip tool if needed.
- Move the passenger seat back to your normal position.
✅ After Repair
- Start your Grand Cherokee and confirm it cranks strongly.
- Check for warning lights; some modules may need a short drive to re-learn after battery power loss.
- Set the clock and reprogram radio presets if they were lost.
- Verify power seats, windows, and locks operate normally.
- Tip: If it cranks slow, recheck clamp tightness.
💰 DIY vs Shop Cost
Shop Cost: $250-$450 (parts + labor)
DIY Cost: $180-$350 (parts only)
You Save: $70-$150 by doing it yourself!
Shop labor rates vary but typically run $100-$150/hour. This repair takes a shop approximately 0.5-1.0 hours.
🎯 Ready to get started?
HowToo makes it easy: same-day/2-day shipping on every part, plus all the tools and specialty tools you need! Check out the parts and tools sections below to add everything to your cart.