








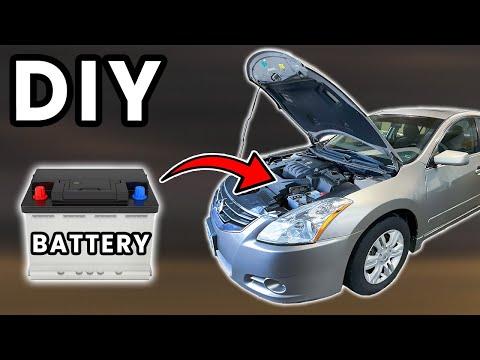







How to Replace the Battery on a 2007 Nissan Altima (12V Battery Change Guide)
Step-by-step battery removal and installation with tools, parts list, torque specs, and safety tips for 1993, 1994, 1995
How to Replace the Battery on a 2007 Nissan Altima (12V Battery Change Guide)
Step-by-step battery removal and installation with tools, parts list, torque specs, and safety tips for 1993, 1994, 1995


🔧 Altima - Battery Replacement
Your Altima’s 12V battery provides power to start the engine and run the car’s electronics. Replacing it is straightforward: remove the old battery safely, clean the connections, and install the new one with the correct polarity.
Difficulty Level: Beginner | Estimated Time: 0.5-1.0 hours
⚠️ Safety & Precautions
- ⚠️ Wear eye protection and gloves—battery acid is corrosive.
- ⚠️ Remove metal jewelry (rings/watches) to prevent accidental short circuits.
- ⚠️ Always disconnect the negative (-) terminal first and reconnect it last.
- ⚠️ Keep tools from touching both battery terminals at the same time.
- ⚠️ Keep the battery upright—do not tip it.
🔧 Required Tools
You'll need the following tools for this repair:
- Safety glasses
- Nitrile gloves
- 10mm wrench
- 10mm socket
- 3/8" drive ratchet
- 6" extension (3/8")
- 12mm socket
- Battery terminal brush
- Small wire brush
- Torque wrench (in-lb or Nm)
- Shop rags
🔩 Required Parts
HowToo sells all the parts you need for this repair:
- 12V car battery (correct group size for Altima) - Qty: 1
- Battery terminal anti-corrosion felt washers - Qty: 2
- Battery terminal protectant spray - Qty: 1
📋 Before You Begin
- Park on level ground, shift to neutral, set the parking brake, and turn the ignition OFF.
- Open the hood and let the engine bay cool if it was recently driven.
- Have your radio presets/clock in mind—some settings may reset after battery replacement.
- Tip: Take a quick photo of the battery terminals.
🔨 Step-by-Step Instructions
Follow these steps in order:
Step 1: Locate the battery and identify terminals
- Open the hood and find the battery at the front of the engine bay.
- Identify negative (-) (usually black cable) and positive (+) (often under a red cover).
Step 2: Disconnect the negative (-) terminal
- Use a 10mm wrench to loosen the negative terminal clamp nut.
- Wiggle the clamp and lift it off the negative post.
- Tuck the cable to the side so it can’t spring back onto the battery.
- Tip: Negative off first prevents accidental sparks.
Step 3: Disconnect the positive (+) terminal
- If there’s a protective cover, open it by hand.
- Use a 10mm wrench to loosen the positive terminal clamp nut.
- Remove the clamp from the positive post and position the cable safely aside.
Step 4: Remove the battery hold-down bracket
- Use a 10mm socket with a 3/8" ratchet and 6" extension to remove the hold-down nuts/bolts.
- If your hold-down hardware uses a different size, use a 12mm socket.
- Lift off the hold-down bracket and set it aside.
Step 5: Remove the old battery
- Lift the battery straight up and out (it’s heavy).
- Keep it upright and place it on the ground away from the car.
Step 6: Clean the terminals and tray
- Use a shop rag to wipe debris from the tray.
- Use a battery terminal brush to clean the inside of each terminal clamp until shiny.
- Use a small wire brush to clean any crusty corrosion on the hold-down bracket if needed.
- Tip: Clean metal-to-metal contact helps starting.
Step 7: Install the new battery
- Set the new battery into the tray in the same orientation as the old one.
- Reinstall the hold-down bracket using a 10mm socket (or 12mm socket if needed).
- Use a torque wrench to tighten the hold-down nuts: Torque to 7.2 Nm (64 in-lb).
Step 8: Reconnect terminals (positive first, negative last)
- Install anti-corrosion washers (if using) on the battery posts by hand.
- Reconnect the positive (+) terminal first. Use a 10mm wrench to tighten: Torque to 5.4 Nm (48 in-lb).
- Reconnect the negative (-) terminal last. Use a 10mm wrench to tighten: Torque to 5.4 Nm (48 in-lb).
- Spray a light coat of battery terminal protectant on the connections.
- Tip: Don’t over-tighten—battery posts can crack.
✅ After Repair
- Start the engine and confirm it cranks strongly.
- Check that the battery warning light is OFF.
- Turn the steering wheel lock-to-lock once (helps some systems re-initialize).
- Reset the clock and radio presets as needed.
- If idle is rough for a short time, let it idle a few minutes and take a short drive—this can be normal after a battery disconnect.
- Recycle the old battery—most parts stores take it back (often with a core credit).
💰 DIY vs Shop Cost
Shop Cost: $180-$350 (parts + labor)
DIY Cost: $120-$260 (parts only)
You Save: $60-$150 by doing it yourself!
Shop labor rates vary but typically run $100-$150/hour. This repair takes a shop approximately 0.5-1.0 hours.
🎯 Ready to get started?
HowToo makes it easy: same-day/2-day shipping on every part, plus all the tools and specialty tools you need! Check out the parts and tools sections below to add everything to your cart.