
















How to replace the Alternator (Trim: SE | Engine: Inline 4 2.0L | Body: Sport Utility) on a 2016 Ford Escape
Tools, parts list, belt removal tips, wiring steps, and key torque specs for a safe alternator swap
How to replace the Alternator (Trim: SE | Engine: Inline 4 2.0L | Body: Sport Utility) on a 2016 Ford Escape
Tools, parts list, belt removal tips, wiring steps, and key torque specs for a safe alternator swap for 2013, 2014, 2015, 2016


🔧 Escape - Alternator Replacement
The alternator makes electricity to keep your battery charged and power the vehicle while the engine runs. On your Escape, replacement involves removing the drive belt, unplugging the alternator wiring, unbolting the alternator, and reinstalling everything with correct belt routing.
Difficulty Level: Intermediate | Estimated Time: 1.5-3.0 hours
⚠️ Safety & Precautions
- ⚠️ Disconnect the negative battery cable first to prevent electrical shorts.
- ⚠️ Let the engine cool; the radiator, exhaust, and belt area can burn you.
- ⚠️ Support the Escape with jack stands; never rely on a floor jack alone.
- ⚠️ Keep fingers/hair/clothing away from the belt path during checks.
- ⚠️ Do not pry on plastic connectors; use the release tabs.
🔧 Required Tools
You'll need the following tools for this repair:
- Safety glasses
- Mechanic gloves
- Floor jack (rated 2-ton minimum)
- Jack stands (rated 2-ton minimum)
- Wheel chocks
- 8mm socket
- 10mm socket
- 13mm socket
- 15mm socket
- 1/4" drive ratchet
- 3/8" drive ratchet
- 3/8" drive torque wrench (10–80 ft-lbs)
- 6" socket extension
- Serpentine belt tool (specialty)
- Flat trim clip tool
- Flathead screwdriver
- Flashlight
🔩 Required Parts
HowToo sells all the parts you need for this repair:
- Alternator (2.5L) - Qty: 1
- Serpentine belt - Qty: 1 Recommended if belt is aged/cracked
📋 Before You Begin
- Park on level ground, shift to Park, and set the parking brake.
- Open the hood and take a quick photo of the belt routing (or draw a simple diagram).
- Disconnect the battery: use a 10mm socket to remove the negative (-) cable and tuck it aside so it can’t spring back.
- Chock a rear wheel with wheel chocks.
🔨 Step-by-Step Instructions
Follow these steps in order:
Assumption: This procedure is written for the 2.5L with alternator accessible from the passenger-side/front area; some covers and fastener locations can vary slightly by production date.
Step 1: Raise and support the front-right corner
- Use a floor jack (rated 2-ton minimum) to lift at the front-right jacking point.
- Set the Escape down onto jack stands (rated 2-ton minimum).
- Remove the right-front wheel using a 19mm lug wrench if available; if you’re using sockets, use the correct size for your lug nuts.
Step 2: Remove the right-front splash shield (inner fender)
- Use a flat trim clip tool and flathead screwdriver to remove plastic push-clips.
- Use an 8mm socket to remove any small screws.
- Pull the shield back to expose the belt and alternator area.
Step 3: Relieve belt tension and remove the serpentine belt
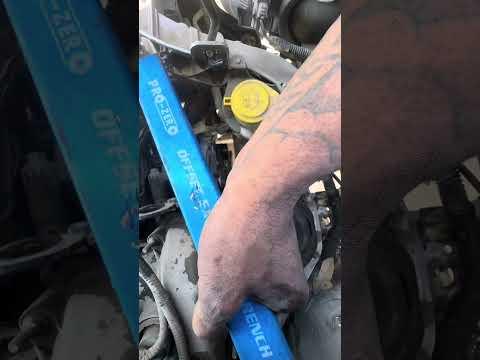
- Place a serpentine belt tool (specialty) with the correct socket on the belt tensioner bolt.
- Rotate the tensioner to release tension, then slide the belt off one pulley.
- Slowly let the tensioner return to rest. Don’t let it snap back
- Remove the belt from the alternator pulley and set it aside.
- A serpentine belt tool is a long, thin ratchet made for tight spaces.
Step 4: Disconnect alternator electrical connections
- Unplug the alternator connector by pressing the tab and pulling straight off.
- Remove the alternator B+ power cable nut using a 10mm socket (some units use 13mm socket).
- Lift off the cable and move it aside. Keep it from touching metal
Step 5: Remove the alternator mounting bolts
- Use a 13mm socket, 3/8" drive ratchet, and a 6" socket extension to remove the alternator mounting bolts.
- Support the alternator with one hand as the last bolt comes out.
- Carefully work the alternator out through the wheel well opening.
Step 6: Install the new alternator
- Position the new alternator in place and hand-start all mounting bolts using a 13mm socket and fingers first (prevents cross-threading).
- Tighten the mounting bolts with a 3/8" drive torque wrench: Torque to 45 Nm (33 ft-lbs).
Step 7: Reconnect alternator wiring
- Install the B+ cable and nut using a 10mm socket (or 13mm socket if equipped): Torque to 10 Nm (89 in-lbs).
- Plug in the alternator connector until it clicks.
Step 8: Reinstall the serpentine belt
- Route the belt per your photo/diagram, leaving the easiest pulley for last.
- Use the serpentine belt tool (specialty) to rotate the tensioner and slip the belt fully onto the last pulley.
- Visually confirm the belt is centered in every pulley groove.
Step 9: Reinstall splash shield and wheel
- Reinstall the inner fender/splash shield using the 8mm socket and the clips with a flat trim clip tool.
- Reinstall the wheel and snug lug nuts evenly.
- Lower the Escape off the jack stands (rated 2-ton minimum) using the floor jack (rated 2-ton minimum).
- Tighten lug nuts in a star pattern to Torque to 135 Nm (100 ft-lbs).
Step 10: Reconnect the battery
- Reconnect the negative battery cable using a 10mm socket.
- Tighten to snug (do not over-tighten and crack the terminal).
✅ After Repair
- Start the engine and confirm the battery/charging warning light is off.
- Listen for belt squeal; if you hear it, shut off and re-check belt alignment.
- With a basic multimeter, check charging voltage at the battery: about 13.5–14.8V with the engine running.
- Re-check that the alternator power cable is tight and the rubber boot (if equipped) covers the terminal.
💰 DIY vs Shop Cost
Shop Cost: $550-$950 (parts + labor)
DIY Cost: $180-$450 (parts only)
You Save: $370-$500 by doing it yourself!
Shop labor rates vary but typically run $100-$150/hour. This repair takes a shop approximately 1.5-3.0 hours.
🎯 Ready to get started?
HowToo makes it easy: same-day/2-day shipping on every part, plus all the tools and specialty tools you need! Check out the parts and tools sections below to add everything to your cart.
Guide for Alternator replace for these Ford vehicles
| Year Make Model | Sub Model | Engine | Body Style |
|---|---|---|---|
| 2016 Ford Escape | S | Inline 4 2.5L | Sport Utility |
| 2016 Ford Escape | SE | Inline 4 2.0L | Sport Utility |
| 2016 Ford Escape | Titanium | Inline 4 2.0L | Sport Utility |
| 2016 Ford Escape | SE | Inline 4 2.5L | Sport Utility |
| 2015 Ford Escape | S | Inline 4 2.5L | Sport Utility |
| 2015 Ford Escape | SE | Inline 4 2.0L | Sport Utility |
| 2015 Ford Escape | Titanium | Inline 4 2.0L | Sport Utility |
| 2015 Ford Escape | SE | Inline 4 2.5L | Sport Utility |
| 2014 Ford Escape | S | Inline 4 2.5L | Sport Utility |
| 2014 Ford Escape | SE | Inline 4 2.0L | Sport Utility |
| 2014 Ford Escape | Titanium | Inline 4 2.0L | Sport Utility |
| 2013 Ford Escape | S | Inline 4 2.5L | Sport Utility |
| 2013 Ford Escape | SE | Inline 4 2.0L | Sport Utility |
| 2013 Ford Escape | SEL | Inline 4 2.0L | Sport Utility |
| 2013 Ford Escape | Titanium | Inline 4 2.0L | Sport Utility |