









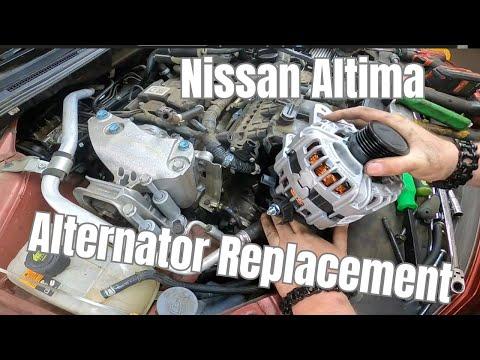






How to Replace the Alternator on a 2020 Nissan Altima 2.5L AWD
Step-by-step DIY alternator replacement with tools, parts list, safety tips, and detailed instructions for 2019, 2020, 2021, 2022
How to Replace the Alternator on a 2020 Nissan Altima 2.5L AWD
Step-by-step DIY alternator replacement with tools, parts list, safety tips, and detailed instructions for 2019, 2020, 2021, 2022


🔧 Altima - Alternator Replacement
You’ll be removing the old alternator from the front of the engine, swapping it for a new unit, and reinstalling the drive belt. This restores proper battery charging and prevents stalling or no-start issues.
Difficulty Level: Intermediate | Estimated Time: 2–3 hours
⚠️ Safety & Precautions
- ⚠️ Always disconnect the negative battery cable before working; the alternator has live power and can cause dangerous sparks.
- ⚠️ Let the engine cool completely; you’ll be working near hot metal and the exhaust.
- ⚠️ Use jack stands anytime the car is lifted; never rely only on a floor jack.
- ⚠️ Keep metal tools away from the battery positive terminal and alternator B+ stud to avoid short circuits.
- ⚠️ Wear safety glasses and gloves; you’ll work under the car and around tight spaces.
- ⚠️ Do not pry on the serpentine belt tensioner with a screwdriver; only use the proper wrench or serpentine belt tool.
🔧 Required Tools
You'll need the following tools for this repair:
- 🔧 Floor jack (rated 3-ton minimum)
- 🔧 Jack stands (rated 3-ton minimum)
- 🔧 Wheel chocks
- 🔧 Ratchet 3/8" drive
- 🔧 Ratchet 1/2" drive
- 🔧 Metric socket set (8mm–19mm)
- 🔧 Metric combination wrench set (8mm–19mm)
- 🔧 Serpentine belt tool or long-handle 3/8" drive breaker bar (specialty)
- 🔧 Torque wrench 3/8" drive (inch-lb and ft-lb range)
- 🔧 Small flathead screwdriver
- 🔧 Trim clip removal tool or panel popper
- 🔧 Pry bar small
- 🔧 Work light
- 🔧 Fender cover
- 🔧 Safety glasses
- 🔧 Mechanic gloves
🔩 Required Parts
HowToo sells all the parts you need for this repair:
- 🔩 Alternator (for 2.5L engine with AWD) - Qty: 1
- 🔩 Serpentine drive belt - Qty: 1
- 🔩 Alternator mounting bolts (hardware kit, if corroded) - Qty: 1 set
- 🔩 Battery terminal cleaning brush - Qty: 1
- 🔩 Dielectric grease - Qty: 1 small tube
- 🔩 Anti-seize compound - Qty: 1 small tube
- 🔩 Disposable shop towels - Qty: 1 pack
📋 Before You Begin
- Park your Altima on level ground, set the parking brake, and place wheel chocks behind the rear wheels.
- Open the hood and remove any loose items from the engine bay area.
- Turn ignition OFF and remove the key; make sure all lights and accessories are off.
- Disconnect the negative battery terminal using a 10mm wrench, and tuck the cable so it cannot spring back.
- Have your new alternator and belt laid out and compare the pulley size, mounting points, and connectors to your old ones before starting.
🔨 Step-by-Step Instructions
Follow these steps in order:
Step 1: Lift and secure the front of the car
- Use the floor jack at the front jacking point to raise the front of your Altima.
- Place jack stands under the factory pinch welds on both sides and slowly lower the car onto the stands.
- Leave the floor jack just touching the support point as backup, but do not rely on it alone.
- Always shake the car lightly to confirm stability.
Step 2: Remove the right front wheel and splash shield
- Use a 19mm socket and 1/2" ratchet to loosen the right front wheel lug nuts and remove the wheel.
- Turn the steering fully to the left for better access to the inner fender.
- Use a trim clip removal tool or flathead screwdriver to remove plastic clips from the right front inner fender splash shield.
- Use a 10mm socket to remove any small bolts securing the splash shield, then remove the shield to expose the side of the engine and belt area.
Step 3: Remove upper engine cover and air intake ducting
- Under the hood, lift off the plastic engine cover (it pulls straight up off rubber grommets).
- Use a flathead screwdriver to loosen the hose clamp at the air intake tube (near the air filter box or throttle body).
- Unclip any electrical connectors or small hoses on the intake duct gently by hand or with the flathead screwdriver.
- Remove the intake duct so you can see and reach the alternator from above.
Step 4: Relieve serpentine belt tension and remove belt from alternator
- The serpentine belt is the long rubber belt that drives the alternator and other accessories.
- Locate the belt tensioner from the wheel well opening; it is a spring-loaded pulley.
- Use a serpentine belt tool or long 3/8" breaker bar in the tensioner square hole or on the tensioner bolt head (usually 14mm) and rotate it to relieve belt tension.
- While holding tension off with the tool, slip the belt off the alternator pulley using your other hand.
- Slowly release the tensioner back to its resting position.
- Take a picture of the belt routing before removing it.
Step 5: Disconnect wiring from the alternator
- From above and/or through the wheel well, locate the back of the alternator.
- Use a 10mm socket to remove the nut on the large main power cable (B+ terminal) on the back of the alternator, then lift the cable off and set it aside.
- Use a flathead screwdriver to gently lift the locking tab for the small electrical plug (field/LIN connector), then unplug it by hand.
- Inspect the connectors for corrosion and clean lightly with a towel if needed.
Step 6: Remove alternator mounting bolts
- Locate the alternator mounting bolts (usually one upper and one or two lower bolts).
- Use a 14mm socket and 3/8" ratchet to remove the upper mounting bolt.
- From the wheel well, use the same 14mm socket to remove the lower mounting bolt(s). You may need a short extension for access.
- Support the alternator with one hand as you remove the last bolt so it does not drop suddenly.
- When reinstalling later, tighten these bolts to manufacturer specification (refer to service data; do not overtighten).
Step 7: Remove the alternator from the engine bay
- Once the bolts are out, the alternator may still be snug in its bracket.
- Use a small pry bar carefully between the alternator and bracket to break it loose if needed. Do not pry on thin aluminum parts.
- Work the alternator out either upward from the top or downward through the wheel well opening, whichever gives more space.
- Rotate the alternator as needed to snake it out.
Step 8: Prepare and install the new alternator
- Compare the new alternator to the old one: mounting ears, pulley, and plugs must match.
- Apply a light film of anti-seize compound on the alternator mounting ears where they contact the bracket.
- Position the new alternator into the bracket by feeding it in the same way the old one came out.
- Install the upper mounting bolt by hand first (no tools yet), then the lower bolt(s) by hand to avoid cross-threading.
- Use a 14mm socket and ratchet to snug all bolts, then use a torque wrench to tighten each to manufacturer specification.
Step 9: Reconnect alternator wiring
- Push the small electrical connector into the new alternator until it clicks.
- Place the main power cable onto the B+ stud.
- Install the B+ nut using a 10mm socket and gently snug it; then use a torque wrench to tighten to manufacturer specification (do not overtighten; you can strip the stud).
- Apply a small dab of dielectric grease on the external connection if desired to help prevent corrosion.
Step 10: Install the new serpentine belt
- Route the new belt according to the belt routing diagram sticker under the hood, or your photo from earlier.
- Make sure the belt sits fully in the grooves on each pulley and is not twisted.
- Use the serpentine belt tool or breaker bar again to rotate the tensioner and create slack.
- Slip the belt over the alternator pulley last, then slowly release the tensioner.
- Double-check from both top and wheel well that the belt is centered on every pulley.
Step 11: Reinstall intake ducting and engine cover
- Reinstall the air intake duct into position.
- Reconnect any hoses and electrical connectors you removed.
- Use a flathead screwdriver to tighten the intake hose clamp.
- Press the engine cover back down onto its mounting grommets until it clicks into place.
Step 12: Reinstall splash shield and wheel
- Reinstall the inner fender splash shield using the original plastic clips and any 10mm bolts with a 10mm socket.
- Reinstall the right front wheel and hand-thread the lug nuts.
- Use a 19mm socket and ratchet to snug the lug nuts in a star pattern.
- Raise the car slightly with the floor jack, remove the jack stands, then lower the car to the ground.
- Use a torque wrench with 19mm socket to tighten lug nuts to manufacturer specification in a star pattern.
Step 13: Reconnect the battery
- Clean the battery terminals with a battery terminal brush if corroded.
- Reconnect the negative battery cable and tighten the nut with a 10mm wrench to snug plus a little more (do not overtighten).
- Apply a thin coat of dielectric grease on the terminals if available.
✅ After Repair
- Start your Altima and watch the instrument cluster; confirm the battery/charging warning light turns off after starting.
- Listen for any unusual belt squeals or grinding; if you hear noise, shut off the engine and recheck belt routing and bolt tightness.
- Use a multimeter (if you have one) to check voltage at the battery with the engine running; it should typically be around 13.5–14.5 volts.
- Turn on headlights, rear defogger, and blower fan; verify the engine runs smoothly and lights do not dim significantly.
- Your Altima’s ECU should adapt automatically; no special scan-tool coding is typically required for the alternator.
💰 DIY vs Shop Cost
Shop Cost: $650–$950 (parts + labor)
DIY Cost: $250–$450 (parts only)
You Save: $400–$500 by doing it yourself!
Shop labor rates vary but typically run $100–$150/hour. This repair takes a shop approximately 1.5–2.0 hours.
🎯 Ready to get started?
HowToo makes it easy: same-day/2-day shipping on every part, plus all the tools and specialty tools you need! Check out the parts and tools sections below to add everything to your cart.