









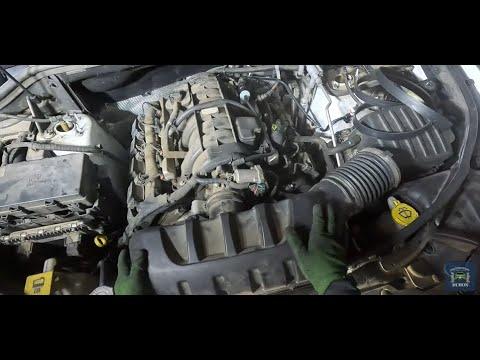




How to Replace the Alternator on a 2019 Jeep Grand Cherokee 5.7L HEMI
Step-by-step DIY alternator replacement with tools, parts list, torque specs, safety tips, and cost savings for 2016, 2017, 2018, 2019, 2020, 2021
How to Replace the Alternator on a 2019 Jeep Grand Cherokee 5.7L HEMI
Step-by-step DIY alternator replacement with tools, parts list, torque specs, safety tips, and cost savings for 2016, 2017, 2018, 2019, 2020, 2021


🔧 Grand Cherokee - Alternator Replacement
You’ll remove the serpentine belt, disconnect the wiring, and unbolt the alternator from the front of the engine, then install a new one. This restores proper charging so the battery stays healthy and electronics work correctly.
Difficulty Level: Intermediate | Estimated Time: 2–3 hours
⚠️ Safety & Precautions
- ⚠️ Always disconnect the negative battery terminal before working on the alternator to avoid sparks and short circuits.
- ⚠️ Let the engine cool completely before starting; hot components can burn you.
- ⚠️ Keep metal tools away from the battery positive terminal and alternator main stud.
- ⚠️ Support the hood securely; make sure it cannot fall while you work.
- ⚠️ If you must raise the front of the Grand Cherokee, always support it with jack stands, never only a jack.
🔧 Required Tools
You'll need the following tools for this repair:
- 10mm socket
- 13mm socket
- 15mm socket
- 18mm socket
- 3/8" drive ratchet
- 1/2" drive ratchet
- 3/8" drive torque wrench (5–80 ft-lbs)
- 1/2" drive torque wrench (20–150 ft-lbs)
- Serpentine belt tool or long 1/2" breaker bar
- Short extension set (3" and 6")
- Flathead screwdriver (medium)
- Trim clip removal tool
- Needle-nose pliers
- Shop light or headlamp
- Fender cover or thick towel
- Floor jack (rated 3-ton minimum)
- Jack stands (rated 3-ton minimum)
- Work gloves
- Safety glasses
🔩 Required Parts
HowToo sells all the parts you need for this repair:
- Alternator (5.7L HEMI, correct amperage) - Qty: 1
- Serpentine drive belt - Qty: 1
- Alternator mounting bolts (optional new) - Qty: 3
- Battery terminal cleaning brush - Qty: 1
- Dielectric grease - Qty: 1
- Anti-seize compound - Qty: 1
- Shop towels - Qty: 1 pack
📋 Before You Begin
- Park the Grand Cherokee on level ground, select Park, and set the parking brake.
- Open the hood fully and secure it with the hood prop or struts.
- Turn off all electrical loads (headlights, A/C, radio) and remove the key from the vehicle.
- Disconnect the negative battery terminal using a 10mm socket and move the cable aside so it cannot spring back.
- If you want more working room, you can remove the engine cover by pulling it straight up off its mounts.
🔨 Step-by-Step Instructions
Follow these steps in order:
Step 1: Remove engine cover and air intake ducting
- Use your hands to lift the plastic engine cover straight up; it just presses onto rubber mounts.
- Use a flathead screwdriver to loosen the hose clamp at the air filter box and at the throttle body.
- Disconnect any small hoses or electrical connectors on the intake duct by squeezing the tabs with your fingers or needle-nose pliers.
- Lift the intake duct out and set it aside so you can see the front of the engine better.
Step 2: Note belt routing
- Look for the belt routing diagram sticker under the hood; if present, take a clear phone photo.
- If you do not see a sticker, take a clear photo of the belt routing from a few angles before removing it. This saves lots of time later
Step 3: Release belt tension
- The serpentine belt tensioner is a spring-loaded pulley; it keeps the belt tight automatically.
- Place your serpentine belt tool or long 1/2" breaker bar into the square hole on the tensioner arm.
- Rotate the tensioner slowly in the direction that loosens the belt (usually clockwise on the 5.7L when viewed from front).
- While holding the tensioner released, slide the belt off the alternator pulley using your other hand.
- Gently release the tensioner back to its resting position; do not let it snap back.
Step 4: Remove the serpentine belt (optional but recommended)
- With the tension relieved, slip the belt off the remaining pulleys by hand.
- Inspect the belt for cracks, glazing, or missing ribs; if worn, replace it with the new one you bought.
- Set the belt aside in the same general shape as installed so routing is easy later.
Step 5: Disconnect alternator electrical connections
- Locate the large cable on the back of the alternator (this is the main charging cable).
- Use a 13mm socket and 3/8" ratchet to remove the nut holding the cable to the stud.
- Pull the cable eyelet off the stud and tuck it aside. Do not twist the stud itself
- Locate the smaller electrical connector on the alternator; press the locking tab with your finger and pull the plug straight off.
- If the tab is stubborn, gently lift it with a flathead screwdriver while pulling.
Step 6: Remove alternator mounting bolts
- Find the upper and lower alternator mounting bolts at the front of the alternator.
- Use a 15mm socket with 3/8" ratchet (or 1/2" ratchet if tight) to loosen and remove the bolts.
- There are typically two upper bolts and one lower bolt on the 5.7L bracket. Keep track of their positions.
- If a bolt is tight, use a longer ratchet or add a pipe to the handle for more leverage, but turn steadily, not in jerks.
Step 7: Remove the alternator from the engine
- Once the bolts are out, the alternator may still be snug in its mounting ears.
- Wiggle the alternator by hand front to back to break it free.
- If needed, gently pry between the alternator and bracket with a flathead screwdriver; do not damage aluminum surfaces.
- Lift the alternator up and out of the engine bay; it is heavy, so use two hands and keep it close to your body.
Step 8: Prepare the new alternator
- Compare the old and new alternators side by side to confirm the same mounting ears, pulley type, and electrical connections.
- Lightly coat the new alternator mounting ears where the bolts pass through with a small amount of anti-seize compound. This helps future removal
- Place a tiny amount of dielectric grease inside the electrical connector opening on the new alternator to help prevent corrosion.
Step 9: Install the new alternator
- Carefully lower the new alternator into position on the bracket.
- Align the bolt holes by gently wiggling the alternator by hand.
- Install the mounting bolts by hand first to avoid cross-threading.
- Once all bolts are started a few turns by hand, use a 15mm socket and 3/8" ratchet to snug them down evenly.
- Then use your 3/8" drive torque wrench with 15mm socket to tighten the alternator mounting bolts to 54 Nm (40 ft-lbs).
Step 10: Reconnect alternator wiring
- Push the small electrical connector straight onto the alternator until it clicks.
- Place the large cable eyelet back over the main alternator stud.
- Install the nut by hand, then use a 13mm socket and 3/8" ratchet to snug it.
- Use the 3/8" drive torque wrench with 13mm socket to tighten the nut to 17 Nm (13 ft-lbs). Do not overtighten; you can damage the stud
Step 11: Reinstall the serpentine belt
- Route the belt around the crankshaft pulley, A/C, power steering, and idler pulleys according to your photo or diagram, leaving the alternator pulley for last.
- Make sure the belt ribs sit centered in each pulley groove.
- Use the serpentine belt tool or 1/2" breaker bar on the tensioner again and rotate it to release tension.
- While holding the tensioner, slide the belt over the alternator pulley with your other hand.
- Slowly release the tensioner so it tightens the belt.
- Double-check from above and below that the belt is in all grooves correctly and not twisted.
Step 12: Reinstall air intake ducting and engine cover
- Position the intake duct back between the air box and the throttle body.
- Slide the duct ends fully onto their connections, then tighten the clamps using a flathead screwdriver.
- Reconnect any small hoses or electrical connectors you removed earlier.
- Align the engine cover over its rubber mounts and press down firmly at each corner until it clicks into place.
Step 13: Reconnect the battery
- Clean the battery terminals with the battery terminal cleaning brush if you see corrosion.
- Place the negative cable back on the negative terminal.
- Use a 10mm socket and 3/8" ratchet to tighten the clamp; it should be snug but not crushing the post.
- Give the cable a slight twist by hand to confirm it does not move.
✅ After Repair
- Start the engine and let it idle. Check that the battery light on the dash turns off after a few seconds.
- Look and listen under the hood: the belt should run smoothly with no squealing or wobbling pulleys.
- Use a multimeter at the battery if available: you should see around 13.5–14.7 volts with the engine running.
- Turn on headlights, blower fan, and rear defroster; voltage should stay above about 13 volts.
- After a short drive, recheck the belt position and the alternator area for any unusual noises.
💰 DIY vs Shop Cost
Shop Cost: $650–$950 (parts + labor)
DIY Cost: $250–$450 (parts only)
You Save: $400–$500 by doing it yourself!
Shop labor rates vary but typically run $100–$150/hour. This repair takes a shop approximately 1.5–2.0 hours.
🎯 Ready to get started?
HowToo makes it easy: same-day/2-day shipping on every part, plus all the tools and specialty tools you need! Check out the parts and tools sections above to add everything to your cart.