










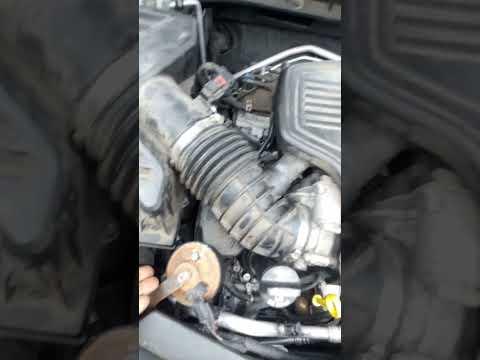







How to Replace the Alternator on a 2019-2022 Cadillac XT4 (Step-by-Step Guide) (Engine: Inline 4 2.0L)
Tools, parts list, safety tips, and key torque specs for alternator and serpentine belt removal/installation
How to Replace the Alternator on a 2019-2022 Cadillac XT4 (Step-by-Step Guide) (Engine: Inline 4 2.0L)
Tools, parts list, safety tips, and key torque specs for alternator and serpentine belt removal/installation for 2019, 2020, 2021, 2022


🔧 XT4 - Alternator Replacement
The alternator keeps your battery charged and powers the electrical system while the engine runs. Replacing it means disconnecting the battery, removing the serpentine belt, unplugging the alternator wiring, and swapping the unit.
Difficulty Level: Advanced | Estimated Time: 2.5-4.0 hours
⚠️ Safety & Precautions
- ⚠️ Disconnect the negative battery cable before touching alternator wiring.
- ⚠️ Let the engine cool; the turbo/engine bay gets very hot.
- ⚠️ Support your XT4 with jack stands; never rely on a jack alone.
- ⚠️ Keep fingers clear of the belt path when releasing the tensioner.
- ⚠️ If your XT4 has auto start/stop, treat wiring as always-live until the battery is disconnected.
🔧 Required Tools
You'll need the following tools for this repair:
- Safety glasses
- Mechanic gloves
- Floor jack (rated 3-ton minimum)
- Jack stands (rated 3-ton minimum)
- Wheel chocks
- Breaker bar 1/2"
- Torque wrench 3/8"
- Torque wrench 1/2"
- Socket set (metric)
- 10mm socket
- 13mm socket
- 15mm socket
- 18mm socket
- Ratchet 3/8"
- Ratchet 1/2"
- Serpentine belt tool 3/8" drive
- Trim clip removal tool
- Flathead screwdriver
- Work light
🔩 Required Parts
HowToo sells all the parts you need for this repair:
- Alternator - Qty: 1
- Serpentine belt - Qty: 1
- Fender liner clips - Qty: 1 set
📋 Before You Begin
- Park on level ground, shift to Park, and set the parking brake.
- Chock the rear wheels using wheel chocks.
- Open the hood and keep your key fob at least 15 feet away from the vehicle.
- Take a quick photo of the belt routing (or find the belt routing decal) so reassembly is easy.
🔨 Step-by-Step Instructions
Follow these steps in order:
Step 1: Disconnect the battery
- Use a 10mm socket and ratchet 3/8" to loosen the negative battery terminal clamp.
- Remove the negative cable and isolate it so it cannot spring back onto the post.
- Tip: Wrap the cable end with a glove.
Step 2: Lift the right-front corner and remove the wheel
- Use a breaker bar 1/2" and 19mm socket (from your socket set (metric)) to crack the lug nuts loose with the tire on the ground.
- Lift using the floor jack (rated 3-ton minimum) and support with jack stands (rated 3-ton minimum).
- Remove the lug nuts and wheel using the 19mm socket and ratchet 1/2".
- Reinstall later and Torque to 190 Nm (140 ft-lbs) using a torque wrench 1/2".
Step 3: Remove the right-front fender liner (access panel)
- Use a trim clip removal tool and flathead screwdriver to remove the plastic push clips and screws.
- Pull the liner back enough to access the serpentine belt area and alternator.
- Tip: Keep clips in a small cup.
Step 4: Relieve belt tension and remove the serpentine belt
- Place a serpentine belt tool 3/8" drive on the belt tensioner.
- Rotate the tensioner to release belt tension, then slip the belt off the alternator pulley.
- Slowly release the tensioner back to its stop (don’t let it snap back).
- If you’re replacing the belt, remove it fully and set it aside.
- Tip: Only remove one belt at a time.
Step 5: Unplug alternator electrical connections
- On the alternator, remove the small plug connector by releasing the lock tab with a flathead screwdriver, then pulling the connector straight off.
- Remove the main B+ cable protective cap (if equipped).
- Use a 13mm socket and ratchet 3/8" to remove the B+ terminal nut, then lift the cable off.
- During reassembly, Torque to 15 Nm (11 ft-lbs) for the B+ terminal nut using a torque wrench 3/8".
Step 6: Remove the alternator mounting bolts
- Support the alternator by hand.
- Use a 15mm socket and ratchet 1/2" (or ratchet 3/8" if clearance is tight) to remove the alternator mounting bolts.
- Remove the alternator from the engine bay through the wheel well opening.
- During reassembly, Torque to 50 Nm (37 ft-lbs) for the alternator mounting bolts using a torque wrench.
Step 7: Install the new alternator
- Position the new alternator in place and start the bolts by hand to avoid cross-threading.
- Tighten with a 15mm socket and ratchet, then Torque to 50 Nm (37 ft-lbs) using a torque wrench.
- Reconnect the main B+ cable and tighten the nut using a 13mm socket, then Torque to 15 Nm (11 ft-lbs).
- Reconnect the alternator plug until it clicks.
Step 8: Reinstall the serpentine belt
- Route the belt using your photo/decal as a guide.
- Use the serpentine belt tool 3/8" drive to rotate the tensioner and slip the belt over the alternator pulley last.
- Visually confirm the belt is seated in every pulley groove (no ribs hanging off).
Step 9: Reinstall the fender liner and wheel
- Reposition the liner and reinstall clips using the trim clip removal tool and flathead screwdriver.
- Reinstall the wheel and hand-start lug nuts.
- Lower the vehicle, then Torque to 190 Nm (140 ft-lbs) using a torque wrench 1/2".
Step 10: Reconnect the battery and verify charging
- Reconnect the negative battery terminal using a 10mm socket and ratchet 3/8".
- Snug the clamp (do not overtighten) and ensure it doesn’t rotate by hand.
- Start the engine and confirm the battery/charging warning light is off.
✅ After Repair
- Let the engine idle for 2–3 minutes and listen for belt squeal or rubbing.
- Turn on headlights and blower motor; confirm no dimming and no warning lights.
- Recheck the belt seating through the wheel well opening with your work light.
- If a charging system message stays on, recheck the alternator plug and B+ cable nut torque.
💰 DIY vs Shop Cost
Shop Cost: $650-$1,050 (parts + labor)
DIY Cost: $250-$550 (parts only)
You Save: $400-$500 by doing it yourself!
Shop labor rates vary but typically run $100-$150/hour. This repair takes a shop approximately 2.5-4.0 hours.
🎯 Ready to get started?
HowToo makes it easy: same-day/2-day shipping on every part, plus all the tools and specialty tools you need! Check out the parts and tools sections below to add everything to your cart.
Guide for Alternator replace for these Cadillac vehicles
| Year Make Model | Sub Model | Engine | Body Style |
|---|---|---|---|
| 2022 Cadillac XT4 | - | Inline 4 2.0L | - |
| 2021 Cadillac XT4 | - | Inline 4 2.0L | - |
| 2020 Cadillac XT4 | - | Inline 4 2.0L | - |
| 2019 Cadillac XT4 | - | Inline 4 2.0L | - |
