









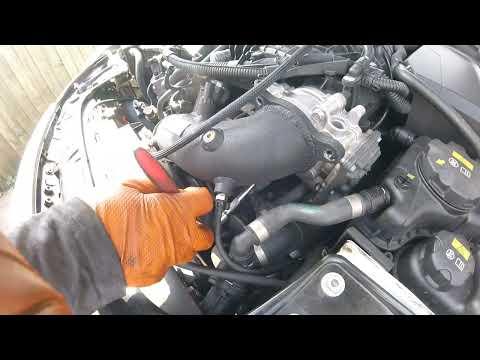







How to Replace the Alternator on a 2016 BMW 340i (B58)
Step-by-step DIY guide with required tools/parts, belt removal tips, and key torque specs for 2016, 2017, 2018
How to Replace the Alternator on a 2016 BMW 340i (B58)
Step-by-step DIY guide with required tools/parts, belt removal tips, and key torque specs for 2016, 2017, 2018


🔧 340i - Alternator Replacement
The alternator charges the battery and powers your 340i’s electronics while the engine runs. Replacement involves disconnecting the battery, removing the serpentine belt, unplugging the alternator wiring, and swapping the unit.
Difficulty Level: Intermediate | Estimated Time: 2-4 hours
⚠️ Safety & Precautions
- ⚠️ Disconnect the battery before touching alternator wiring (the main cable is always “hot”).
- ⚠️ Let the engine cool completely; the turbo/engine bay gets very hot.
- ⚠️ Support the car with jack stands if you go underneath—never rely on a jack alone.
- ⚠️ Keep fingers/tools clear of the belt path; the tensioner is spring-loaded.
🔧 Required Tools
You'll need the following tools for this repair:
- Safety glasses
- Mechanic gloves
- Wheel chocks
- Floor jack (rated 3-ton minimum)
- Jack stands (rated 3-ton minimum)
- 10mm socket
- 13mm socket
- 16mm socket
- E10 external Torx socket
- E12 external Torx socket
- E14 external Torx socket
- Torx T20 bit
- Torx T25 bit
- Torx T30 bit
- Torx T60 bit
- 3/8" drive ratchet
- 3/8" drive breaker bar
- 3" socket extension
- 6" socket extension
- Torque wrench (5–60 Nm range)
- Trim clip removal tool
- Flat-blade screwdriver
- Work light
- Multimeter
- OBD2 scan tool (BMW-capable) (specialty)
🔩 Required Parts
HowToo sells all the parts you need for this repair:
- Alternator - Qty: 1
- Serpentine belt - Qty: 1
- Engine undertray fastener clips - Qty: 1 set
📋 Before You Begin
- 🧰 Park on level ground, steering straight, and set the parking brake.
- 🧰 Open the trunk and access the battery area.
- 🧰 Disconnect the negative battery terminal using a 10mm socket. (Negative is the “-” terminal.)
- 🧰 Take a quick belt-routing photo.
🔨 Step-by-Step Instructions
Follow these steps in order:
Step 1: Remove the lower splash shield (undertray)
- Raise the front of the car with a floor jack (rated 3-ton minimum) and support it on jack stands (rated 3-ton minimum).
- Remove the undertray screws/bolts using Torx T25 bit, Torx T30 bit, and/or a 10mm socket (varies by fastener type).
- Use a trim clip removal tool for any plastic push-clips.
Step 2: Remove the intake ducting (for access)
- From the top of the engine bay, loosen hose clamps with a flat-blade screwdriver (a hose clamp is the metal band that tightens around a rubber coupler).
- Remove any intake snorkel/duct screws using a Torx T20 bit or Torx T25 bit.
- Move the ducting aside to improve access to the front accessory drive (belt/alternator area).
Step 3: Release belt tension and remove the serpentine belt
- Install a Torx T60 bit into the belt tensioner.
- Use a breaker bar to rotate the tensioner and unload belt tension (spring-loaded arm).
- Slide the belt off the alternator pulley, then remove the belt from the other pulleys.
- Compare new belt length to old.
Step 4: Disconnect alternator electrical connections
- Remove the alternator rear plastic cap using a trim clip removal tool or flat-blade screwdriver (gently).
- Remove the main B+ cable nut using a 13mm socket, then lift the cable off the stud.
- Unplug the alternator electrical connector by releasing the lock tab (use a flat-blade screwdriver carefully if needed).
- Torque on install: B+ terminal nut to 15 Nm (11 ft-lbs)
Step 5: Unbolt and remove the alternator
- Remove alternator mounting bolts using E12 external Torx socket and/or E14 external Torx socket (bolt head size can vary by alternator version).
- Support the alternator by hand as you remove the last bolt, then work it out of the engine bay.
- Torque on install: Alternator mounting bolts to 41 Nm (30 ft-lbs)
Step 6: Install the new alternator
- Place the new alternator into position and start the mounting bolts by hand to avoid cross-threading.
- Tighten bolts with an E12 external Torx socket/E14 external Torx socket, then torque to 41 Nm (30 ft-lbs) using a torque wrench (5–60 Nm range).
- Reconnect the electrical plug until it clicks.
- Reinstall the B+ cable and nut with a 13mm socket, then torque to 15 Nm (11 ft-lbs).
- Reinstall the rear plastic cap.
Step 7: Reinstall the serpentine belt
- Route the belt according to your photo (make sure it sits fully in every pulley groove).
- Rotate the tensioner with a Torx T60 bit and breaker bar, slip the belt onto the last pulley, then slowly release the tensioner.
- If it squeaks, a rib is likely mis-seated.
Step 8: Reinstall intake ducting and undertray
- Reinstall intake ducting using the same Torx T20 bit/Torx T25 bit hardware you removed.
- Reinstall the undertray using Torx T25 bit, Torx T30 bit, and/or 10mm socket. Replace any broken clips from your engine undertray fastener clips set.
- Lower the car from the jack stands (rated 3-ton minimum) using the floor jack (rated 3-ton minimum).
Step 9: Reconnect the battery and check charging
- Reconnect the negative battery terminal using a 10mm socket.
- Start the engine and verify the belt runs smoothly (no wobble, no chirping).
- Use a multimeter across the battery terminals: you should typically see roughly 13.5–15.0V with the engine running (BMW charging is “smart,” so it may vary).
✅ After Repair
- 🧪 Use an OBD2 scan tool (BMW-capable) (specialty) to clear any charging/voltage faults and confirm no codes return.
- 🧪 Do a short test drive, then recheck for belt noise and recheck voltage.
- 🧪 If you see a battery/charging warning, stop and recheck the alternator plug and B+ connection.
💰 DIY vs Shop Cost
Shop Cost: $900-$1,600 (parts + labor)
DIY Cost: $350-$900 (parts only)
You Save: $550-$700 by doing it yourself!
Shop labor rates vary but typically run $100-$150/hour. This repair takes a shop approximately 2-4 hours.
🎯 Ready to get started?
HowToo makes it easy: same-day/2-day shipping on every part, plus all the tools and specialty tools you need! Check out the parts and tools sections below to add everything to your cart.