


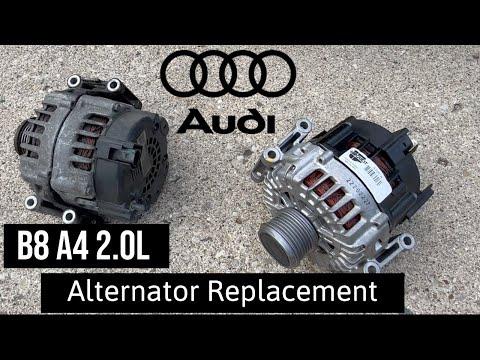


How to Replace the Alternator on a 2016 Audi A4 (DIY Step-by-Step Guide)
Tools, parts list, service position tips, safety checks, and charging system test after install
How to Replace the Alternator on a 2016 Audi A4 (DIY Step-by-Step Guide)
Tools, parts list, service position tips, safety checks, and charging system test after install
🔧 A4 - Alternator Replacement
The alternator charges your battery and powers the car while the engine is running. Replacing it means removing the drive belt, unplugging the alternator wiring, and swapping the unit—space is tight on your A4, so moving the front end into “service position” can make the job much easier.
Difficulty Level: Advanced | Estimated Time: 2.5-5.0 hours
⚠️ Safety & Precautions
- ⚠️ Disconnect the battery negative terminal before touching the alternator wiring.
- ⚠️ Let the engine cool fully; the turbo/engine bay gets very hot.
- ⚠️ Support the car with jack stands on solid, level ground—never rely on a jack.
- ⚠️ If you move the front end to service position, support the lock carrier so it can’t drop or pull on hoses/wiring.
- ⚠️ Keep fingers clear of the belt path; the tensioner is spring-loaded.
🔧 Required Tools
You'll need the following tools for this repair:
- Safety glasses
- Mechanic gloves
- Floor jack (rated 3-ton minimum)
- Jack stands (rated 3-ton minimum)
- Wheel chocks
- Torque wrench (10–200 Nm range)
- Ratchet (3/8")
- Ratchet (1/2")
- Socket set metric 8mm–18mm
- Wobble extension set
- Serpentine belt tool with 16mm socket
- Torx T25 bit
- Torx T30 bit
- Torx T45 bit
- Triple-square bit set (M8–M10)
- Flat trim tool
- Pick tool
- Flashlight
- Multimeter
- Bungee cord
🔩 Required Parts
HowToo sells all the parts you need for this repair:
- Alternator - Qty: 1
- Serpentine drive belt - Qty: 1
- Alternator mounting bolts - Qty: 1 set
📋 Before You Begin
- Park on level ground, set the parking brake, and place wheel chocks behind the rear wheels.
- Pop the hood and remove the key from the vehicle area.
- Disconnect the battery: use a 10mm socket to remove the negative terminal and isolate it so it can’t spring back. Prevents accidental short circuits.
- Assumption: This covers the common A4 layout where access may require moving the front end into service position.
🔨 Step-by-Step Instructions
Follow these steps in order:
Step 1: Lift and access the front of the engine
- Use a floor jack to lift the front and set the car onto jack stands.
- Remove the lower engine splash shield: use a Torx T25 bit and Torx T30 bit to remove the fasteners, then drop the panel.
Step 2: Remove the intake snorkel/upper covers (for working room)
- Remove the engine cover by pulling upward firmly (it’s held by grommets). Use mechanic gloves for grip.
- If equipped with an intake snorkel or small air guides, remove clips using a flat trim tool.
Step 3: Decide access method (standard vs service position)
- Standard access (tight): Continue to Step 4 and work from above and below with wobble extensions.
- Service position (recommended for first-timers): Move the lock carrier forward a few inches to create space, then continue to Step 4.
- A “lock carrier” is the front core support that holds the radiator/condenser; sliding it forward gives room without fully removing the radiator.
Step 3A: Put the front end in service position (recommended path)
- Remove the upper bumper/lock carrier fasteners as needed: use Torx T30 bit, Torx T45 bit, and triple-square bit set (M8–M10) depending on fastener type.
- Carefully pull the lock carrier forward and support it with a bungee cord so no hoses/wires are stretched.
- Go slow—don’t force anything.
Step 4: Relieve belt tension and remove the serpentine belt
- Locate the belt tensioner.
- Use a serpentine belt tool with 16mm socket to rotate the tensioner and relieve tension.
- Slide the belt off the alternator pulley first, then remove the belt from the rest of the pulleys.
- Take a clear photo of the belt routing with your phone before removal.
Step 5: Unplug alternator electrical connections
- Remove the alternator’s plastic terminal cap using a pick tool.
- Remove the main power cable nut using the correct size from your socket set metric 8mm–18mm, then set the cable aside.
- Disconnect the alternator plug (field/connector) by releasing the tab with a pick tool and pulling straight off.
- Torque on reassembly: Tighten electrical fasteners to Audi factory specification using a torque wrench.
Step 6: Remove the alternator mounting bolts
- Support the alternator by hand while loosening bolts.
- Use a ratchet (3/8"), wobble extension set, and the correct socket from your socket set metric 8mm–18mm to remove the alternator mounting bolts.
- If a bolt uses triple-square, use the triple-square bit set (M8–M10).
- Torque on reassembly: Alternator mounting bolts must be tightened to Audi factory specification with a torque wrench. Some bolts may be one-time-use.
Step 7: Remove the alternator from the engine bay
- Work it out slowly—rotate the alternator to clear brackets/hoses.
- Use a flashlight to check for anything still attached before pulling harder.
Step 8: Install the new alternator
- Place the new alternator into position.
- Hand-thread all mounting bolts first to avoid cross-threading.
- Tighten bolts evenly using a ratchet (3/8") and then final-tighten with a torque wrench to Audi factory specification.
Step 9: Reconnect alternator wiring
- Reconnect the alternator electrical plug until it clicks.
- Install the main power cable and nut using the correct socket from your socket set metric 8mm–18mm, then torque to Audi factory specification with a torque wrench.
- Reinstall the terminal cap.
Step 10: Install the new serpentine belt
- Route the new belt exactly like your photo.
- Use the serpentine belt tool with 16mm socket to rotate the tensioner, slip the belt onto the last pulley, then slowly release tension.
- Visually confirm the belt ribs are seated in every pulley groove.
Step 11: Reassemble remaining parts
- If you used service position, move the lock carrier back and reinstall fasteners using Torx T30 bit, Torx T45 bit, and/or triple-square bit set (M8–M10).
- Torque: Tighten lock carrier/bumper fasteners to Audi factory specification using a torque wrench.
- Reinstall the splash shield using Torx T25 bit and Torx T30 bit.
- Lower the car using the floor jack.
- Reconnect the battery negative terminal using a 10mm socket and tighten securely.
✅ After Repair
- Start the engine and confirm the battery/charging warning light turns off.
- Use a multimeter at the battery terminals:
- Engine off: typically around 12.4–12.8V for a healthy battery.
- Engine running: typically around 13.5–14.7V if the alternator is charging.
- Listen for belt squeal and watch the belt for wobble.
- Take a short test drive, then recheck for any warning lights.
💰 DIY vs Shop Cost
Shop Cost: ₹25,000-₹60,000 (parts + labor)
DIY Cost: ₹15,000-₹45,000 (parts only)
You Save: ₹10,000-₹15,000 by doing it yourself!
Shop labor rates vary but typically run ₹800-₹2,000/hour. This repair takes a shop approximately 2.5-5.0 hours.
🎯 Ready to get started?
HowToo makes it easy: same-day/2-day shipping on every part, plus all the tools and specialty tools you need! Check out the parts and tools sections below to add everything to your cart.
