









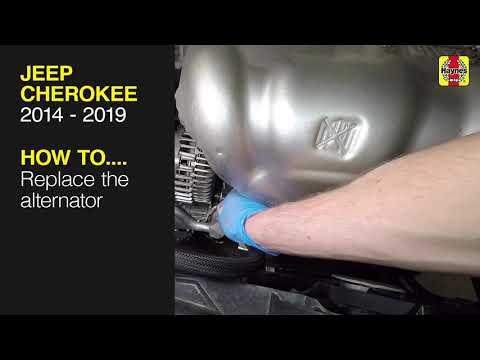







How to Replace the Alternator on a 2014-2019 Jeep Cherokee (2.4L) (Engine: Inline 4 2.4L)
Step-by-step DIY instructions with tools, parts list, belt routing tips, and charging voltage check
How to Replace the Alternator on a 2014-2019 Jeep Cherokee (2.4L) (Engine: Inline 4 2.4L)
Step-by-step DIY instructions with tools, parts list, belt routing tips, and charging voltage check for 2014, 2015, 2016, 2017, 2018, 2019


🔧 Cherokee - Alternator Replacement
The alternator keeps your battery charged and powers the vehicle’s electrical system while the engine runs. Replacing it involves removing the serpentine belt, disconnecting the alternator wiring, and swapping the unit from the engine bay (access is usually easiest through the right-front wheel well).
Difficulty Level: Intermediate | Estimated Time: 2-4 hours
Assumption: Factory 2.4L layout; fastener sizes may vary—match sockets to bolts.
⚠️ Safety & Precautions
- 🛑 Disconnect the negative battery cable before touching the alternator wiring.
- 🧤 Keep hands clear of the belt path; the tensioner is spring-loaded.
- 🧱 Support the vehicle with jack stands; never rely on a floor jack alone.
- 🔥 Work on a cool engine to avoid burns from hot exhaust/engine parts.
🔧 Required Tools
You'll need the following tools for this repair:
- Safety glasses
- Nitrile gloves
- Floor jack (rated 2-ton minimum)
- Jack stands (rated 2-ton minimum)
- Wheel chocks
- Lug nut socket
- Metric socket set (8mm-18mm)
- Metric combination wrench set (8mm-18mm)
- Ratchet
- 3/8" breaker bar
- Torque wrench (3/8" drive)
- Serpentine belt tool (specialty)
- Trim clip remover
- Flathead screwdriver
- Needle-nose pliers
- Multimeter
- Shop light
🔩 Required Parts
HowToo sells all the parts you need for this repair:
- Alternator - Qty: 1
- Serpentine belt - Qty: 1
- Dielectric grease - Qty: 1
- Anti-seize compound - Qty: 1
📋 Before You Begin
- Park on level ground, shift to Park, and set the parking brake.
- Place wheel chocks behind the rear tires.
- Open the hood and have your multimeter ready for a charging check after installation.
- Plan to remove the right-front wheel and inner splash shield for access.
🔨 Step-by-Step Instructions
Follow these steps in order:
Step 1: Disconnect the battery
- Use a 10mm socket to loosen the negative battery terminal clamp.
- Remove the negative cable and tuck it aside so it cannot spring back.
Step 2: Raise the right-front and remove the wheel
- Use a lug nut socket and breaker bar to slightly loosen the lug nuts while the tire is on the ground.
- Lift the right-front with a floor jack and place jack stands under a solid lift point.
- Remove the lug nuts with a ratchet and lug nut socket, then remove the wheel.
Step 3: Remove the right-front inner splash shield
- Use a trim clip remover and flathead screwdriver to remove plastic push-clips/screws.
- Pull the shield back to expose the belt drive area and alternator.
Step 4: Release the serpentine belt tension
- Use a serpentine belt tool (specialty) to rotate the belt tensioner and relieve belt tension. A serpentine belt tool is a long, slim lever made to reach the tensioner in tight spaces.
- Slip the belt off the alternator pulley, then slowly release the tensioner.
- Tip: Take a photo of belt routing first.
Step 5: Disconnect the alternator electrical connections
- Unplug the alternator connector by pressing the lock tab (use needle-nose pliers gently if needed).
- Remove the nut from the main charging cable (B+ terminal) using a metric socket that fits.
- Move the cable aside and keep the nut safe.
- Apply a thin film of dielectric grease to the connector seal during reassembly.
Step 6: Remove the alternator mounting bolts
- Support the alternator with one hand.
- Use a ratchet and correctly sized metric socket to remove the alternator mounting bolts.
- If the alternator is stuck in the bracket, gently wiggle it free (avoid prying on aluminum surfaces).
Step 7: Remove the alternator from the vehicle
- Maneuver the alternator out through the wheel well opening.
- Use a shop light and go slowly to avoid snagging wires or hoses.
Step 8: Install the new alternator
- Position the new alternator into the bracket by hand.
- Start all mounting bolts by hand to prevent cross-threading.
- Tighten the bolts using a ratchet, then final-tighten with a torque wrench: Torque to factory specification.
- Tip: A tiny anti-seize dab helps future removal.
Step 9: Reconnect alternator wiring
- Install the main charging cable and nut using the correctly sized metric socket: Torque to factory specification.
- Reconnect the alternator electrical plug until it clicks.
- Ensure wiring is routed away from the belt and pulleys.
Step 10: Reinstall the serpentine belt
- Route the belt according to the under-hood belt diagram (or the photo you took).
- Use the serpentine belt tool (specialty) to rotate the tensioner and slide the belt onto the alternator pulley.
- Release the tensioner slowly and verify the belt is fully seated in every pulley groove.
Step 11: Reinstall the splash shield and wheel
- Reinstall the inner splash shield using the trim clip remover (and flathead screwdriver as needed).
- Reinstall the wheel and hand-thread lug nuts.
- Lower the vehicle off the jack stands using the floor jack.
- Tighten lug nuts with a torque wrench: Torque to factory specification.
Step 12: Reconnect the battery and perform a charging check
- Reconnect the negative battery terminal using a 10mm socket.
- Start the engine and let it idle.
- Use a multimeter at the battery terminals; you should typically see roughly 13.5V-14.8V at idle depending on load and smart-charging behavior.
- Listen for belt squeal and watch for a battery warning light.
✅ After Repair
- Recheck that the belt is centered on each pulley after a short test idle.
- Do a 10-15 minute drive with headlights and blower on, then recheck charging voltage with the multimeter.
- If a warning light stays on, scan for codes with a capable scan tool and address any stored charging-system faults.
- Inspect for any loose clips/fasteners in the wheel well.
💰 DIY vs Shop Cost
Shop Cost: $600-$1,050 (parts + labor)
DIY Cost: $180-$450 (parts only)
You Save: $420-$600 by doing it yourself!
Shop labor rates vary but typically run $100-$150/hour. This repair takes a shop approximately 2-4 hours.
🎯 Ready to get started?
HowToo makes it easy: same-day/2-day shipping on every part, plus all the tools and specialty tools you need! Check out the parts and tools sections below to add everything to your cart.
Guide for Alternator replace for these Jeep vehicles
| Year Make Model | Sub Model | Engine | Body Style |
|---|---|---|---|
| 2019 Jeep Cherokee | - | Inline 4 2.4L | - |
| 2018 Jeep Cherokee | - | Inline 4 2.4L | - |
| 2017 Jeep Cherokee | - | Inline 4 2.4L | - |
| 2016 Jeep Cherokee | - | Inline 4 2.4L | - |
| 2015 Jeep Cherokee | - | Inline 4 2.4L | - |
| 2014 Jeep Cherokee | - | Inline 4 2.4L | - |