









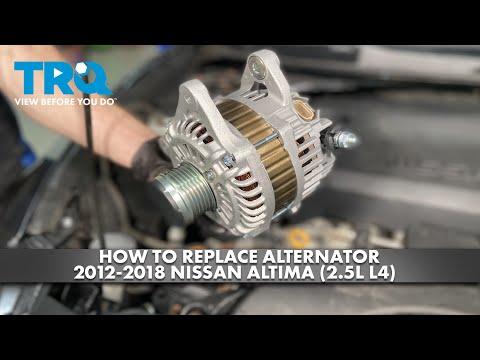




How to Replace the Alternator on a 2013-2018 Nissan Altima 2.5L (Engine: Inline 4 2.5L | Body: Sedan)
Step-by-step DIY guide with tools, parts, torque specs, belt routing, and safety tips for 2013, 2014, 2015, 2016, 2017, 2018
How to Replace the Alternator on a 2013-2018 Nissan Altima 2.5L (Engine: Inline 4 2.5L | Body: Sedan)
Step-by-step DIY guide with tools, parts, torque specs, belt routing, and safety tips for 2013, 2014, 2015, 2016, 2017, 2018


🔧 Altima - Alternator Replacement
The alternator charges the battery and powers the electrical system while the engine is running. On your Altima, the alternator is mounted low on the front/passenger side of the 2.5L engine and is driven by the serpentine belt.
Difficulty Level: Intermediate | Estimated Time: 2-3 hours
⚠️ Safety & Precautions
- ⚠️ Disconnect the negative battery cable before touching the alternator wiring. The alternator has a direct battery power cable.
- ⚠️ Let the engine cool completely before working near the belt, radiator fan, or exhaust area.
- ⚠️ Support your Altima securely with jack stands if you raise the front end. Never rely on a floor jack alone.
- ⚠️ Keep fingers, tools, and clothing away from the serpentine belt path.
- ⚠️ If the battery warning light was on, charge and test the battery after the repair. A weak battery can damage a new alternator.
🔧 Required Tools
You'll need the following tools for this repair:
- 10mm socket
- 12mm socket
- 14mm socket
- 17mm socket
- 3/8-inch drive ratchet
- 3/8-inch drive 6-inch extension
- Serpentine belt tool with 14mm adapter (specialty)
- Flathead screwdriver
- Trim clip removal tool
- Torque wrench rated 10-80 ft-lbs
- Floor jack rated 2-ton minimum
- Jack stands rated 2-ton minimum
- Wheel chocks
- Battery terminal brush
- Digital multimeter
- Mechanic gloves
- Safety glasses
🔩 Required Parts
HowToo sells all the parts you need for this repair:
- Alternator - Qty: 1
- Serpentine belt - Qty: 1
- Battery terminal corrosion protectant - Qty: 1
📋 Before You Begin
- 🅿️ Park your Altima on level ground, shift to Park, and set the parking brake.
- 🧊 Let the engine cool fully before starting.
- 🔋 Open the hood and disconnect the negative battery cable with a 10mm socket. A negative cable is usually marked with a minus symbol.
- 🧠 If the radio presets or clock matter to you, write them down before disconnecting the battery.
- 🛞 Place wheel chocks behind the rear wheels before raising the front of the car.
🔨 Step-by-Step Instructions
Follow these steps in order:
Step 1: Disconnect the Battery
- Use a 10mm socket to loosen the negative battery terminal clamp.
- Lift the negative cable off the battery post and move it aside so it cannot spring back.
- Use a battery terminal brush to clean corrosion from the battery post and cable end if needed.
- Always disconnect negative first.
Step 2: Raise and Support the Front
- Use a floor jack rated 2-ton minimum to raise the front of your Altima at the front center jacking point.
- Place jack stands rated 2-ton minimum under the front side pinch weld support points.
- Gently lower the vehicle onto the stands and lightly shake the car to confirm it is stable.
- Wear safety glasses before working underneath.
Step 3: Remove the Passenger-Side Lower Splash Shield
- Use a trim clip removal tool to remove the plastic push clips from the passenger-side lower splash shield.
- Use a 10mm socket to remove any lower shield bolts.
- Pull the shield down and set it aside.
- A splash shield is the plastic cover under the engine that blocks water and road debris.
Step 4: Note the Serpentine Belt Routing
- Use your phone to take a clear photo of the belt path before removing it.
- The serpentine belt is the long ribbed belt that drives the alternator, A/C compressor, and other pulleys.
- Make sure the photo shows how the belt wraps around every pulley.
- A photo prevents routing mistakes.
Step 5: Release Belt Tension
- Place the serpentine belt tool with 14mm adapter on the automatic belt tensioner.
- The tensioner is a spring-loaded arm that keeps the belt tight.
- Rotate the tensioner to relieve belt tension.
- Slide the belt off the alternator pulley first, then slowly release the tensioner.
- Remove the belt from the engine bay if you are replacing it.
Step 6: Disconnect the Alternator Electrical Connectors
- Use a flathead screwdriver gently to release the small alternator connector lock, then unplug the connector by hand.
- Pull back the rubber boot from the large alternator battery cable terminal.
- Use a 12mm socket to remove the nut from the large battery cable terminal.
- Lift the cable off the stud and position it away from the alternator.
- Do not pull on wires.
Step 7: Remove the Alternator Mounting Bolts
- Support the alternator with one hand while removing the bolts.
- Use a 14mm socket, 3/8-inch drive ratchet, and 3/8-inch drive 6-inch extension to remove the upper alternator mounting bolt.
- Use a 14mm socket to remove the lower alternator mounting bolt.
- If access is tight, use the 17mm socket only where needed for bracket clearance hardware.
- Keep the bolts in order so they return to the same locations.
Step 8: Remove the Alternator
- Work the alternator out through the passenger-side lower opening.
- Use both hands and take your time. The alternator is heavier than it looks.
- If it sticks in the bracket, gently rock it by hand until it loosens.
- Do not pry hard against aluminum engine brackets.
Step 9: Compare the New Alternator
- Place the old and new alternator side by side.
- Confirm the pulley, mounting ears, electrical connector, and battery terminal are in the same positions.
- If the replacement alternator uses a protective cap on the battery terminal, remove it before installation.
Step 10: Install the New Alternator
- Guide the new alternator into the bracket from the lower passenger-side opening.
- Start both mounting bolts by hand first to prevent cross-threading.
- Use a 14mm socket to snug the mounting bolts evenly.
- Use a torque wrench rated 10-80 ft-lbs and 14mm socket to tighten the alternator mounting bolts to Torque to 48 Nm (35 ft-lbs).
Step 11: Reconnect the Alternator Wiring
- Install the large battery cable onto the alternator output stud.
- Use a 12mm socket and torque wrench rated 10-80 ft-lbs to tighten the terminal nut to Torque to 10 Nm (89 in-lbs).
- Push the rubber protective boot fully over the terminal.
- Plug in the small alternator connector until it clicks.
Step 12: Install the Serpentine Belt
- Route the new serpentine belt around the pulleys using your photo as a guide.
- Use the serpentine belt tool with 14mm adapter to rotate the belt tensioner again.
- Slide the belt over the alternator pulley last.
- Slowly release the tensioner.
- Check that the belt ribs sit fully inside every pulley groove.
- Misaligned belts shred quickly.
Step 13: Reinstall the Lower Splash Shield
- Position the passenger-side lower splash shield back in place.
- Use a trim clip removal tool to reinstall the plastic push clips.
- Use a 10mm socket to reinstall the lower shield bolts.
- Tighten the small shield bolts snug only; do not overtighten plastic panels.
Step 14: Lower the Vehicle
- Use the floor jack rated 2-ton minimum to slightly raise the front of your Altima off the jack stands.
- Remove the jack stands rated 2-ton minimum.
- Lower the vehicle slowly to the ground.
Step 15: Reconnect the Battery
- Apply battery terminal corrosion protectant to the cleaned terminal if available.
- Install the negative battery cable onto the negative battery post.
- Use a 10mm socket to tighten the clamp until secure.
- Do not overtighten; battery posts can crack.
✅ After Repair
- ✅ Start the engine and confirm the battery warning light turns off.
- ✅ Use a digital multimeter at the battery terminals. With the engine running, charging voltage should typically read about 13.5-14.8 volts.
- ✅ Turn on headlights, blower motor, and rear defroster, then confirm the engine keeps running smoothly.
- ✅ Listen for belt squeal or chirping. If you hear noise, shut the engine off and recheck belt alignment.
- ✅ Reset the clock and radio presets if they were lost after battery disconnect.
- ✅ If warning lights remain on, scan for codes and test the battery condition before driving far.
💰 DIY vs Shop Cost
Shop Cost: $550-$900 (parts + labor)
DIY Cost: $220-$450 (parts only)
You Save: $300-$450 by doing it yourself!
Shop labor rates vary but typically run $100-$150/hour. This repair takes a shop approximately 1.5-2.5 hours.
🎯 Ready to get started?
HowToo makes it easy: same-day/2-day shipping on every part, plus all the tools and specialty tools you need! Check out the parts and tools sections below to add everything to your cart.