









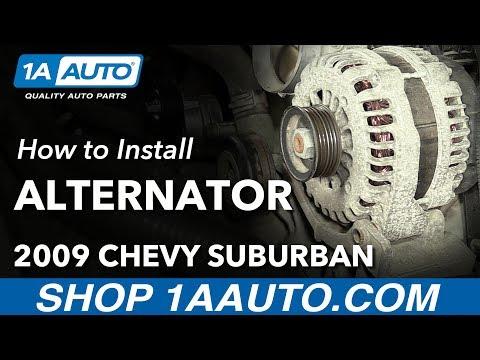






How to Replace the Alternator on a 2007-2008 Chevrolet Suburban 1500 (DIY Guide) (Engine: V8 5.3L)
Step-by-step instructions with required tools/parts, serpentine belt tips, torque specs, and voltage testing
How to Replace the Alternator on a 2007-2008 Chevrolet Suburban 1500 (DIY Guide) (Engine: V8 5.3L)
Step-by-step instructions with required tools/parts, serpentine belt tips, torque specs, and voltage testing for 2007, 2008


🔧 Suburban - Alternator Replacement
The alternator charges the battery and powers the electrical system while the engine runs. Replacing it on your Suburban mainly involves removing the serpentine belt from the alternator pulley, unbolting the alternator, and swapping the electrical connections to the new unit.
Difficulty Level: Intermediate | Estimated Time: 1-2 hours
⚠️ Safety & Precautions
- ⚠️ Disconnect the negative battery cable first to prevent a short.
- ⚠️ Keep fingers/tools away from the belt and pulleys.
- ⚠️ Work on a cool engine to avoid burns.
- ⚠️ Do not allow the alternator power wire to touch ground.
🔧 Required Tools
You'll need the following tools for this repair:
- Safety glasses
- Mechanic gloves
- 10mm socket
- 13mm socket
- 3/8" drive ratchet
- 3/8" drive breaker bar
- 3/8" drive torque wrench (10-100 ft-lbs range)
- 3/8" drive extension set
- Flathead screwdriver
- Trim clip removal tool
- Digital multimeter
- Fender cover
🔩 Required Parts
HowToo sells all the parts you need for this repair:
- Alternator - Qty: 1
- Serpentine belt - Qty: 1 Recommended if belt is cracked
📋 Before You Begin
- 🧰 Park on level ground, shift to Park, and set the parking brake.
- 🧰 Open the hood and let the engine cool fully.
- 🧰 Put a fender cover on to protect paint.
- 🧰 Disconnect the battery: use a 10mm socket to remove the negative (−) cable and move it aside so it can’t spring back.
🔨 Step-by-Step Instructions
Follow these steps in order:
Step 1: Remove any intake cover/ducting if it’s in the way
- Use a flathead screwdriver to loosen any worm clamps.
- Use a trim clip removal tool to pop out any plastic push-clips without breaking them.
- Lift the ducting/cover off and set it aside.
Step 2: Release the serpentine belt from the alternator pulley
- Find the belt routing diagram (usually on the radiator support) and take a quick photo as backup.
- Insert a 3/8" drive breaker bar into the square hole on the belt tensioner. (The tensioner is the spring-loaded arm that keeps the belt tight.)
- Rotate the breaker bar to relieve tension, then slide the belt off the alternator pulley.
- Slowly release the tensioner back to its resting position.
Step 3: Unplug the alternator electrical connections
- Unplug the alternator regulator connector by pressing the lock tab and pulling straight out.
- Remove the protective boot on the alternator power stud.
- Use a 13mm socket to remove the nut from the alternator power wire (B+ cable).
Step 4: Remove the alternator mounting bolts
- Use a 13mm socket with a 3/8" ratchet and extension to remove the alternator mounting bolts.
- Support the alternator with your free hand as the last bolt comes out.
- Lift the alternator up and out of the engine bay.
Step 5: Install the new alternator
- Set the new alternator into place and start the mounting bolts by hand to avoid cross-threading.
- Use a 13mm socket and 3/8" ratchet to snug the bolts evenly.
- Use a 3/8" torque wrench to tighten alternator mounting bolts: Torque to 50 Nm (37 ft-lbs).
Step 6: Reconnect alternator wiring
- Install the alternator power wire onto the stud and thread the nut on by hand.
- Use a 13mm socket and torque wrench to tighten the B+ terminal nut: Torque to 20 Nm (15 ft-lbs).
- Reinstall the protective boot over the power stud.
- Plug the regulator connector back in until it clicks.
Step 7: Reinstall the serpentine belt
- Route the belt according to the under-hood diagram (or your photo).
- Use a 3/8" drive breaker bar on the tensioner again, slip the belt over the alternator pulley, then slowly release tension.
- Visually confirm the belt ribs are seated in every pulley groove.
Step 8: Reinstall any intake ducting/covers
- Reinstall removed parts using the trim clip removal tool in reverse (push-clips back in).
- Use a flathead screwdriver to tighten any hose clamps.
Step 9: Reconnect the battery
- Reconnect the negative battery cable using a 10mm socket and snug it firmly (do not over-tighten).
✅ After Repair
- ✅ Start the engine and listen for belt squeal or slapping.
- ✅ Watch the belt for 30 seconds to confirm it runs straight and centered on pulleys.
- ✅ Use a digital multimeter at the battery terminals with the engine idling: you typically want about 13.8-14.7V.
- ✅ If the battery light stays on, recheck the alternator connector and the B+ nut/boot.
💰 DIY vs Shop Cost
Shop Cost: $450-$850 (parts + labor)
DIY Cost: $180-$450 (parts only)
You Save: $270-$400 by doing it yourself!
Shop labor rates vary but typically run $100-$150/hour. This repair takes a shop approximately 1-2 hours.
🎯 Ready to get started?
HowToo makes it easy: same-day/2-day shipping on every part, plus all the tools and specialty tools you need! Check out the parts and tools sections below to add everything to your cart.
Guide for Alternator replace for these Chevrolet vehicles
| Year Make Model | Sub Model | Engine | Body Style |
|---|---|---|---|
| 2008 Chevrolet Suburban 1500 | - | V8 5.3L | - |
| 2008 Chevrolet Suburban 1500 | - | V8 6.0L | - |
| 2007 Chevrolet Suburban 1500 | - | V8 5.3L | - |
| 2007 Chevrolet Suburban 1500 | - | V8 6.0L | - |