


How to Replace the Alternator (Generator) on a 2021 Chevrolet Trailblazer
Step-by-step removal and install with tools, parts list, safety tips, and charging system checks
How to Replace the Alternator (Generator) on a 2021 Chevrolet Trailblazer
Step-by-step removal and install with tools, parts list, safety tips, and charging system checks


🔧 Trailblazer - Alternator Replacement
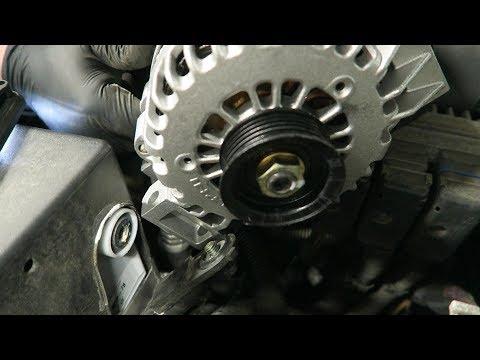
On your Trailblazer, the alternator (GM calls it the “generator”) charges the battery and powers the vehicle while the engine is running. Replacement involves disconnecting the battery, removing the drive belt, unbolting the alternator, and transferring any brackets/connectors to the new unit.
Difficulty Level: Intermediate | Estimated Time: 1.5-3.0 hours
⚠️ Safety & Precautions
- ⚠️ Disconnect the negative battery cable first to prevent short circuits.
- ⚠️ Let the engine cool; the turbo/heat shields can burn you.
- ⚠️ Support the vehicle with jack stands if you lift it; never rely on a jack alone.
- ⚠️ Keep fingers clear of the belt path when releasing belt tension.
🔧 Required Tools
You'll need the following tools for this repair:
- Safety glasses
- Mechanic gloves
- Wheel chocks
- Floor jack (rated 3-ton minimum)
- Jack stands (rated 3-ton minimum)
- 1/4" drive ratchet
- 3/8" drive ratchet
- 6" extension (3/8" drive)
- 10mm socket (3/8" drive)
- 13mm socket (3/8" drive)
- 15mm socket (3/8" drive)
- Torx T20 screwdriver
- Trim clip removal tool
- Serpentine belt tool (specialty)
- Torque wrench (10–150 ft-lbs)
- Flashlight
🔩 Required Parts
HowToo sells all the parts you need for this repair:
- Alternator (generator) assembly - Qty: 1
- Serpentine drive belt - Qty: 1 Recommended if belt is cracked/glazed
📋 Before You Begin
- Park on level ground, shift to Park, and set the parking brake.
- Open the hood and remove any loose jewelry (rings/watches).
- Disconnect the battery: use a 10mm socket to remove the negative cable and isolate it so it can’t spring back.
🔨 Step-by-Step Instructions
Follow these steps in order:
Before I generate the exact OEM bolt torque specs and the correct access path, I need 2 quick details:
- Does your Trailblazer have Auto Start/Stop (the engine shuts off at stops)?
- Are you replacing the alternator from the top (engine bay) or do you have access from the bottom (you can safely jack it up and remove the lower splash shield)?
Reply with “Start/Stop: yes/no” and “Access: top/bottom”.
✅ After Repair
- After install, verify the belt is fully seated in every pulley groove.
- Start the engine and confirm the charging system warning light stays off.
- If you have a multimeter, check charging voltage at the battery with the engine running.
💰 DIY vs Shop Cost
Shop Cost: $650-$1,200 (parts + labor)
DIY Cost: $250-$650 (parts only)
You Save: $400-$550 by doing it yourself!
Shop labor rates vary but typically run $100-$150/hour. This repair takes a shop approximately 1.5-3.0 hours.
🎯 Ready to get started?
HowToo makes it easy: same-day/2-day shipping on every part, plus all the tools and specialty tools you need! Check out the parts and tools sections below to add everything to your cart.