


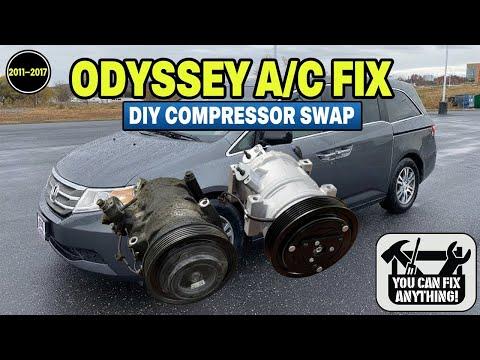


How to Replace the A/C Compressor on a 2016 Honda Odyssey (R-134a System)
Step-by-step replacement with required tools/parts, O-ring & oil tips, and evac/recharge torque specs
How to Replace the A/C Compressor on a 2016 Honda Odyssey (R-134a System)
Step-by-step replacement with required tools/parts, O-ring & oil tips, and evac/recharge torque specs


🔧 Odyssey - A/C Compressor Replacement
Replacing the A/C compressor on your Odyssey means safely recovering the refrigerant, removing the drive belt, swapping the compressor (and sealing O-rings), then vacuuming and recharging the system to the exact refrigerant weight. This repair is very doable at home, but the refrigerant handling portion requires the right equipment to avoid illegal venting and system damage.
Difficulty Level: Advanced | Estimated Time: 3-6 hours
Assumption: Your Odyssey uses R-134a; verify charge on under-hood label.
⚠️ Safety & Precautions
- ⚠️ Do not vent refrigerant to the air; it’s hazardous and illegal. Recover it with proper equipment.
- ⚠️ Wear safety glasses and gloves; liquid refrigerant can cause frostbite instantly.
- ⚠️ Keep hands clear of the serpentine belt path; accidental cranking can injure you.
- ⚠️ Support the van with jack stands on solid points; never rely on a jack alone.
- ⚠️ Disconnect the negative battery cable before unplugging the compressor clutch connector.
🔧 Required Tools
You'll need the following tools for this repair:
- Safety glasses
- Nitrile gloves
- Floor jack (rated 3-ton minimum)
- Jack stands (rated 3-ton minimum)
- Wheel chocks
- Metric socket set (8mm-19mm)
- 3/8" drive ratchet
- 3/8" drive torque wrench (10-80 ft-lbs)
- 6" extension (3/8" drive)
- 12" extension (3/8" drive)
- Serpentine belt tool or 14mm long-handled wrench
- Phillips screwdriver
- Trim clip removal tool
- Catch pan
- Shop rags
- A/C manifold gauge set (specialty)
- Vacuum pump (specialty)
- Refrigerant recovery machine (specialty)
- Refrigerant scale (specialty)
- UV leak light (specialty)
🔩 Required Parts
HowToo sells all the parts you need for this repair:
- A/C compressor assembly - Qty: 1
- A/C compressor manifold O-ring set - Qty: 1
- Serpentine drive belt - Qty: 1 (recommended while removed)
- R-134a refrigerant - Qty: As specified on under-hood label
- PAG compressor oil (ND-OIL 8 / equivalent) - Qty: As needed
- UV dye (R-134a compatible) - Qty: 1 (optional)
📋 Before You Begin
- Park on level ground, set the parking brake, and chock the rear wheels.
- Let the engine cool completely; you’ll be working near the radiator and exhaust area.
- Recover the refrigerant with a refrigerant recovery machine (a device that pulls refrigerant into a storage tank instead of releasing it).
- Disconnect the battery: use a 10mm socket to remove the negative cable and tuck it aside.
- Locate the under-hood A/C label and note the exact R-134a charge weight; you must recharge by weight, not by pressure.
🔨 Step-by-Step Instructions
Follow these steps in order:
Step 1: Recover the refrigerant
- Connect your A/C manifold gauge set (specialty) to the high and low service ports.
- Use a refrigerant recovery machine (specialty) to fully recover the system.
- Never loosen A/C lines until recovered.
Step 2: Raise the front and remove lower covers
- Lift the front with a floor jack (rated 3-ton minimum) and support with jack stands (rated 3-ton minimum).
- Use a Phillips screwdriver and trim clip removal tool to remove the lower splash shield/undercover fasteners.
Step 3: Remove the serpentine belt
- Use a serpentine belt tool or 14mm long-handled wrench on the belt tensioner to rotate it and release belt tension.
- Slip the belt off the A/C compressor pulley first, then remove the belt.
- Take a quick photo of belt routing.
Step 4: Disconnect the compressor electrical connector
- Unplug the compressor clutch/control connector by hand; if needed, gently help with a trim clip removal tool.
- Move the harness aside so it can’t get pinched during install.
Step 5: Disconnect the A/C lines from the compressor
- Place a catch pan under the compressor area.
- Use a metric socket set (8mm-19mm) with a 3/8" drive ratchet and extension to remove the compressor line/manifold retaining bolt(s).
- Carefully wiggle the lines off; cap/cover the open lines with shop rags to keep dirt and moisture out.
- Remove and discard the old O-rings from the line manifold.
- Moisture ruins A/C systems fast.
Step 6: Remove the A/C compressor
- Support the compressor with one hand.
- Use a metric socket set (8mm-19mm), 3/8" drive ratchet, and extensions to remove the compressor mounting bolts.
- Lower the compressor out through the bottom.
Step 7: Prepare the new compressor (oil balancing)
- Drain the old compressor oil into a catch pan by slowly turning the compressor by hand and pouring from the ports.
- Drain the shipping oil from the new compressor the same way.
- Add the correct amount of fresh PAG compressor oil (ND-OIL 8 / equivalent) to the new compressor to match what came out of the old one.
- Oil amount matters as much as refrigerant.
Step 8: Install the new compressor
- Position the compressor and hand-start all mounting bolts to avoid cross-threading.
- Use a torque wrench to tighten compressor mounting bolts: Torque to 25 Nm (18 ft-lbs).
Step 9: Install new O-rings and reconnect A/C lines
- Lightly coat new O-rings with clean PAG compressor oil (ND-OIL 8 / equivalent) using a gloved finger.
- Install O-rings onto the line manifold, then seat the manifold straight into the compressor (do not force at an angle).
- Use a torque wrench to tighten the line/manifold retaining bolt(s): Torque to 12 Nm (9 ft-lbs).
Step 10: Reconnect electrical connector and reinstall belt
- Reconnect the compressor electrical connector until it clicks.
- Route the belt correctly, then use a serpentine belt tool or 14mm long-handled wrench to move the tensioner and slip the belt onto the last pulley.
- Visually confirm the belt is centered on every pulley groove.
Step 11: Reinstall lower covers and lower the van
- Reinstall the splash shield using a Phillips screwdriver and trim clip removal tool.
- Lower the vehicle from the jack stands using the floor jack.
Step 12: Evacuate (vacuum) the A/C system
- Reconnect the A/C manifold gauge set (specialty).
- Connect the vacuum pump (specialty) and pull vacuum for 30–45 minutes.
- Close the valves and verify it holds vacuum for 10–15 minutes (a quick leak check).
Step 13: Recharge with R-134a by weight
- Place the refrigerant can/tank on a refrigerant scale (specialty).
- Charge the exact amount listed on your Odyssey’s under-hood A/C label.
- Start the engine, set A/C to MAX, blower high, and continue charging as your equipment procedure requires.
- Charging by pressure is inaccurate.
Step 14: Final leak check and performance check
- Use a UV leak light (specialty) to inspect compressor fittings and line joints (especially where you replaced O-rings).
- Confirm the A/C blows cold and the compressor cycles smoothly with no unusual noise.
✅ After Repair
- Recheck for oily residue at A/C fittings after your first drive; oil film can indicate a small leak.
- Listen for belt squeal; if present, recheck belt routing and pulley alignment.
- If cooling is weak or pressures look abnormal, stop running the A/C and recheck charge amount and leaks.
💰 DIY vs Shop Cost
Shop Cost: $1,200-$2,200 (parts + labor + evac/recharge)
DIY Cost: $350-$900 (parts only, assuming you have access to A/C equipment)
You Save: $300-$1,300 by doing it yourself!
Shop labor rates vary but typically run $100-$150/hour. This repair takes a shop approximately 3-5 hours.
🎯 Ready to get started?
HowToo makes it easy: same-day/2-day shipping on every part, plus all the tools and specialty tools you need! Check out the parts and tools sections below to add everything to your cart.
